Switchboard Live Initial Setup
Welcome to Switchboard! This guide walks you through everything you need to go live for the first time, from logging into your account to multistreaming across your first destinations. Whether you're a solo streamer or setting this up for a team managing multiple workflows, this is your starting point.
Last updated About 2 months ago
Welcome to the Switchboard Family

Estimated time to complete: 10–15 minutes
Before You Start
Make sure you have the following on hand:
An active Switchboard account
Login credentials for the platforms you want to stream to (e.g., YouTube, Facebook, Twitch, LinkedIn, X, Rumble) — or the Stream URL and Stream Key if you're connecting a custom RTMP Destination
Your live streaming software or encoder installed and ready (e.g., OBS, Zoom, Vmix, LiveU, Ecamm, Blackmagic)
Setting this up for a team or multiple workflows? Everything below works the same whether you have one workflow or many. Look for the "For Teams" callouts throughout, and see Built for Teams at the end for how to invite teammates and manage multiple workflows.
Quick-Start Checklist
Dashboard
When you log into Switchboard, you'll land on your Dashboard. From here you can reach the Workflow page, Destinations, PartnerShare Destinations, Scheduled Events, Team Management, and account settings.

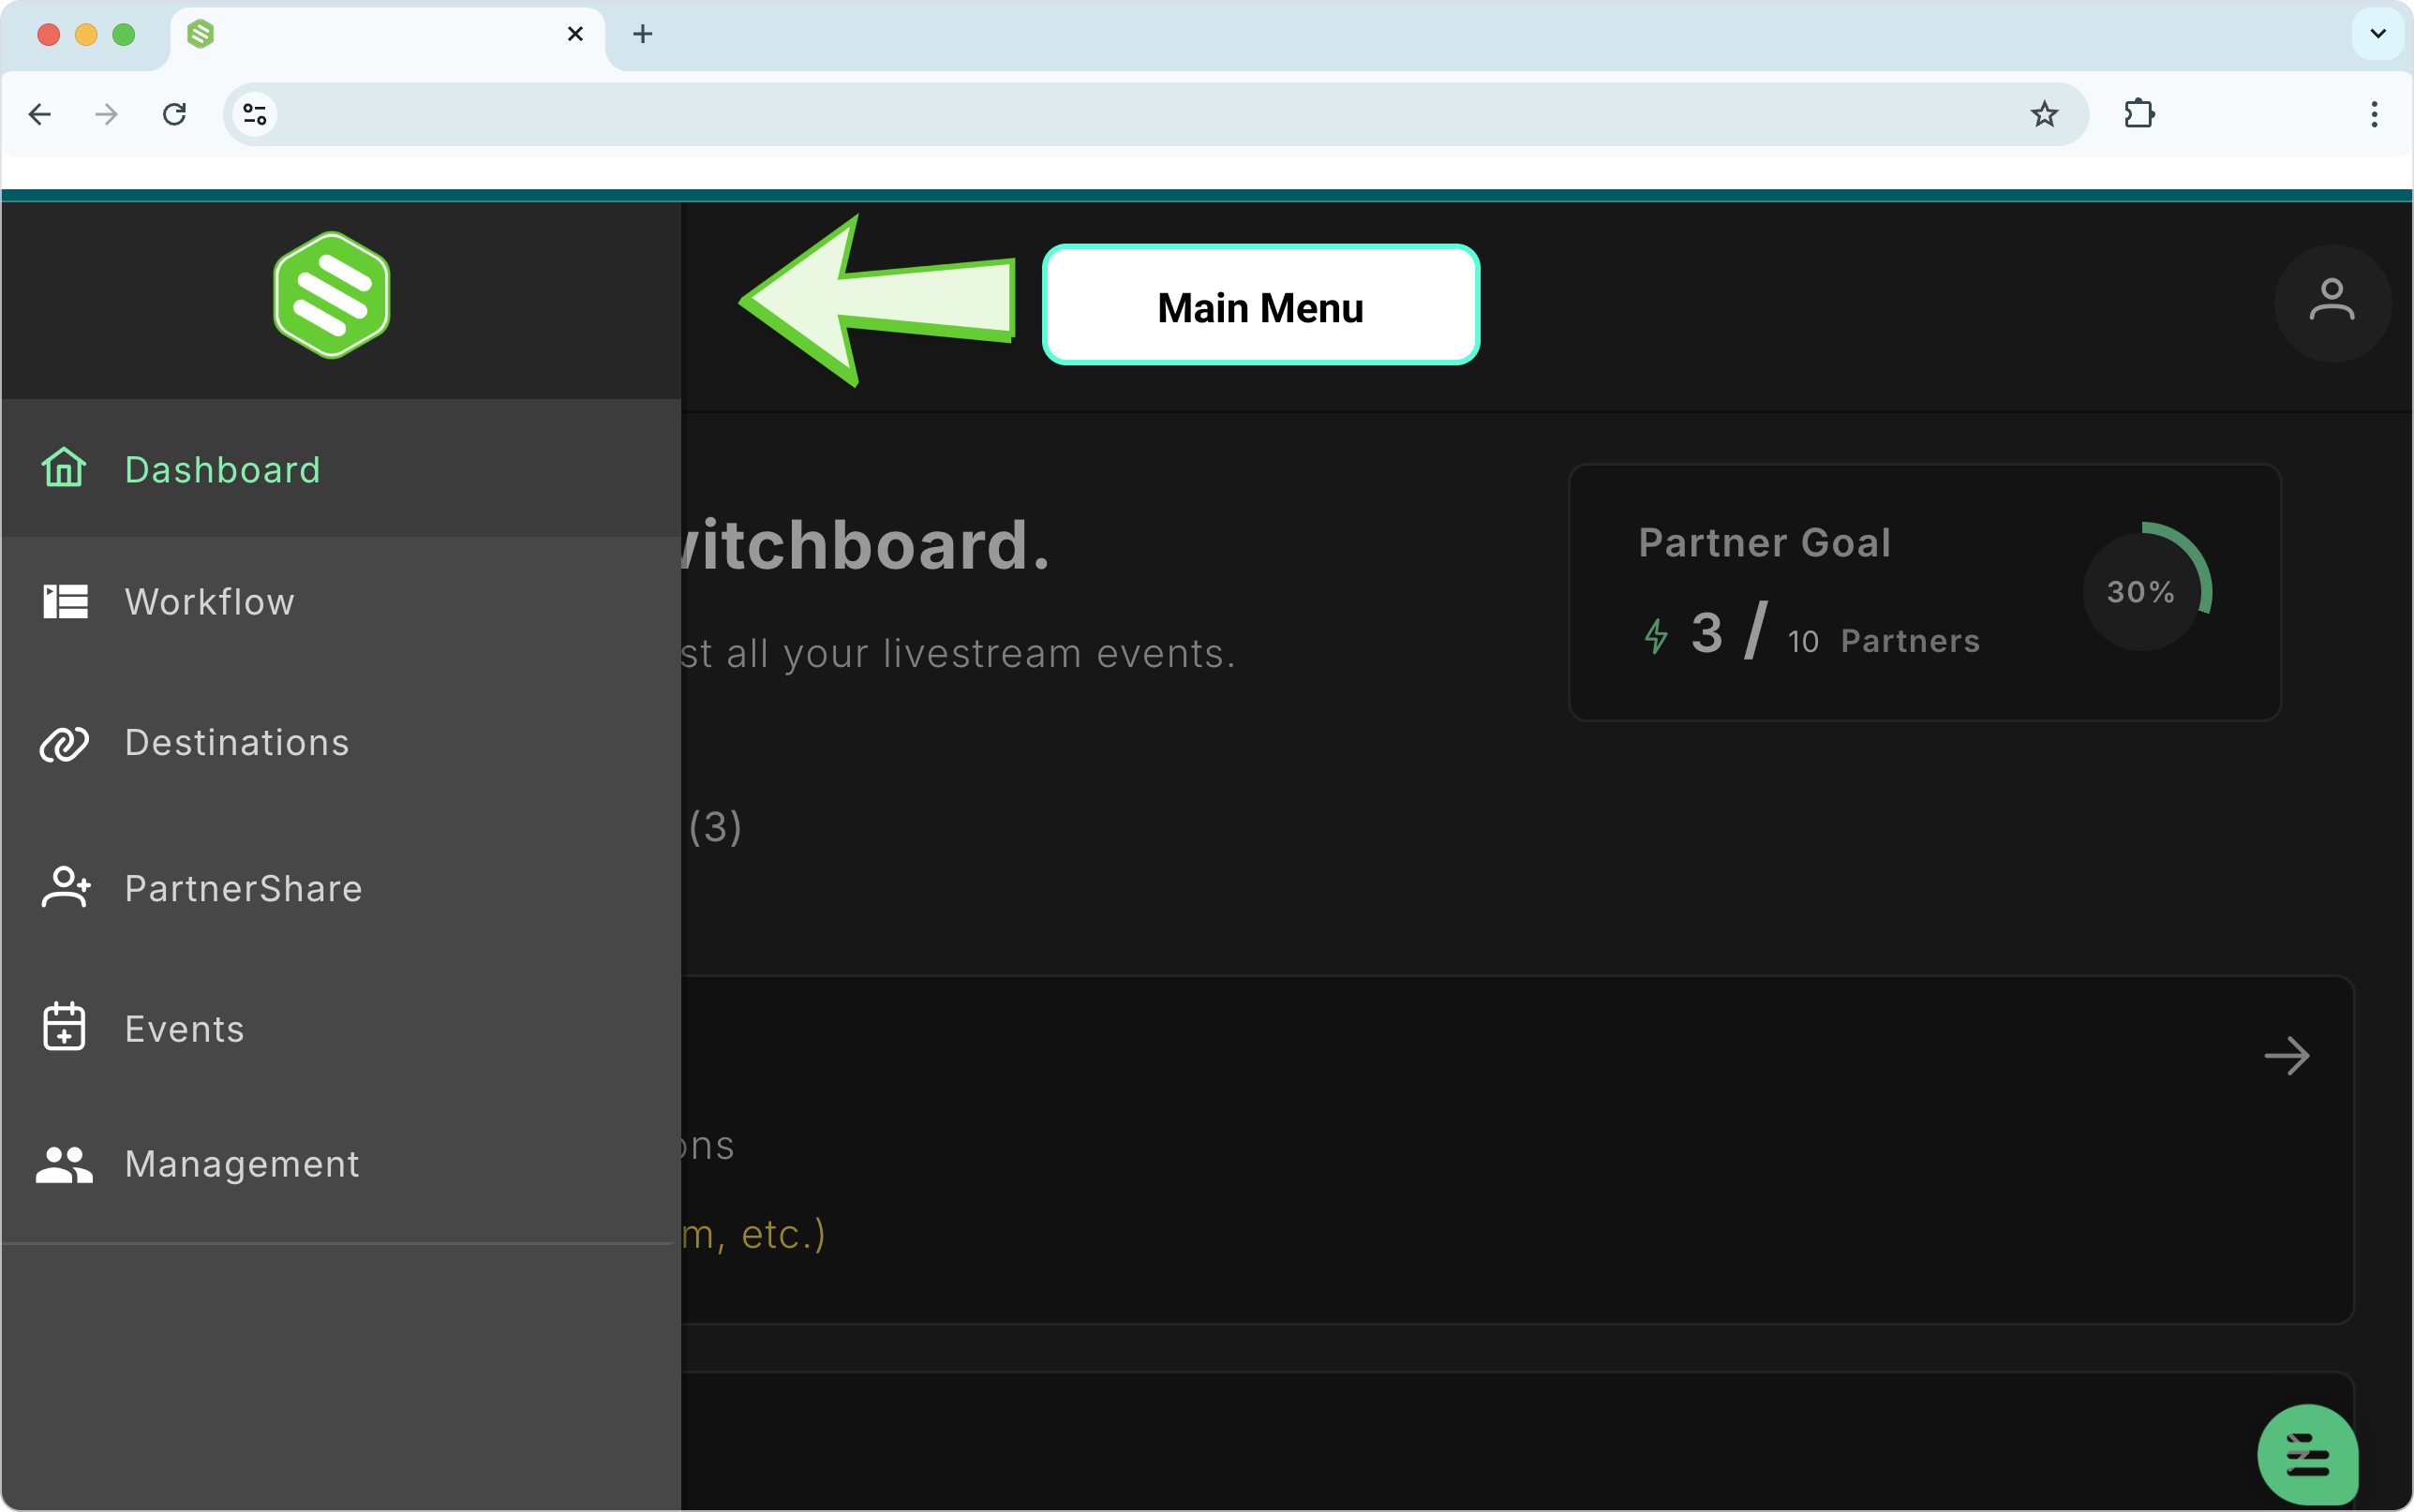
Step 1: Access the Workflow Page
Click Stream Now to open the Workflow page.
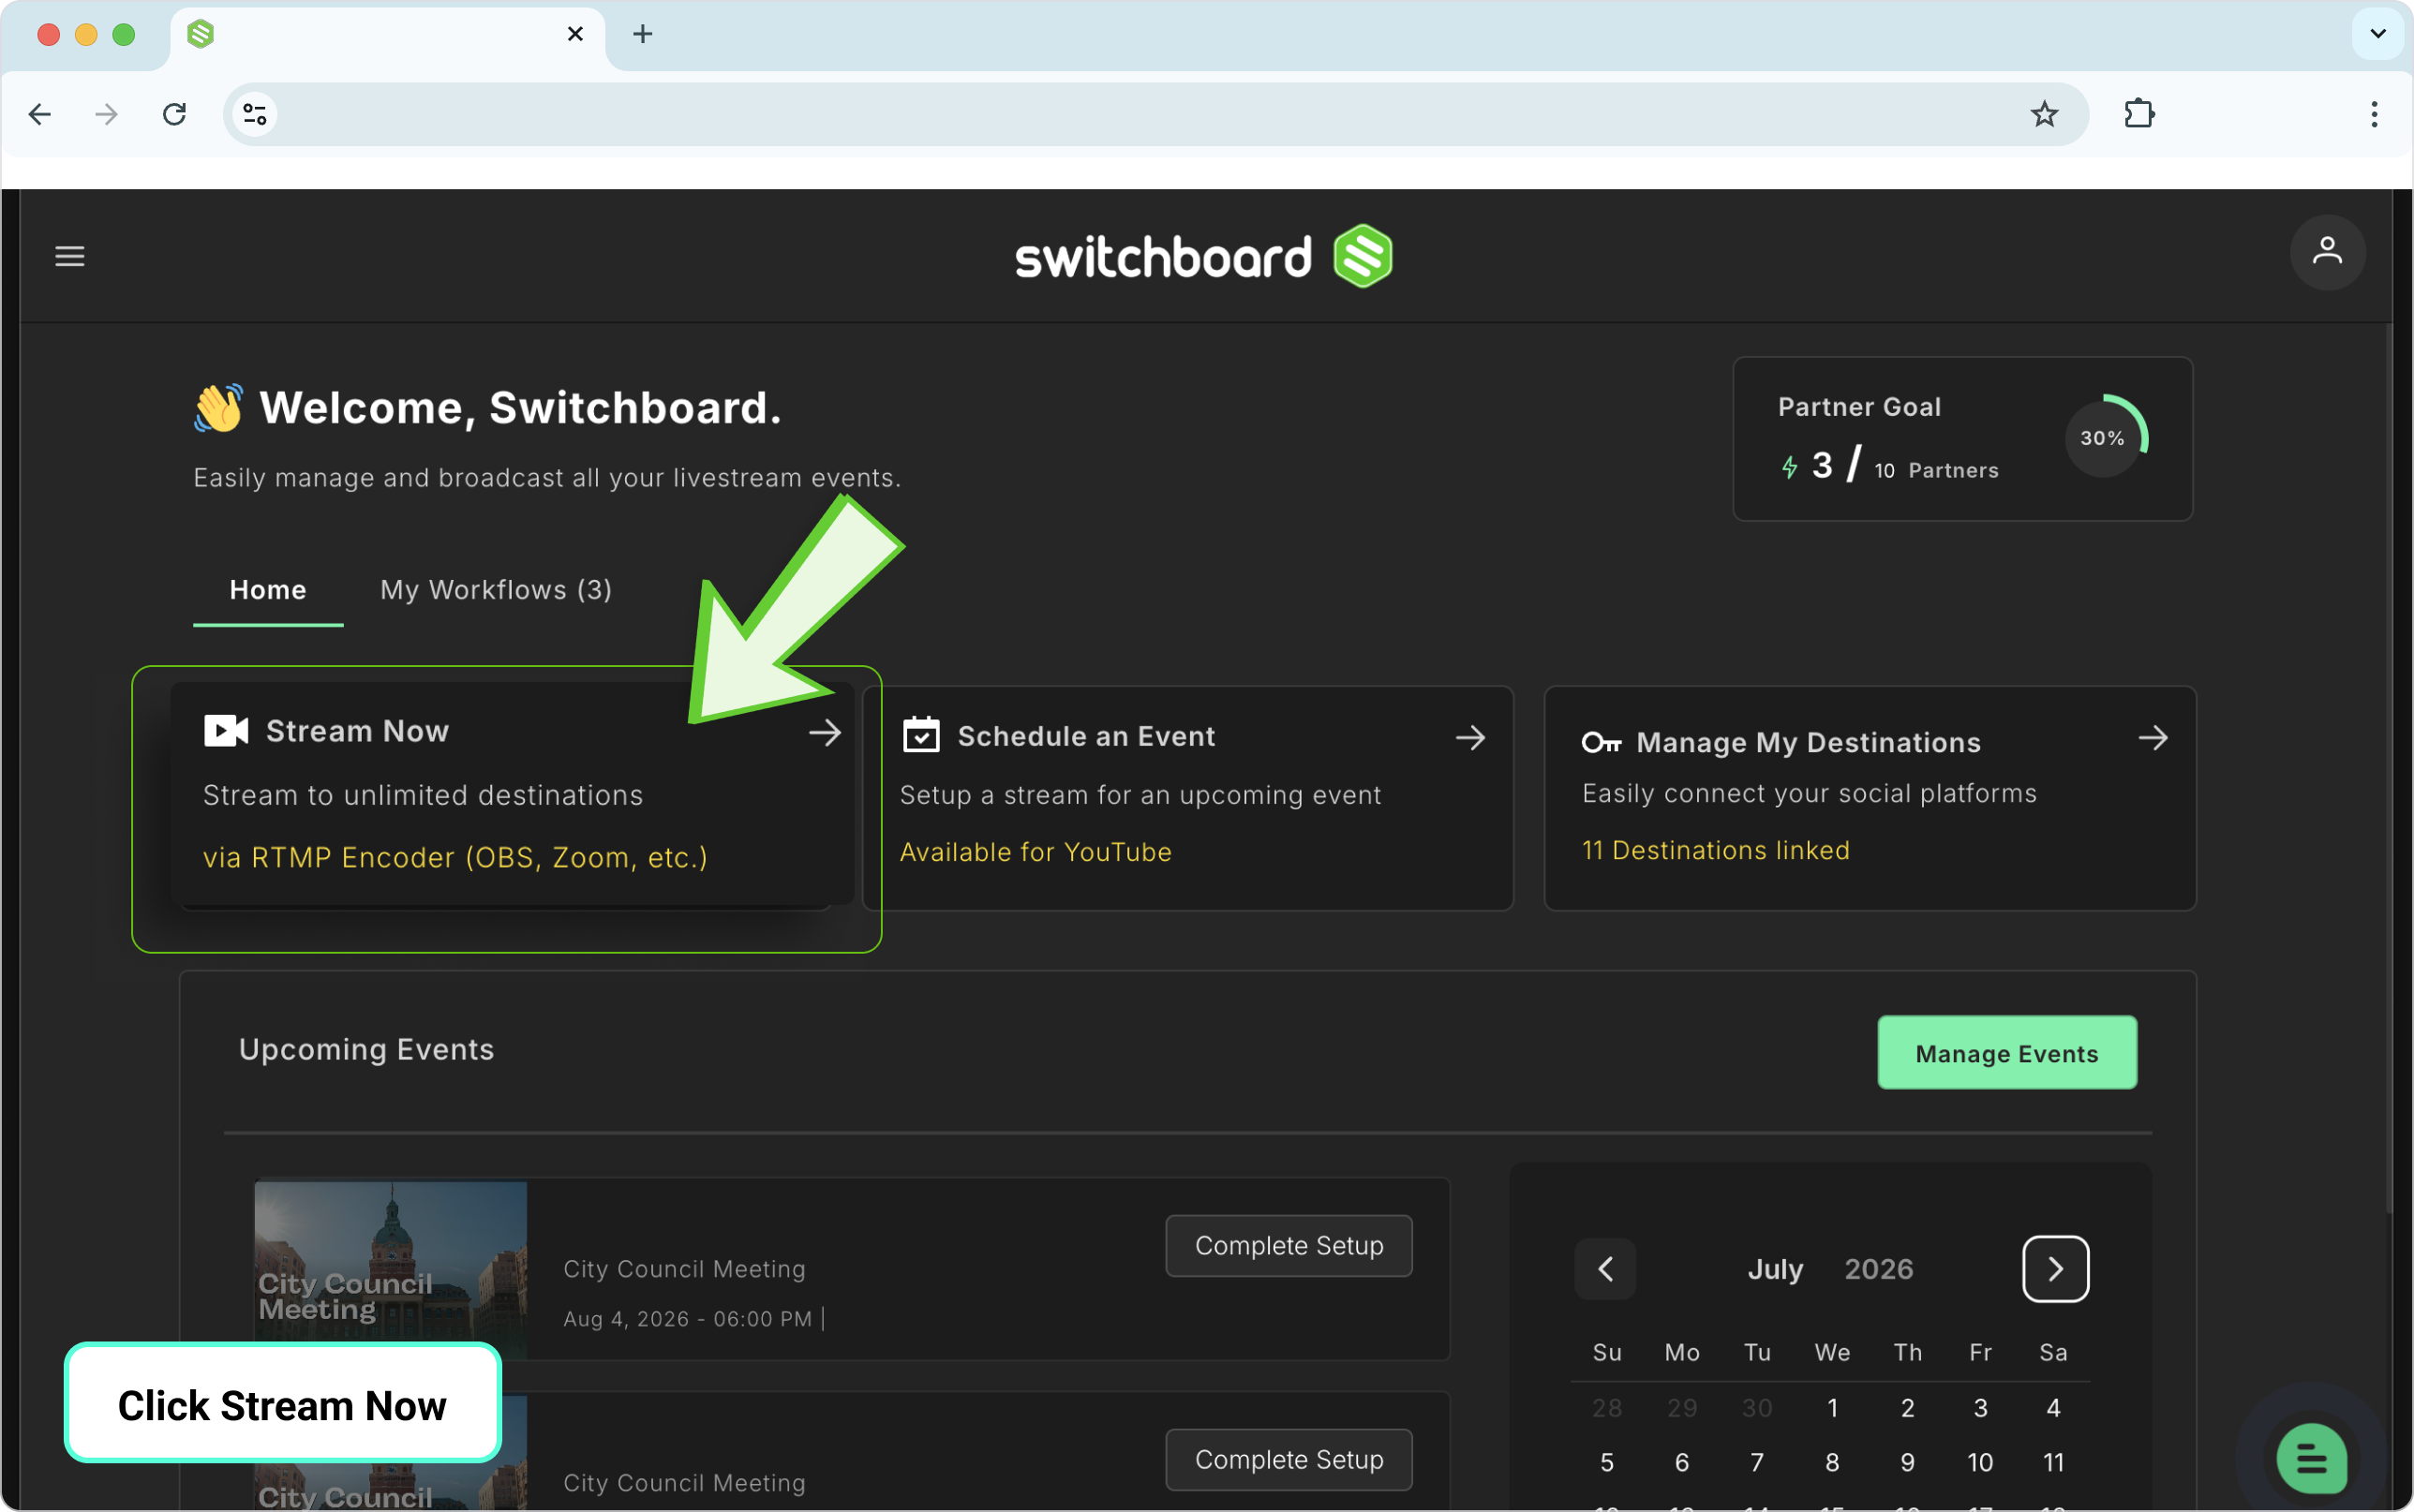
A default workflow is automatically created for you the first time you log in, so you can start building right away. You can rename it and give it a color label later; see Optional: Customize Your Workflow.
For Teams: If your account has more than one workflow (for example, one per team, department, or event), you'll choose which workflow to open from this same page.
Step 2: Add Your First Stream Group
A Stream Group holds everything for one broadcast: the destinations you're streaming to, the title and description, and the controls to go live. You can create multiple Stream Groups within a single workflow to organize different streams or events.
Click Create Stream Group.
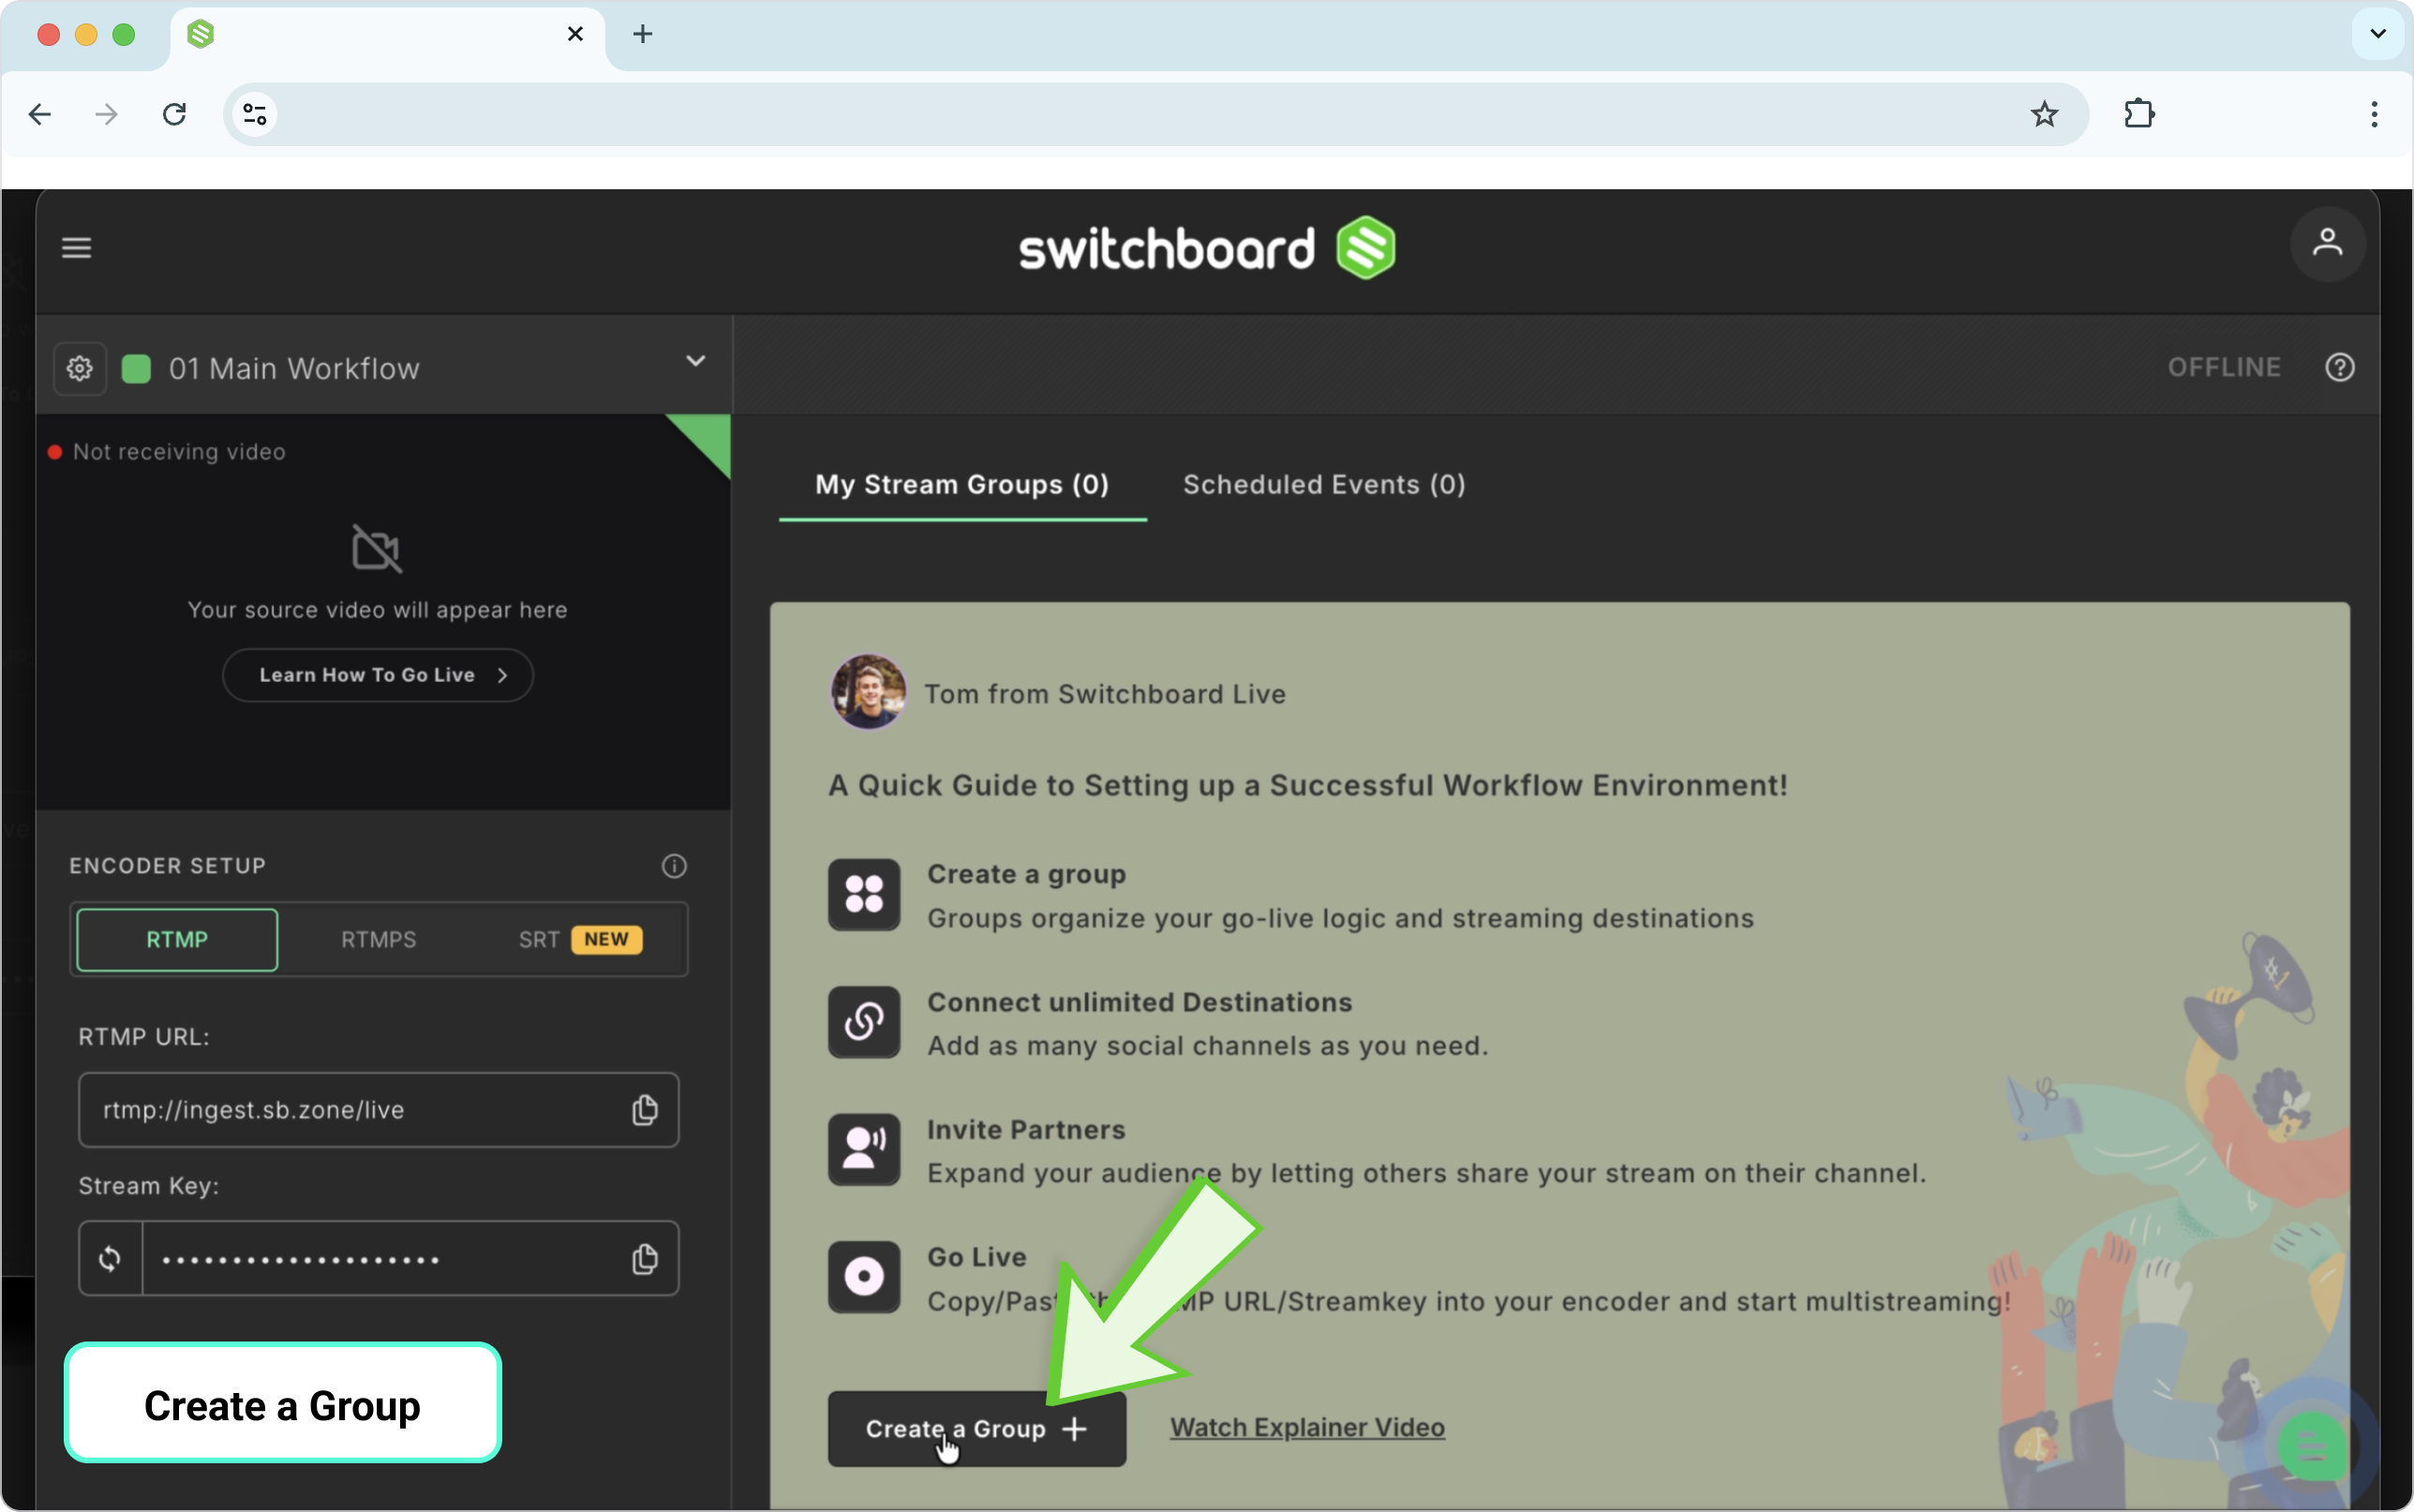
Give the group a name.
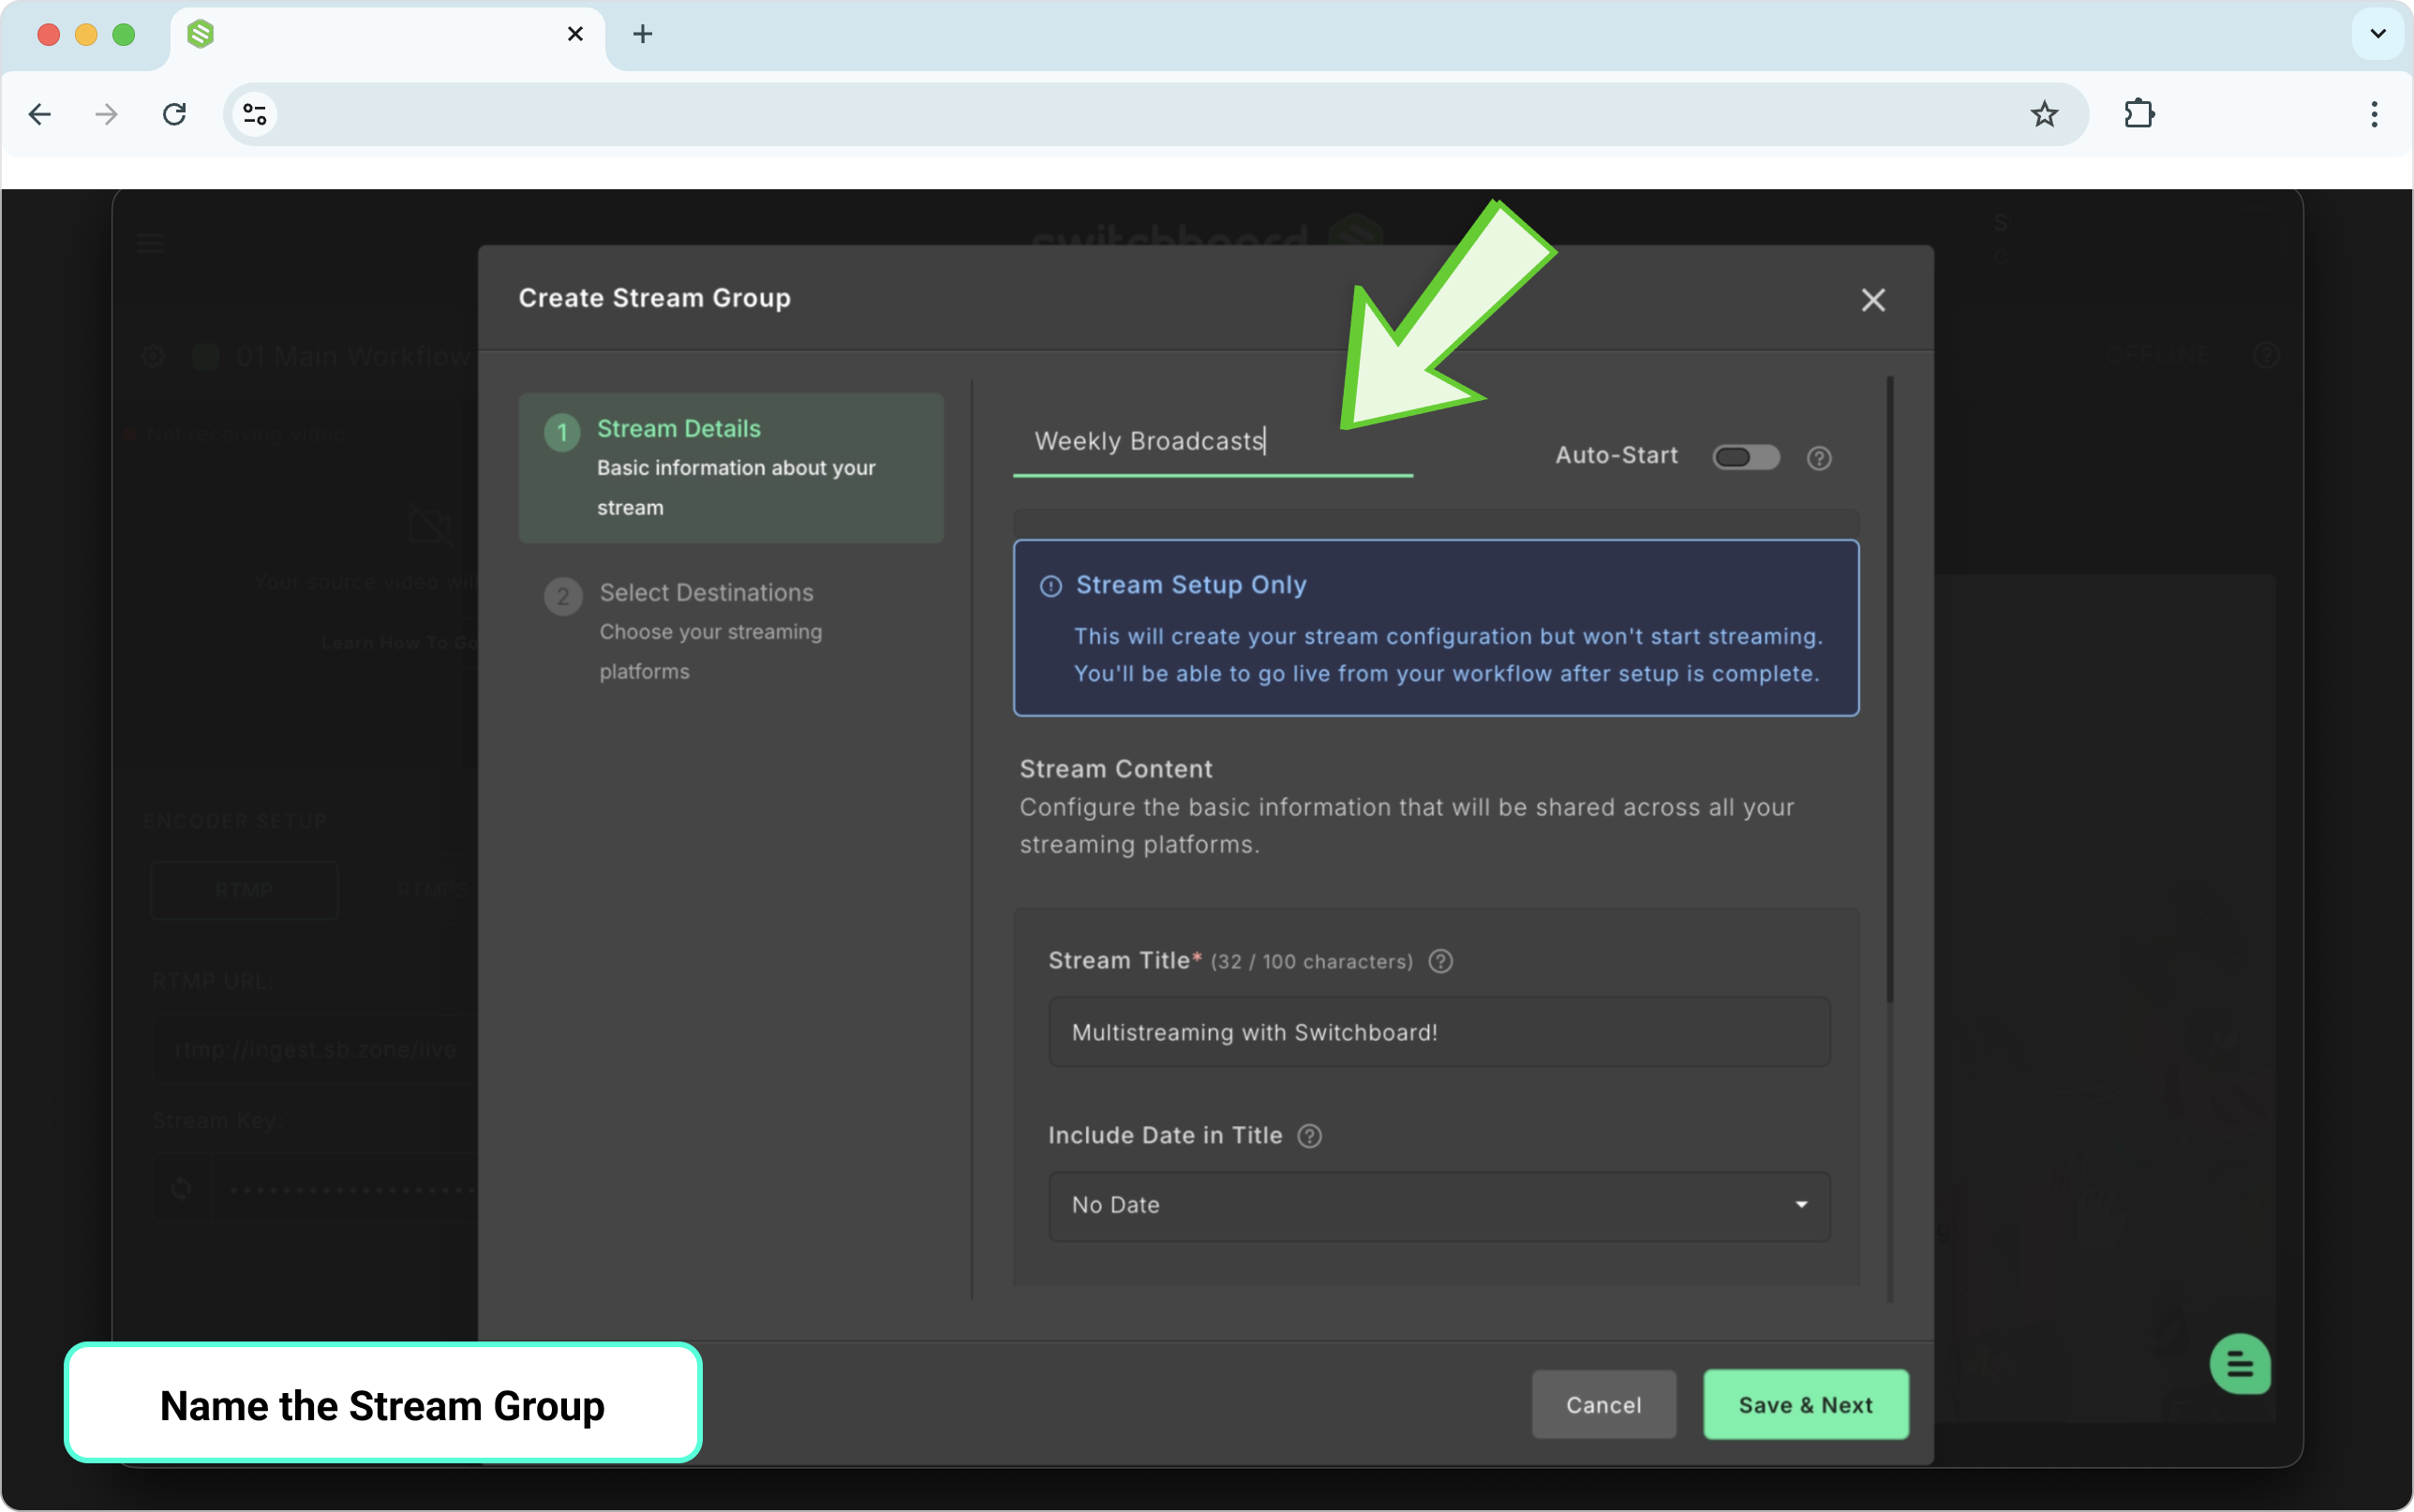
Add a stream title.
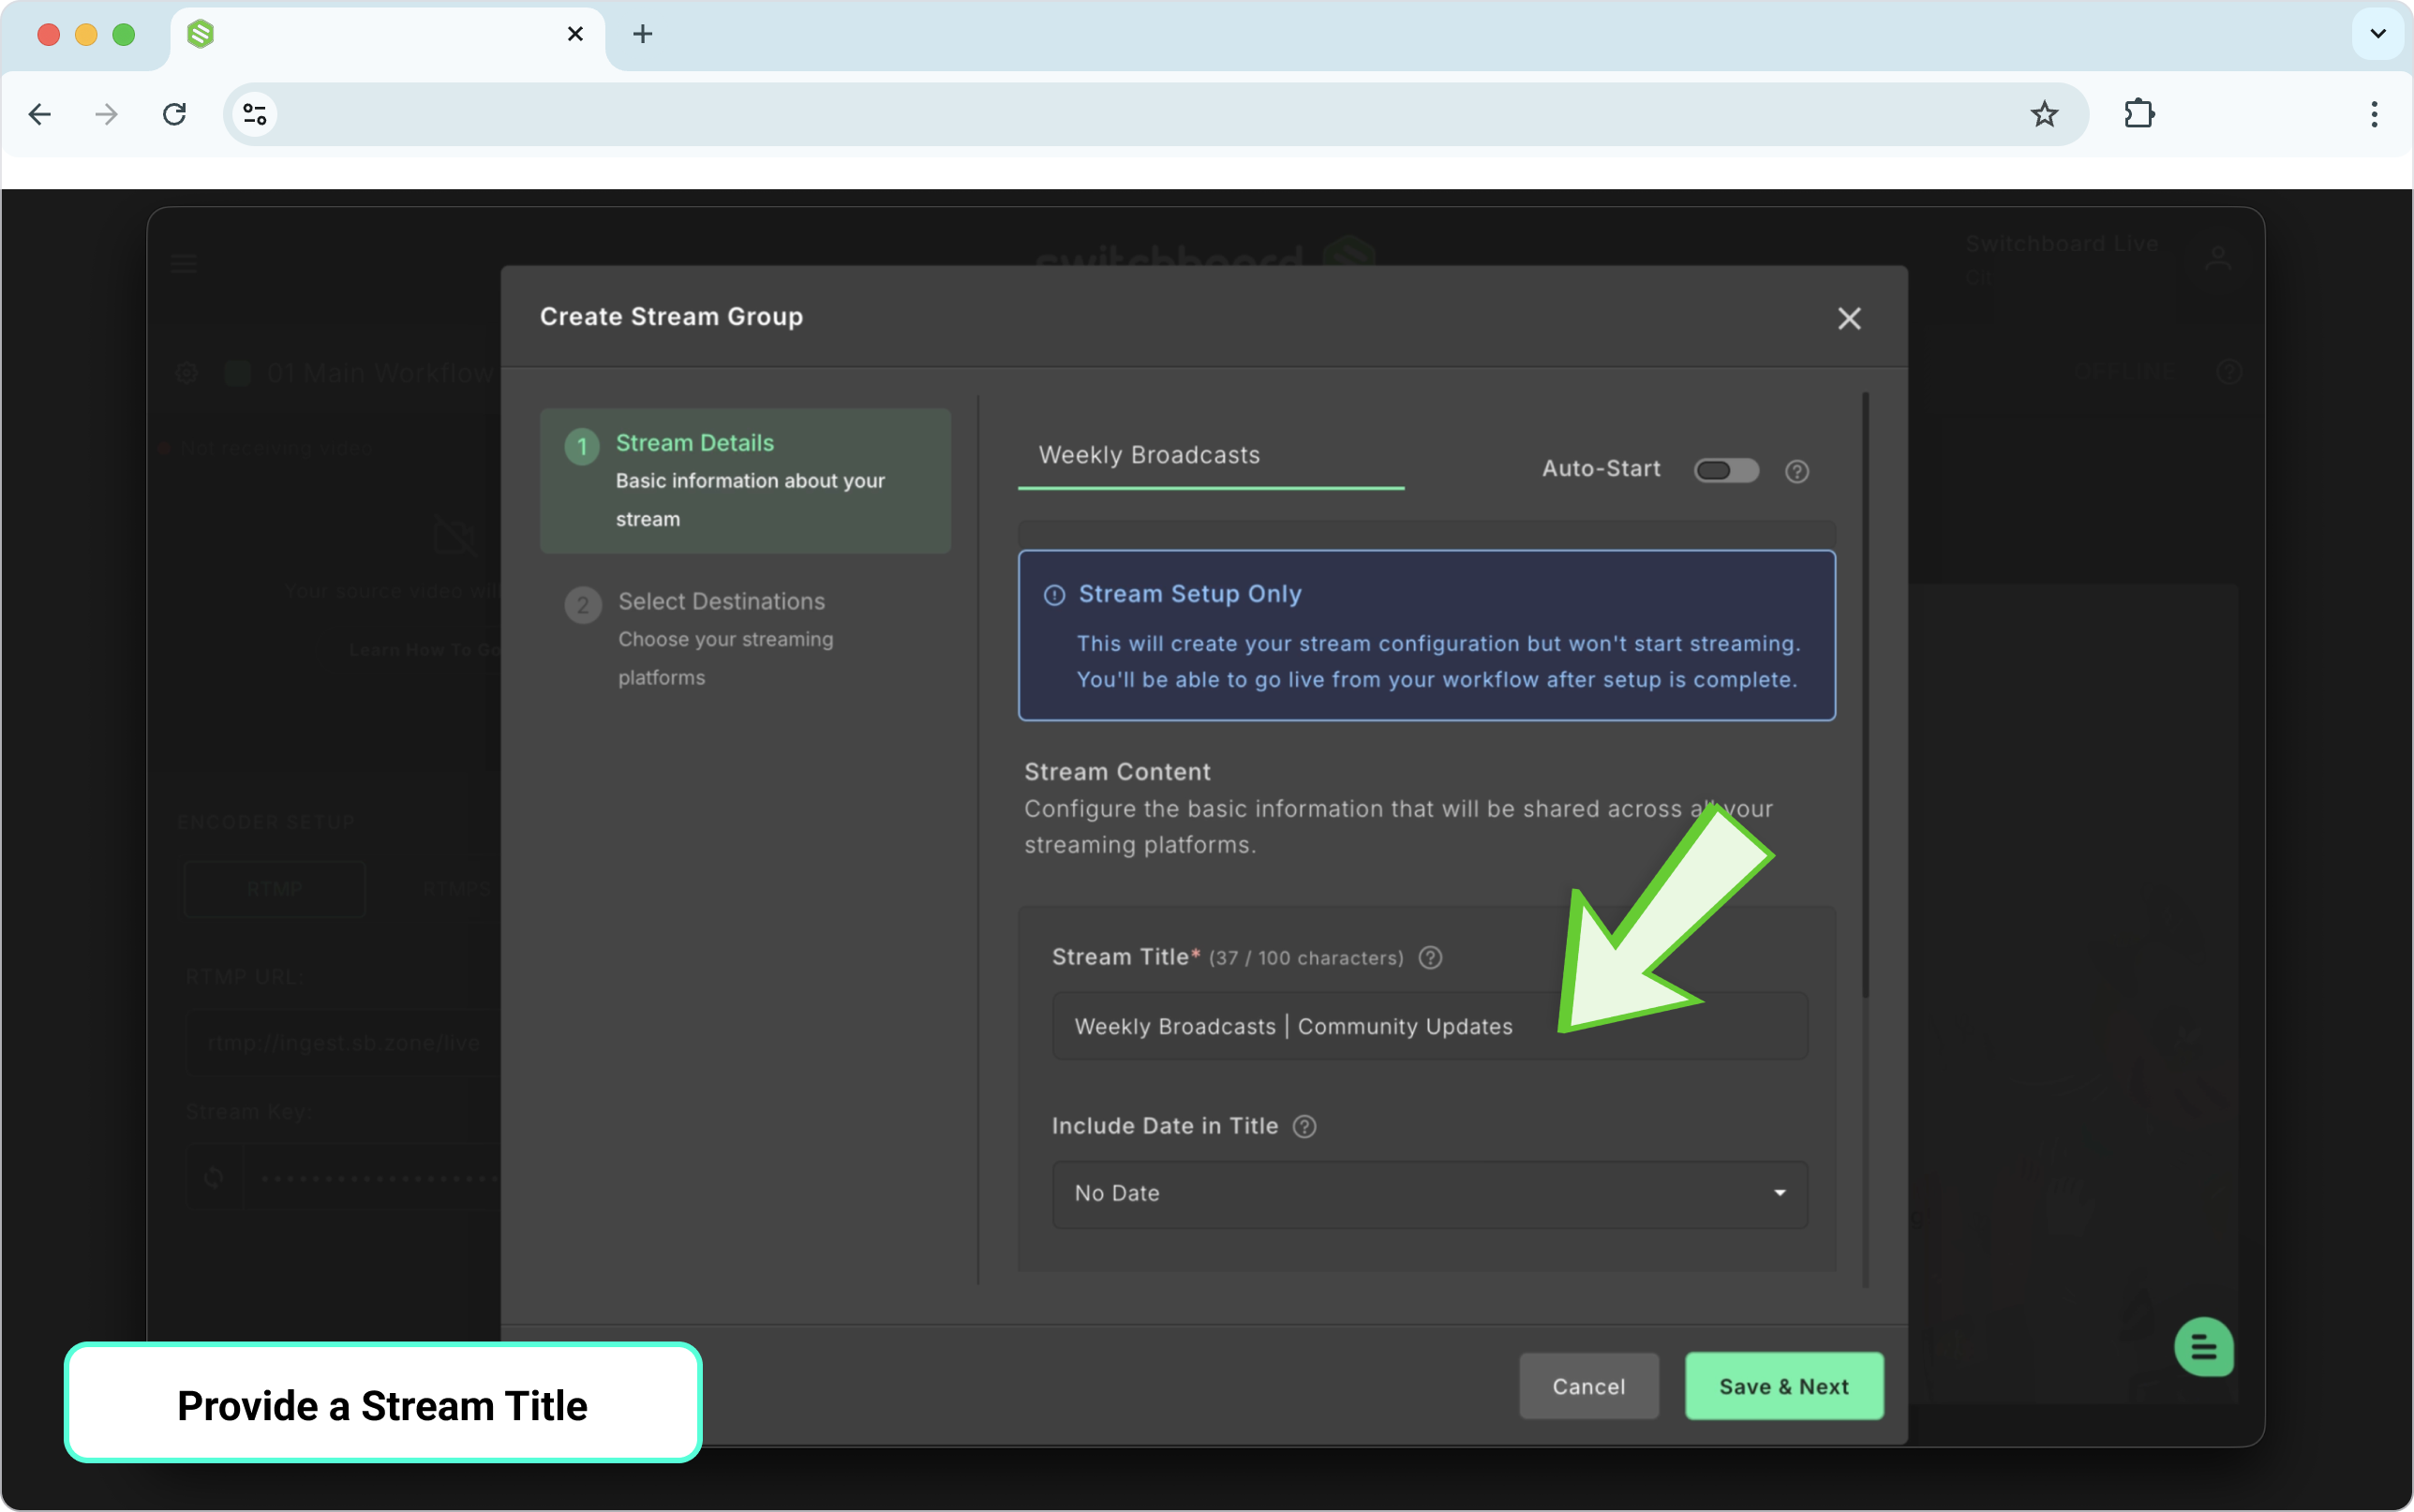
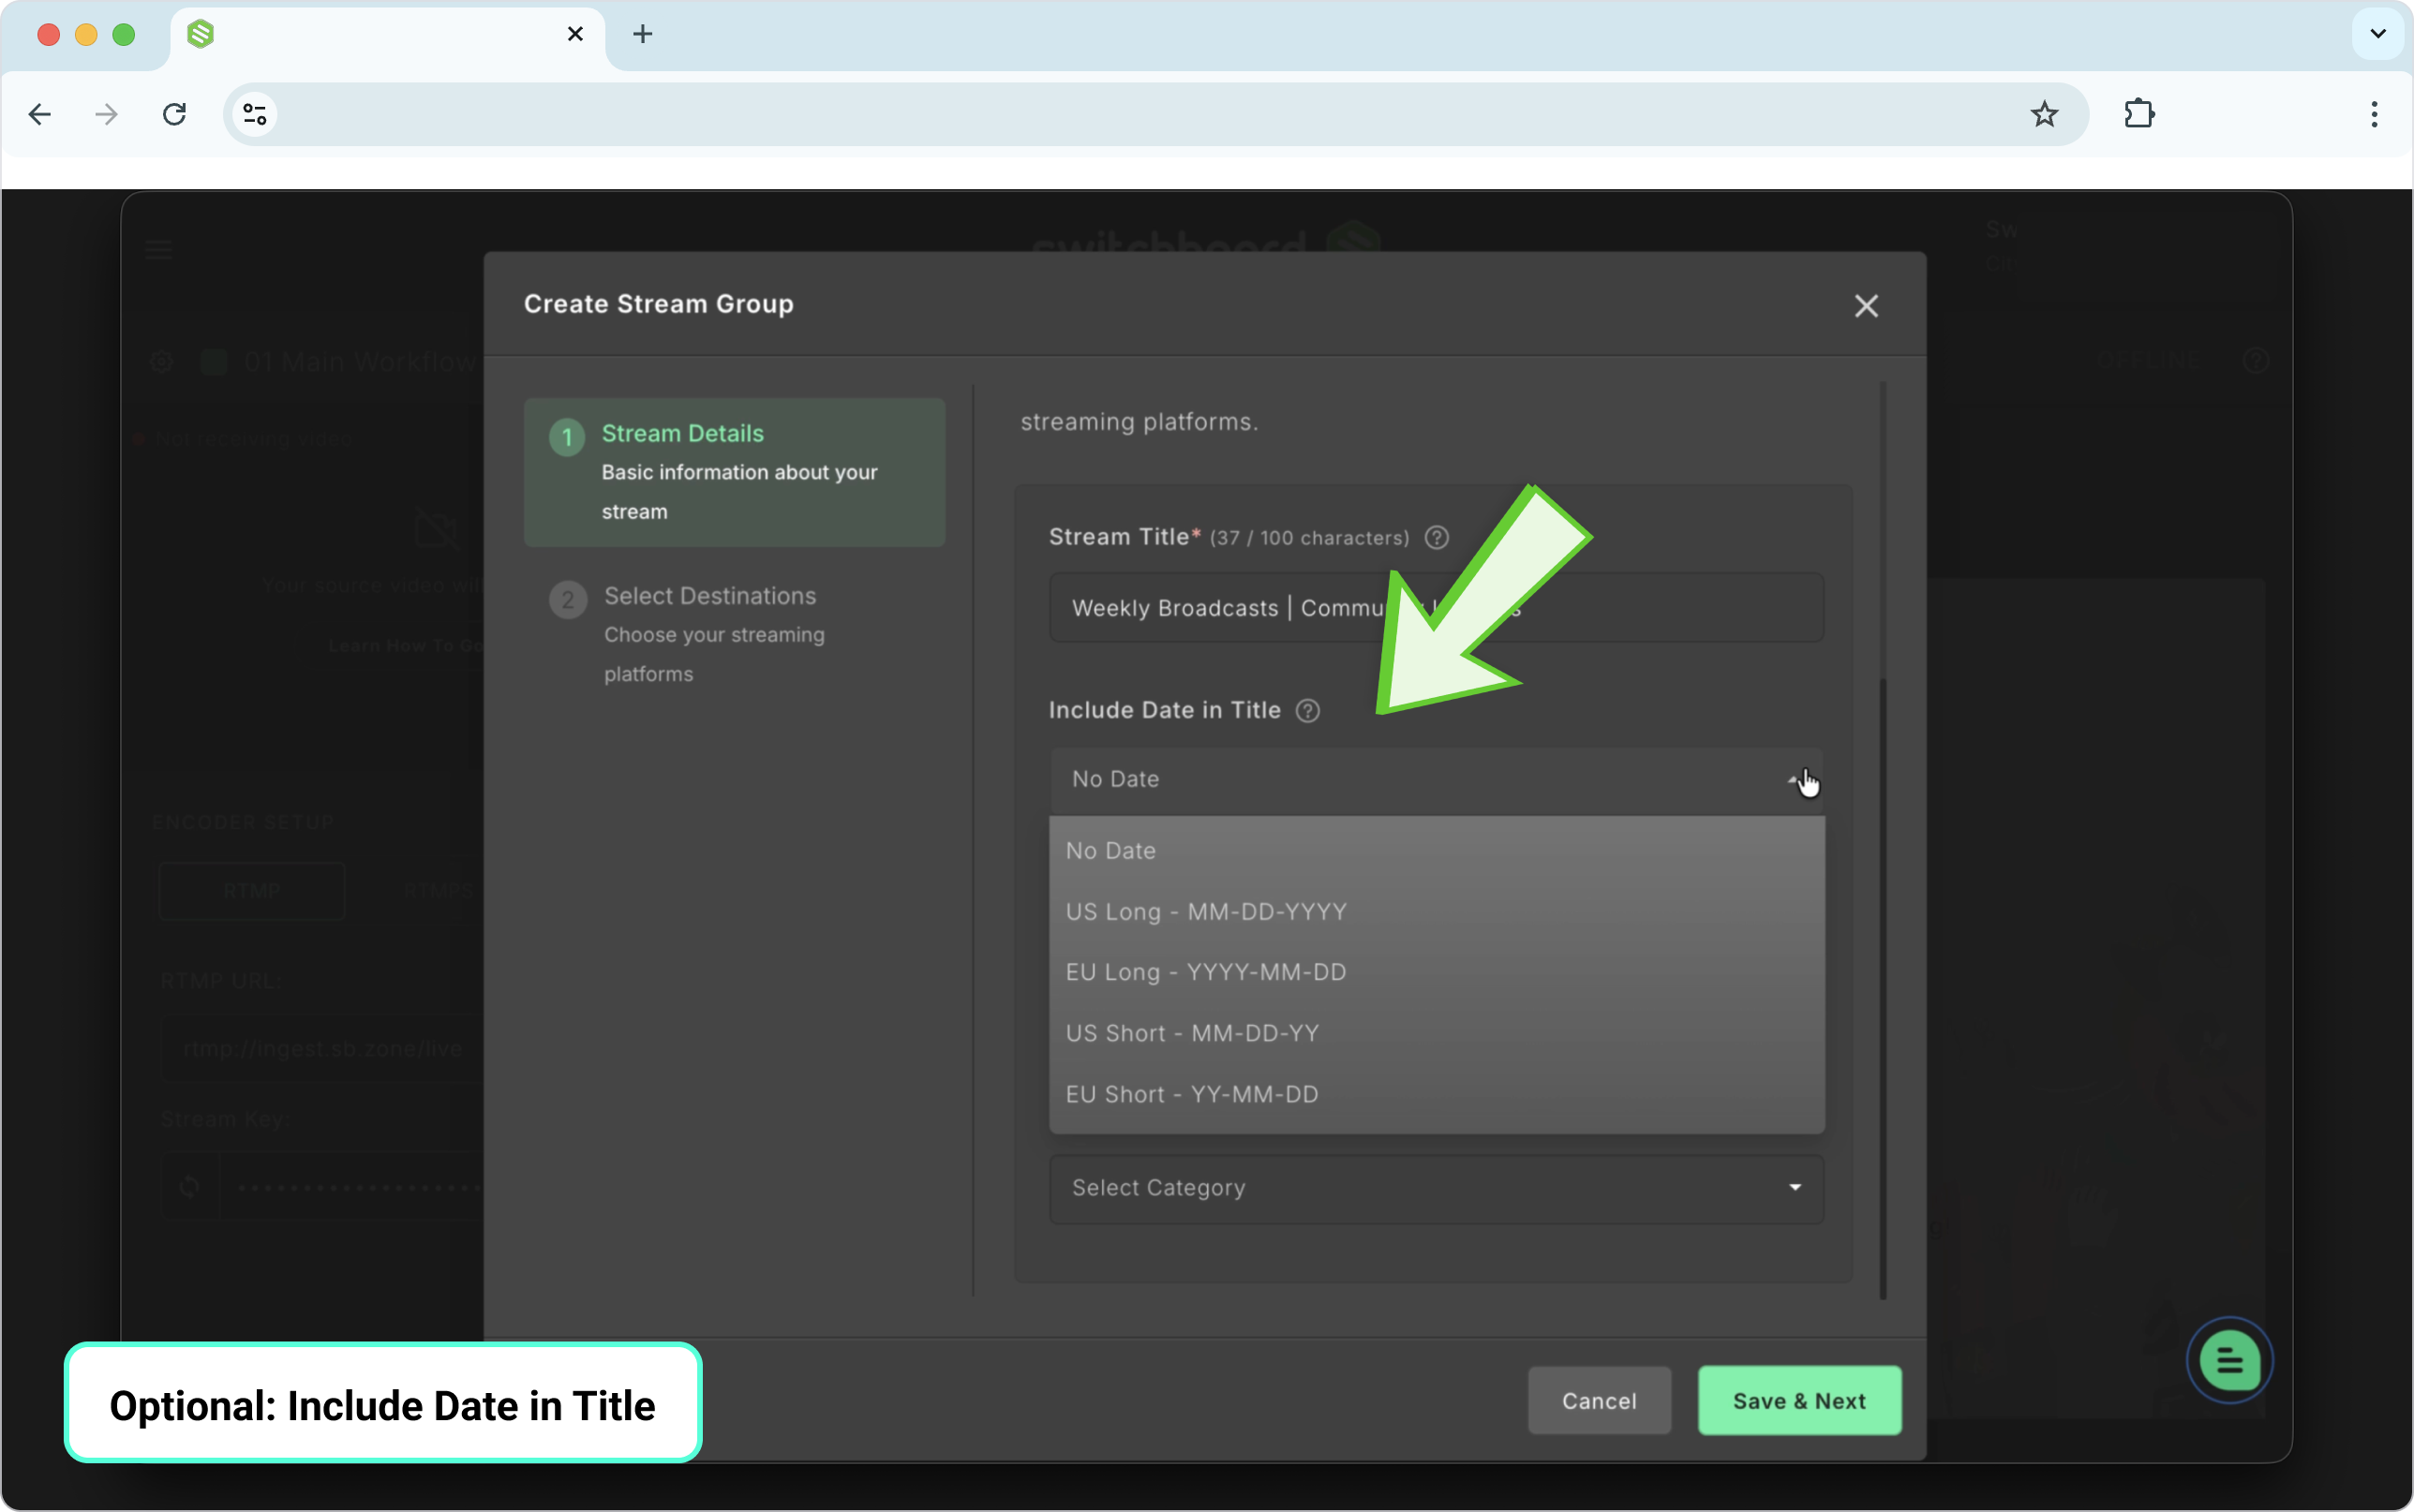
(Optional) Turn on the date-in-title feature.
Add a description for the stream.
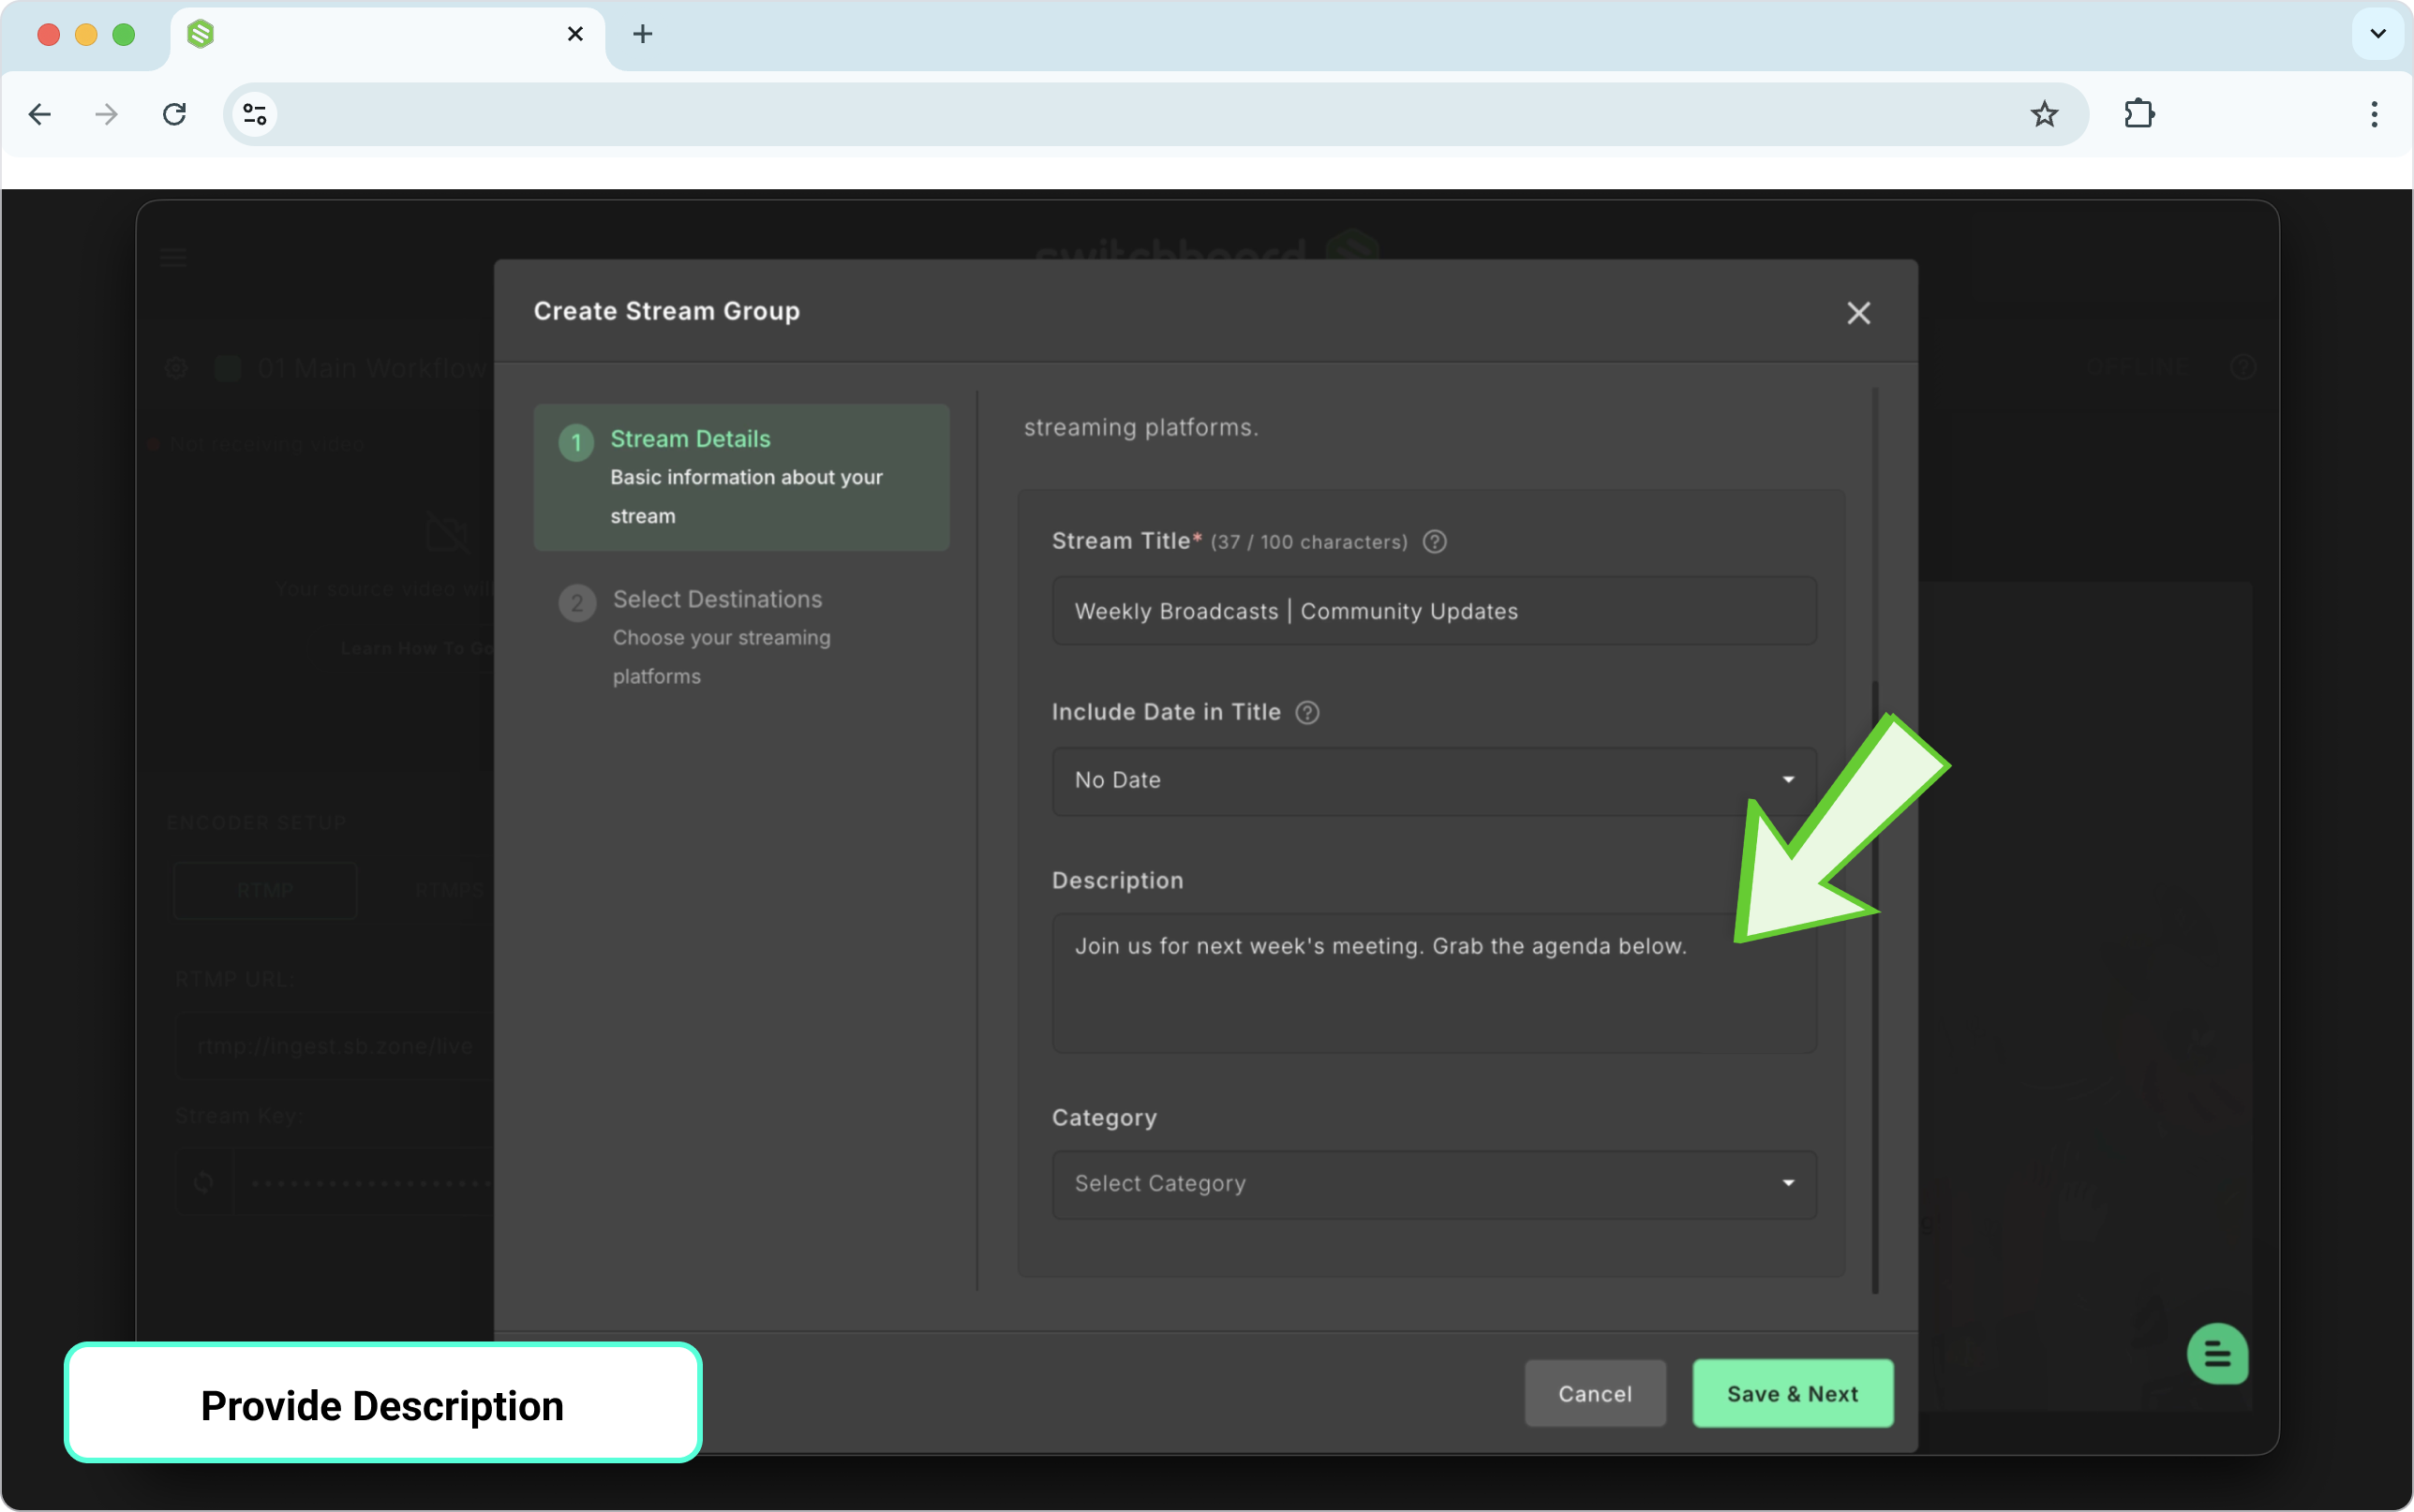
Click Save & Next.
Step 3: Connect Destinations to Your Stream Group
Destinations are the platforms you're streaming to, social channels like YouTube or Facebook, or custom RTMP endpoints.
Connect a Destination for the first time
While the Create Group window is open, click Connect More.

Select the platform from the list and log in when prompted.
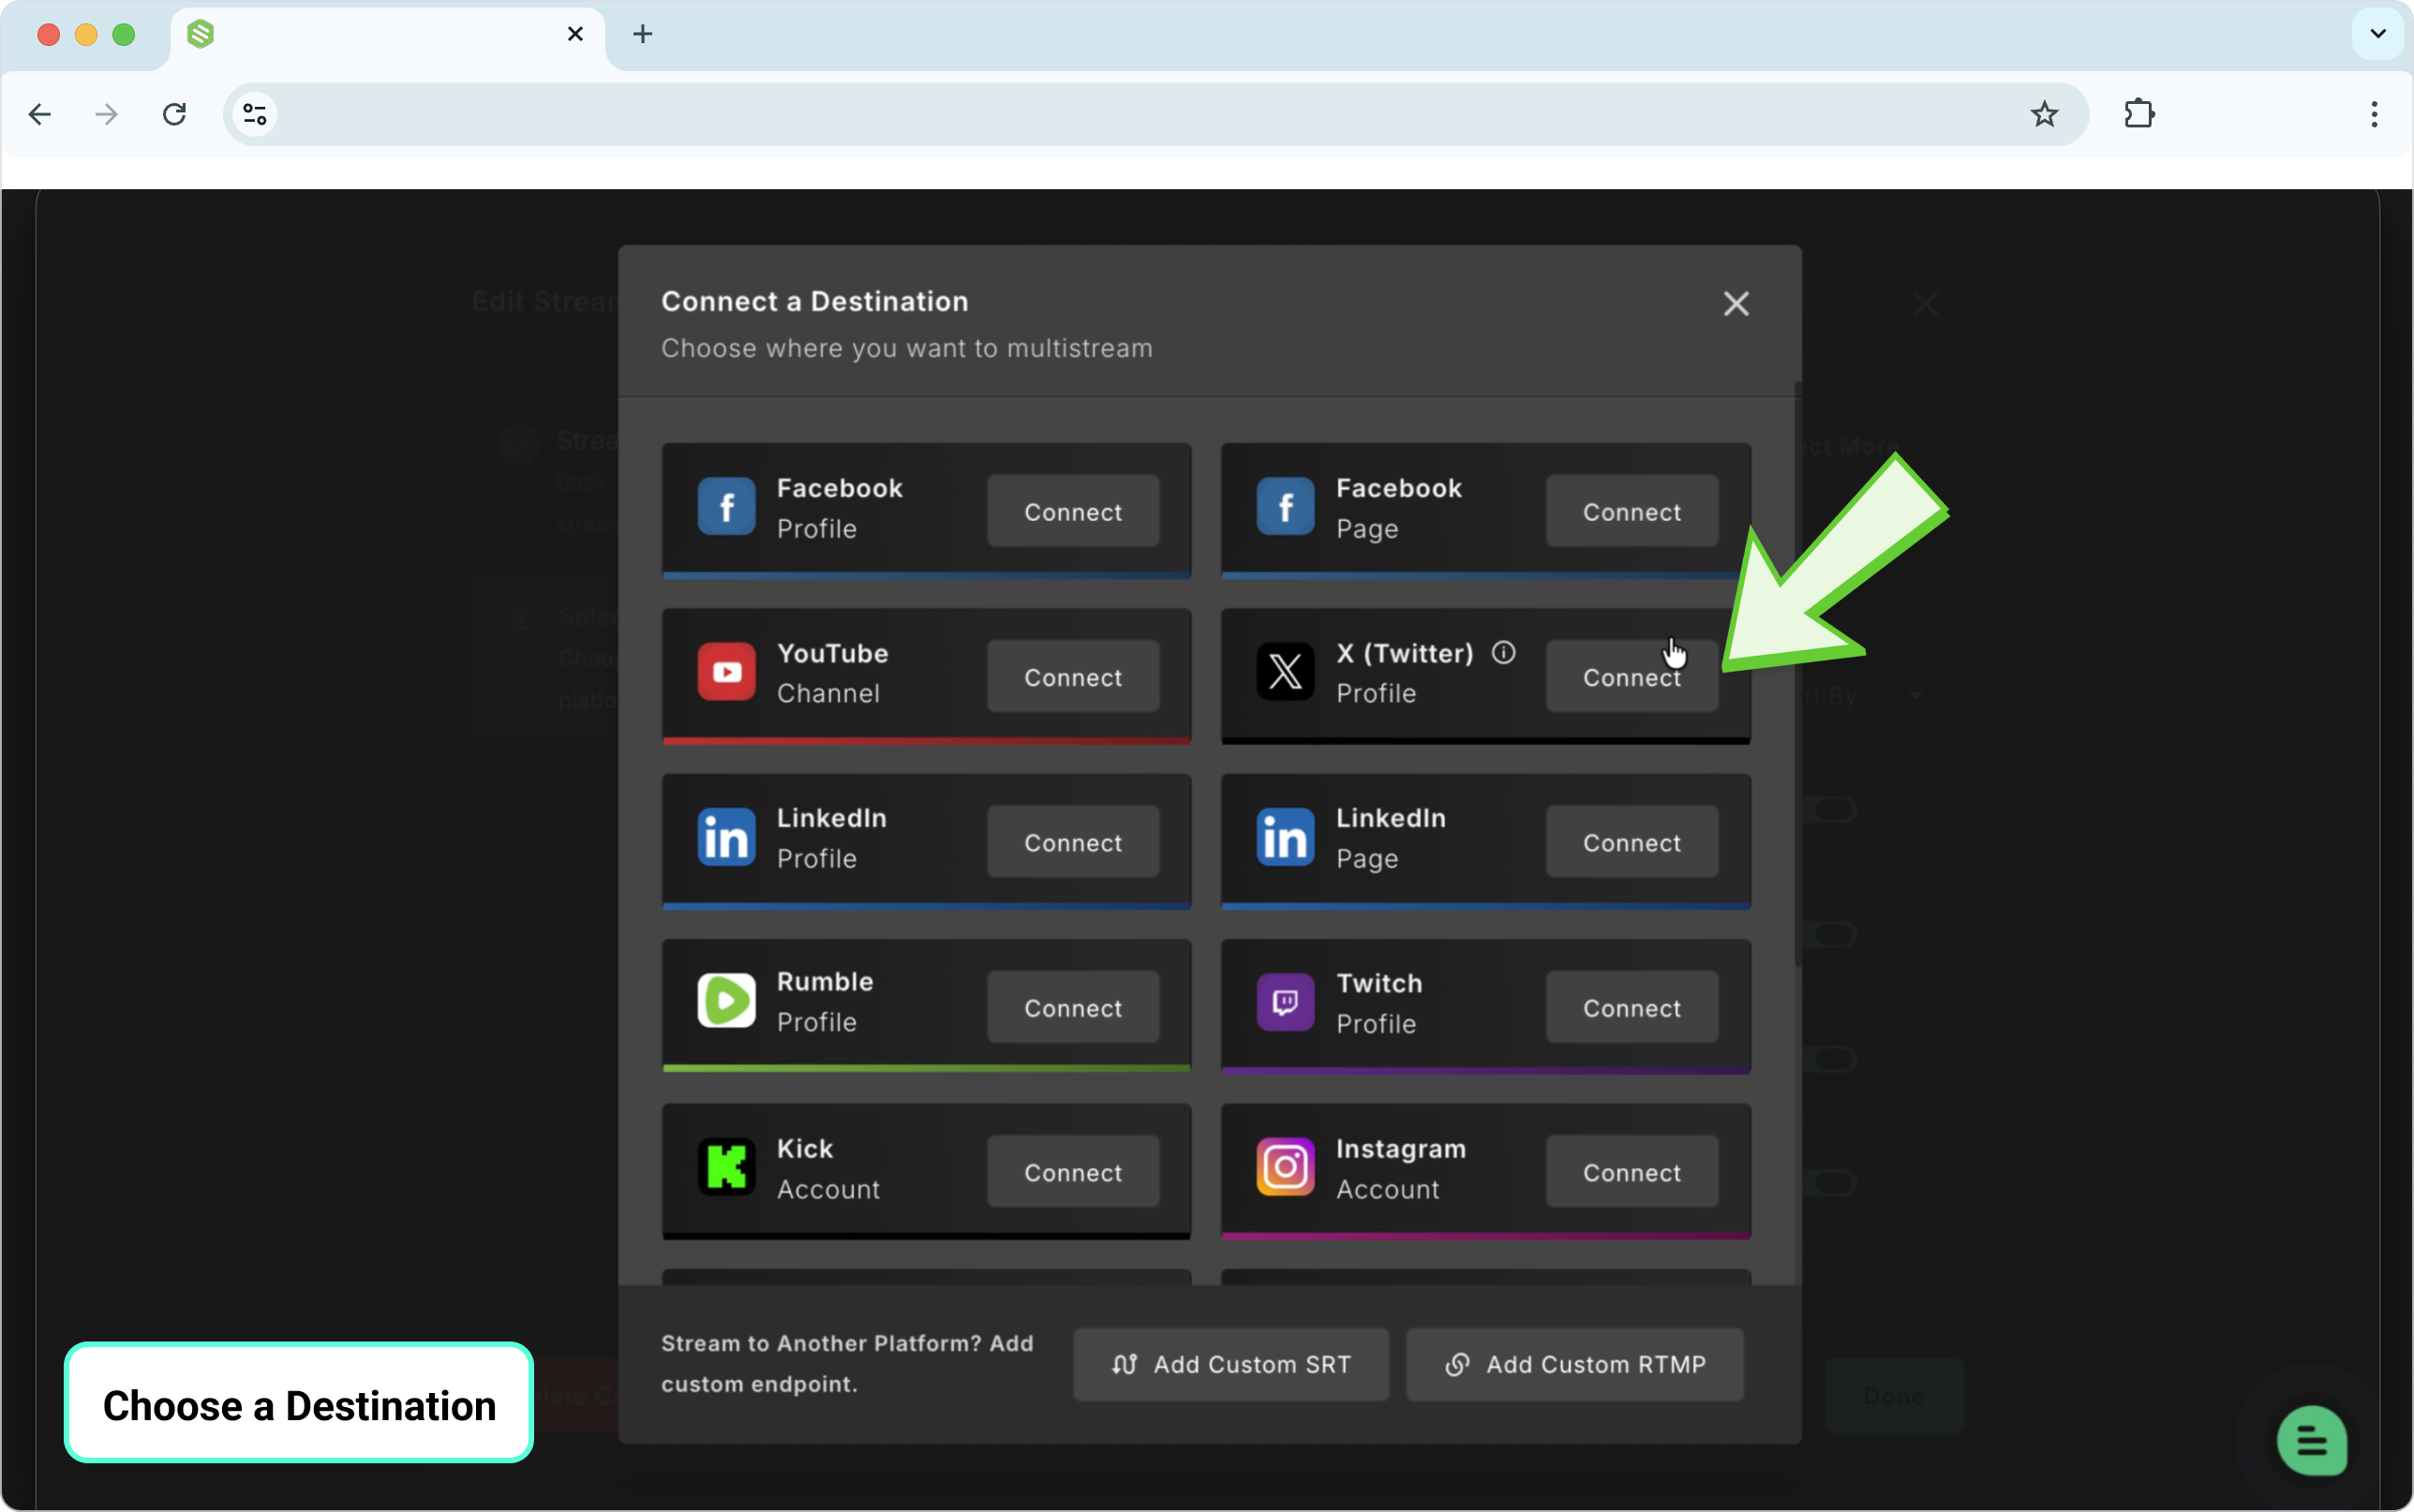
Continue until you reach the success screen.
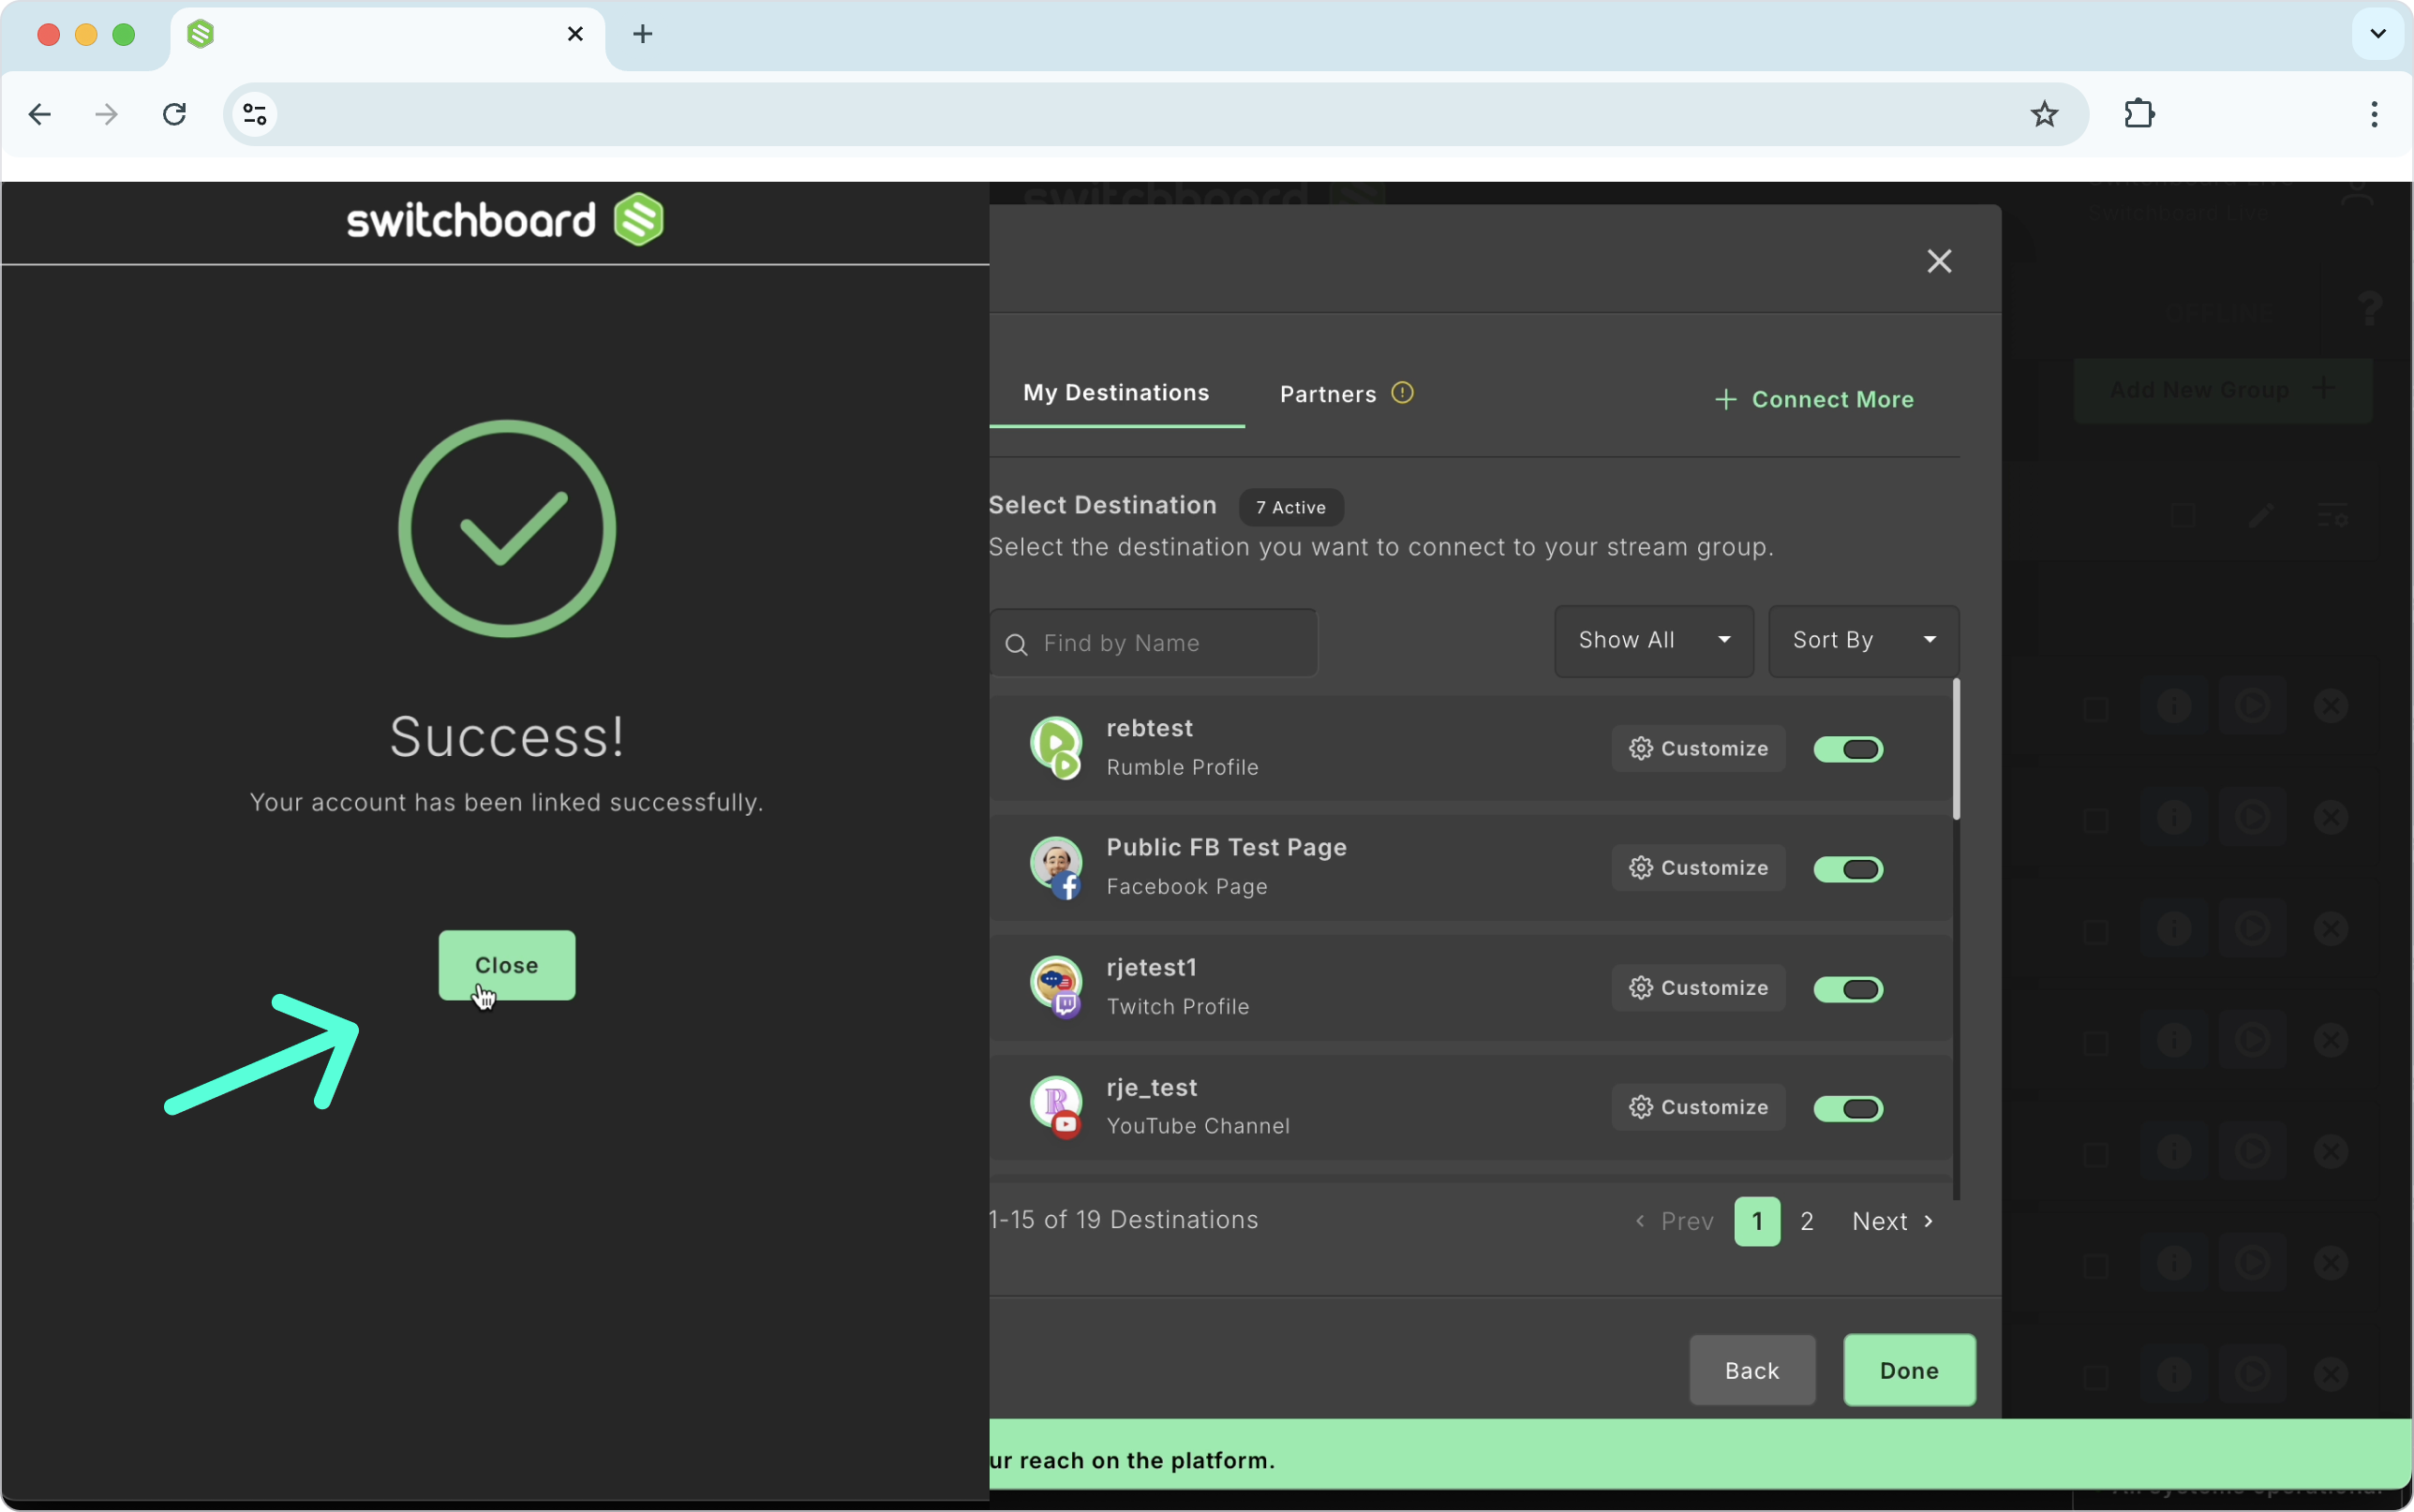
This works the same way for Facebook, YouTube, X, Twitch, Rumble, LinkedIn, and other supported platforms; you just need valid login credentials for that platform.
Once a Destination is connected to your account, you can reuse it across any Stream Group in any workflow without reauthorizing it.
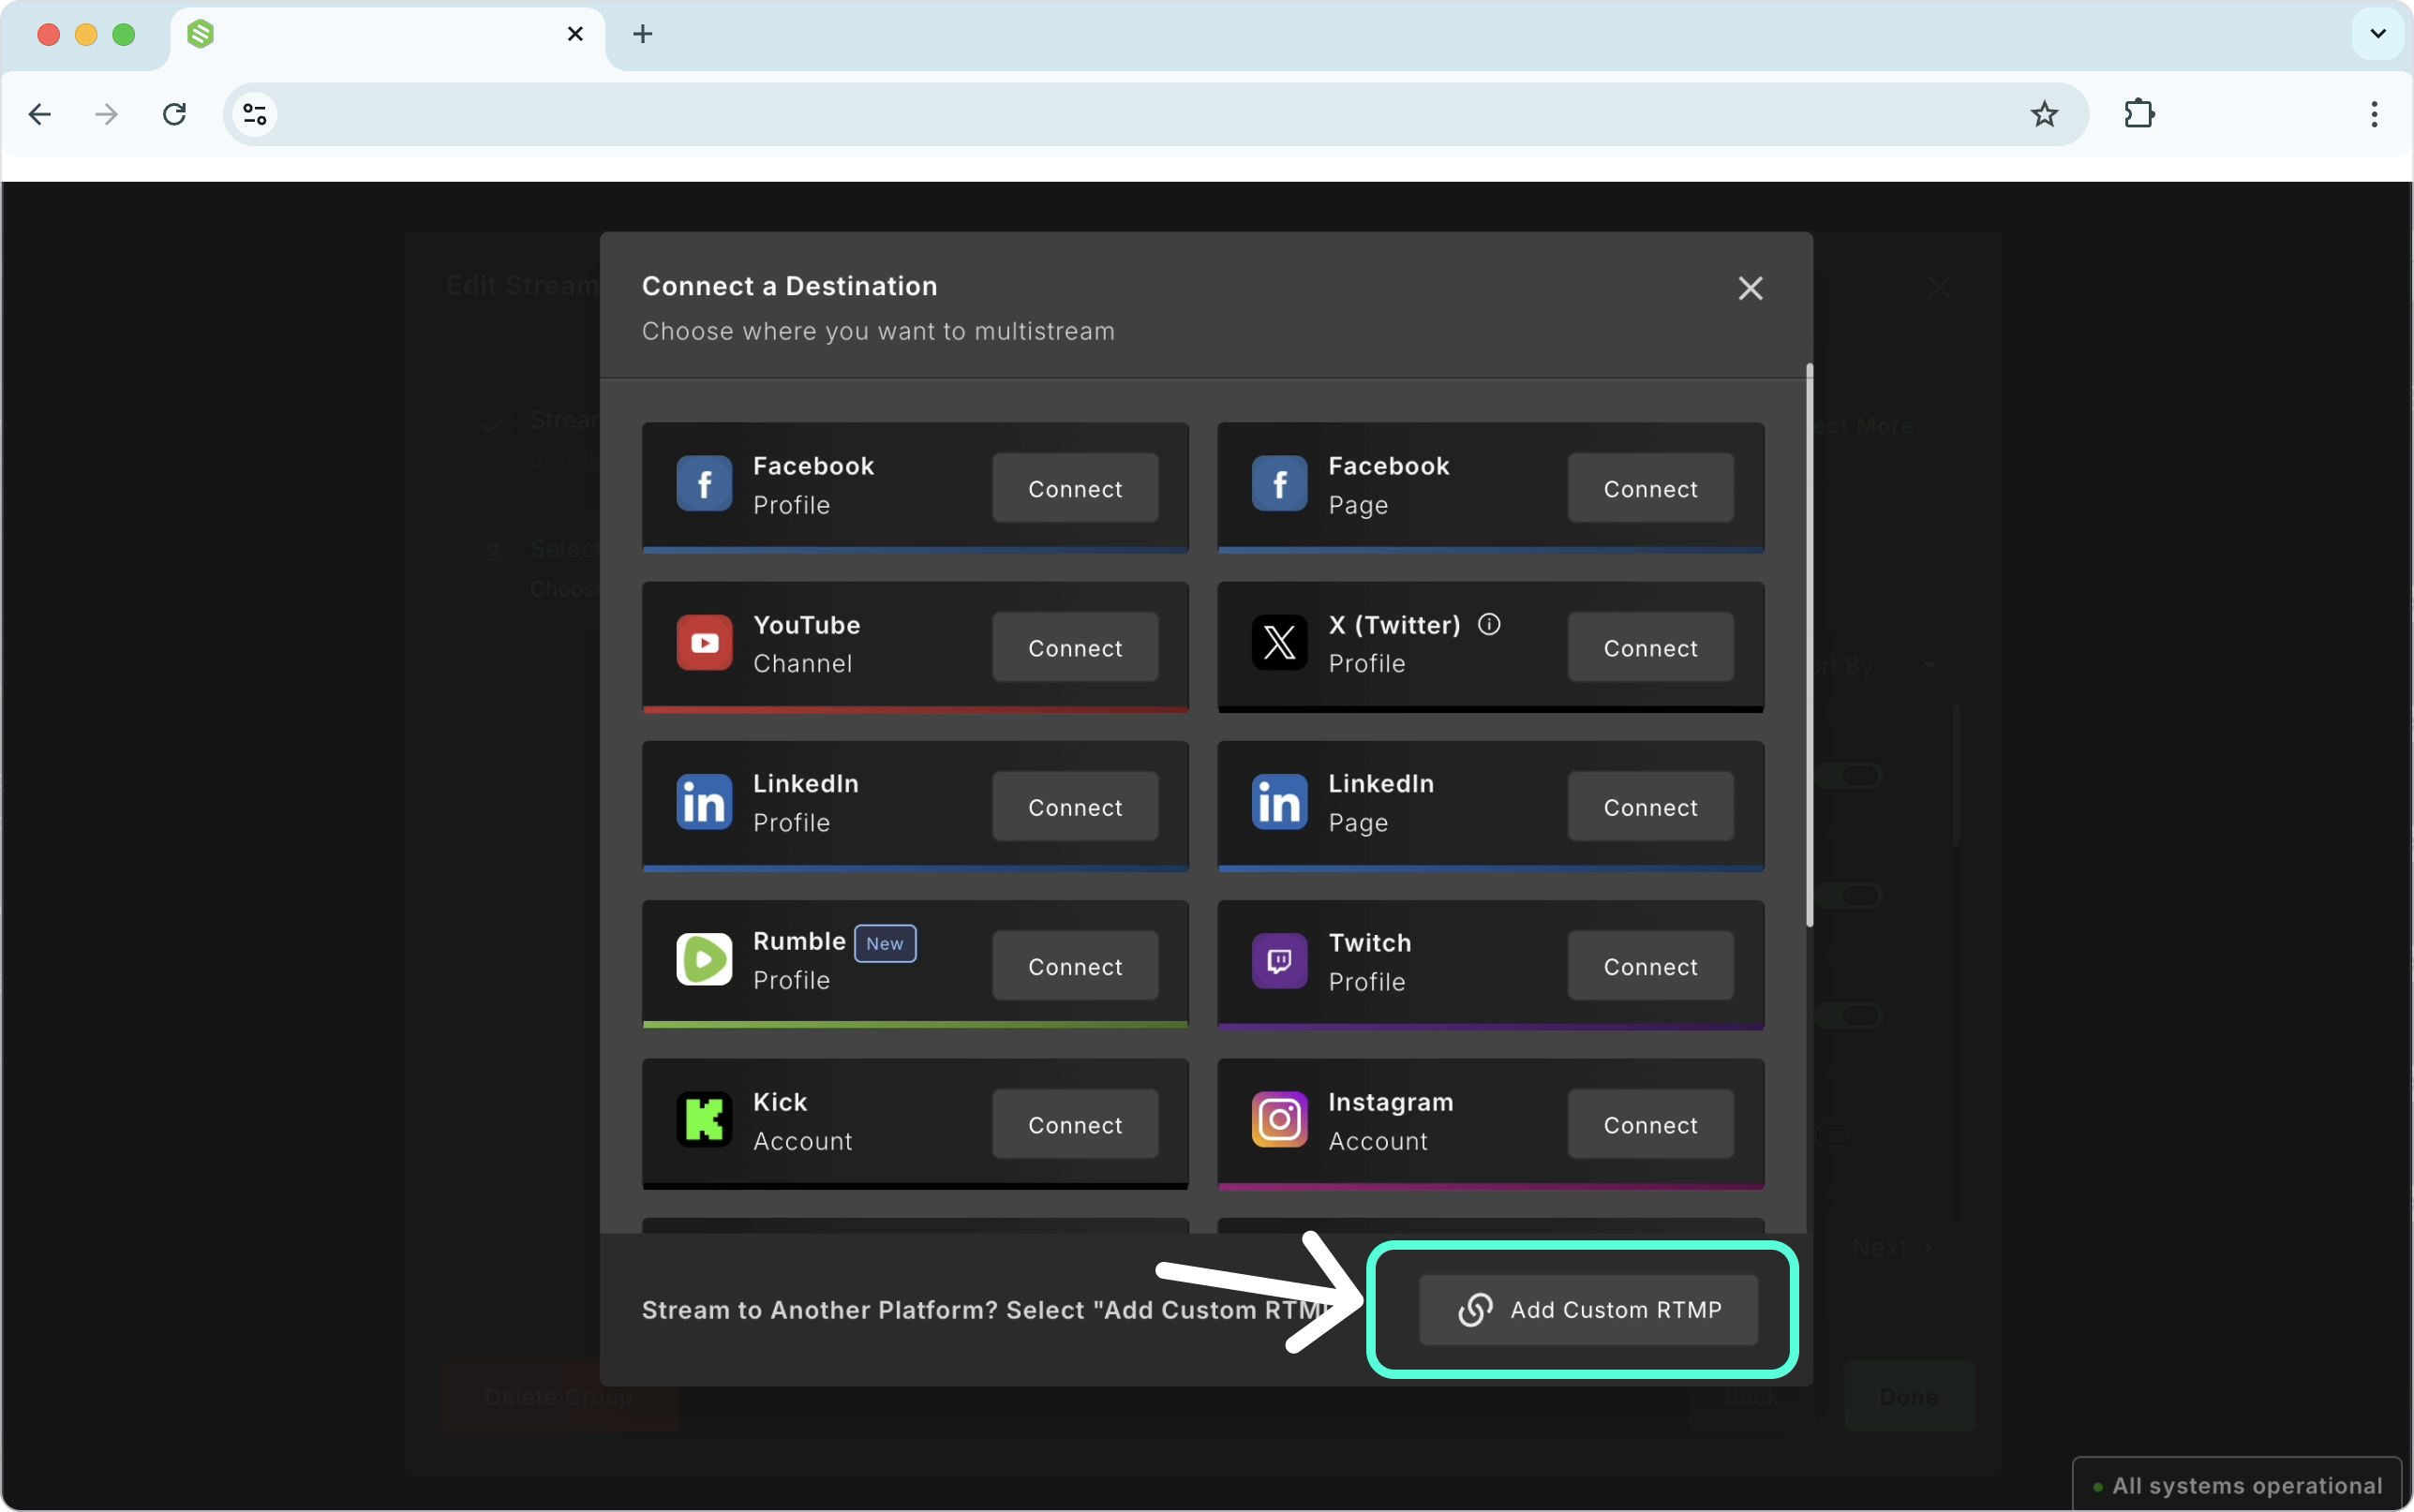
Add a custom RTMP Destination
If you're streaming to a platform that isn't in the list, you can add it manually using its RTMP Stream URL and Stream Key. There's no limit to how many custom RTMP destinations you can add.
Add a custom SRT Destination
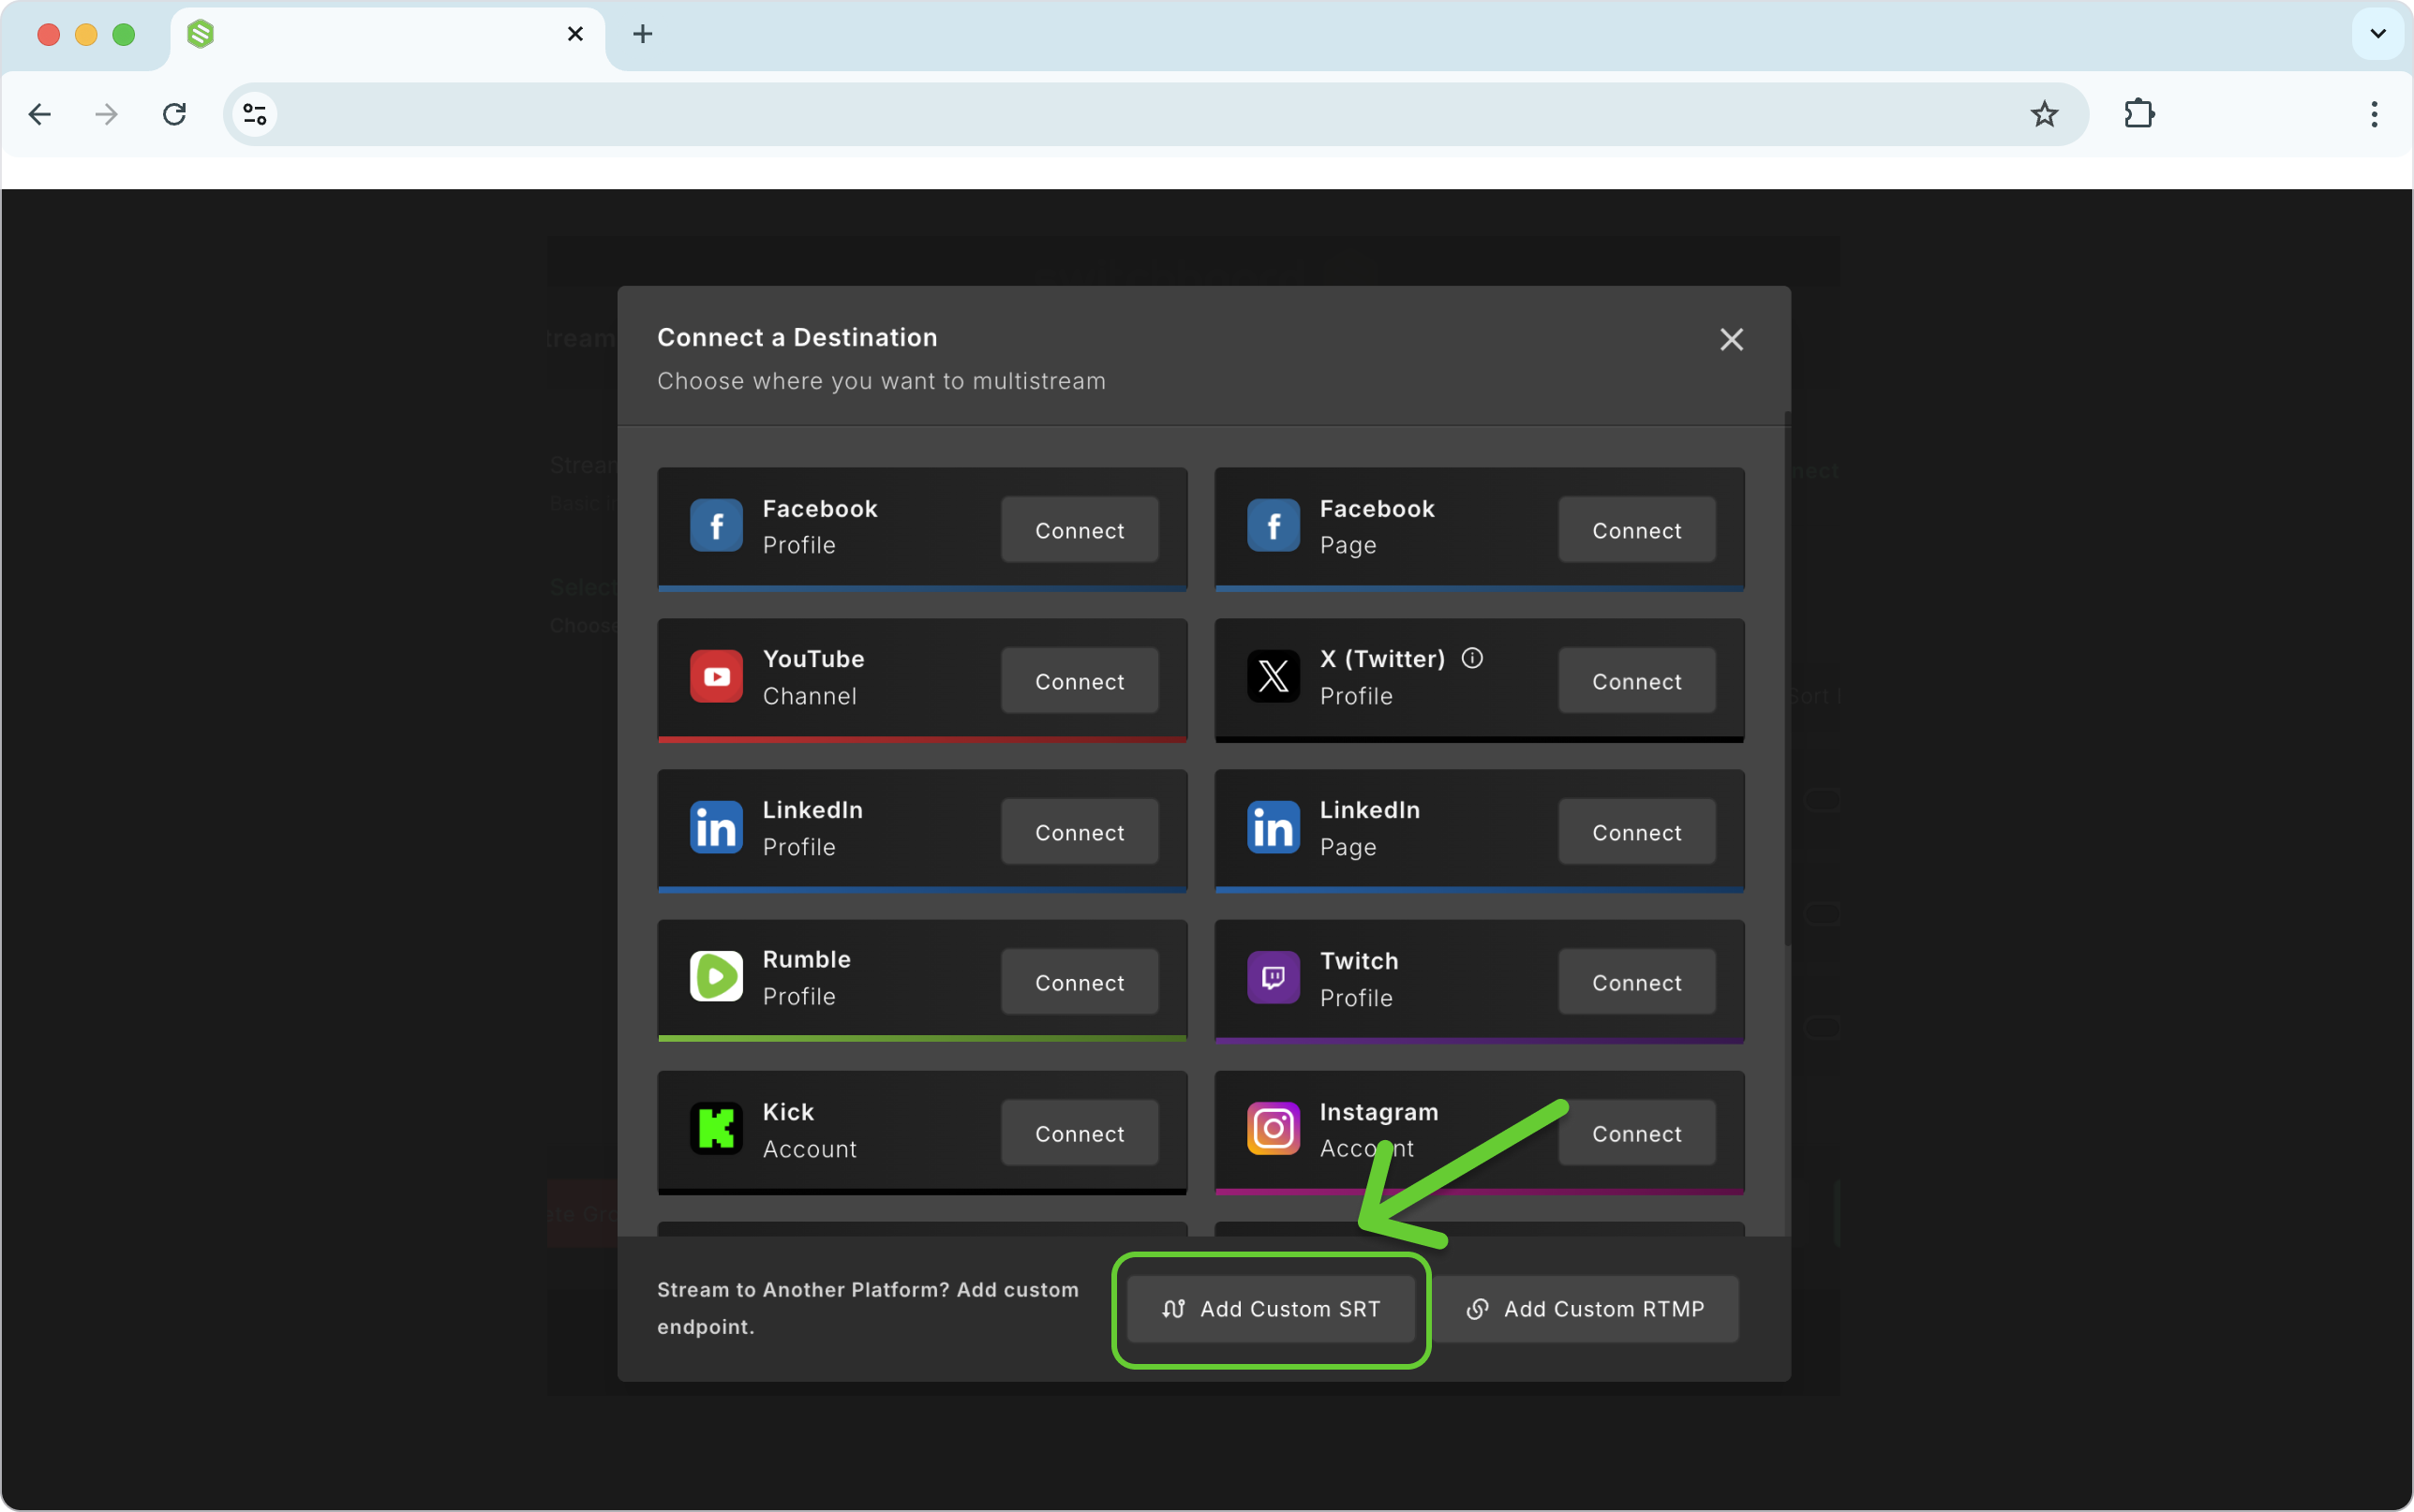
You can also connect an SRT Destination as an option.
Step 4: Find Your Stream URL and Stream Key
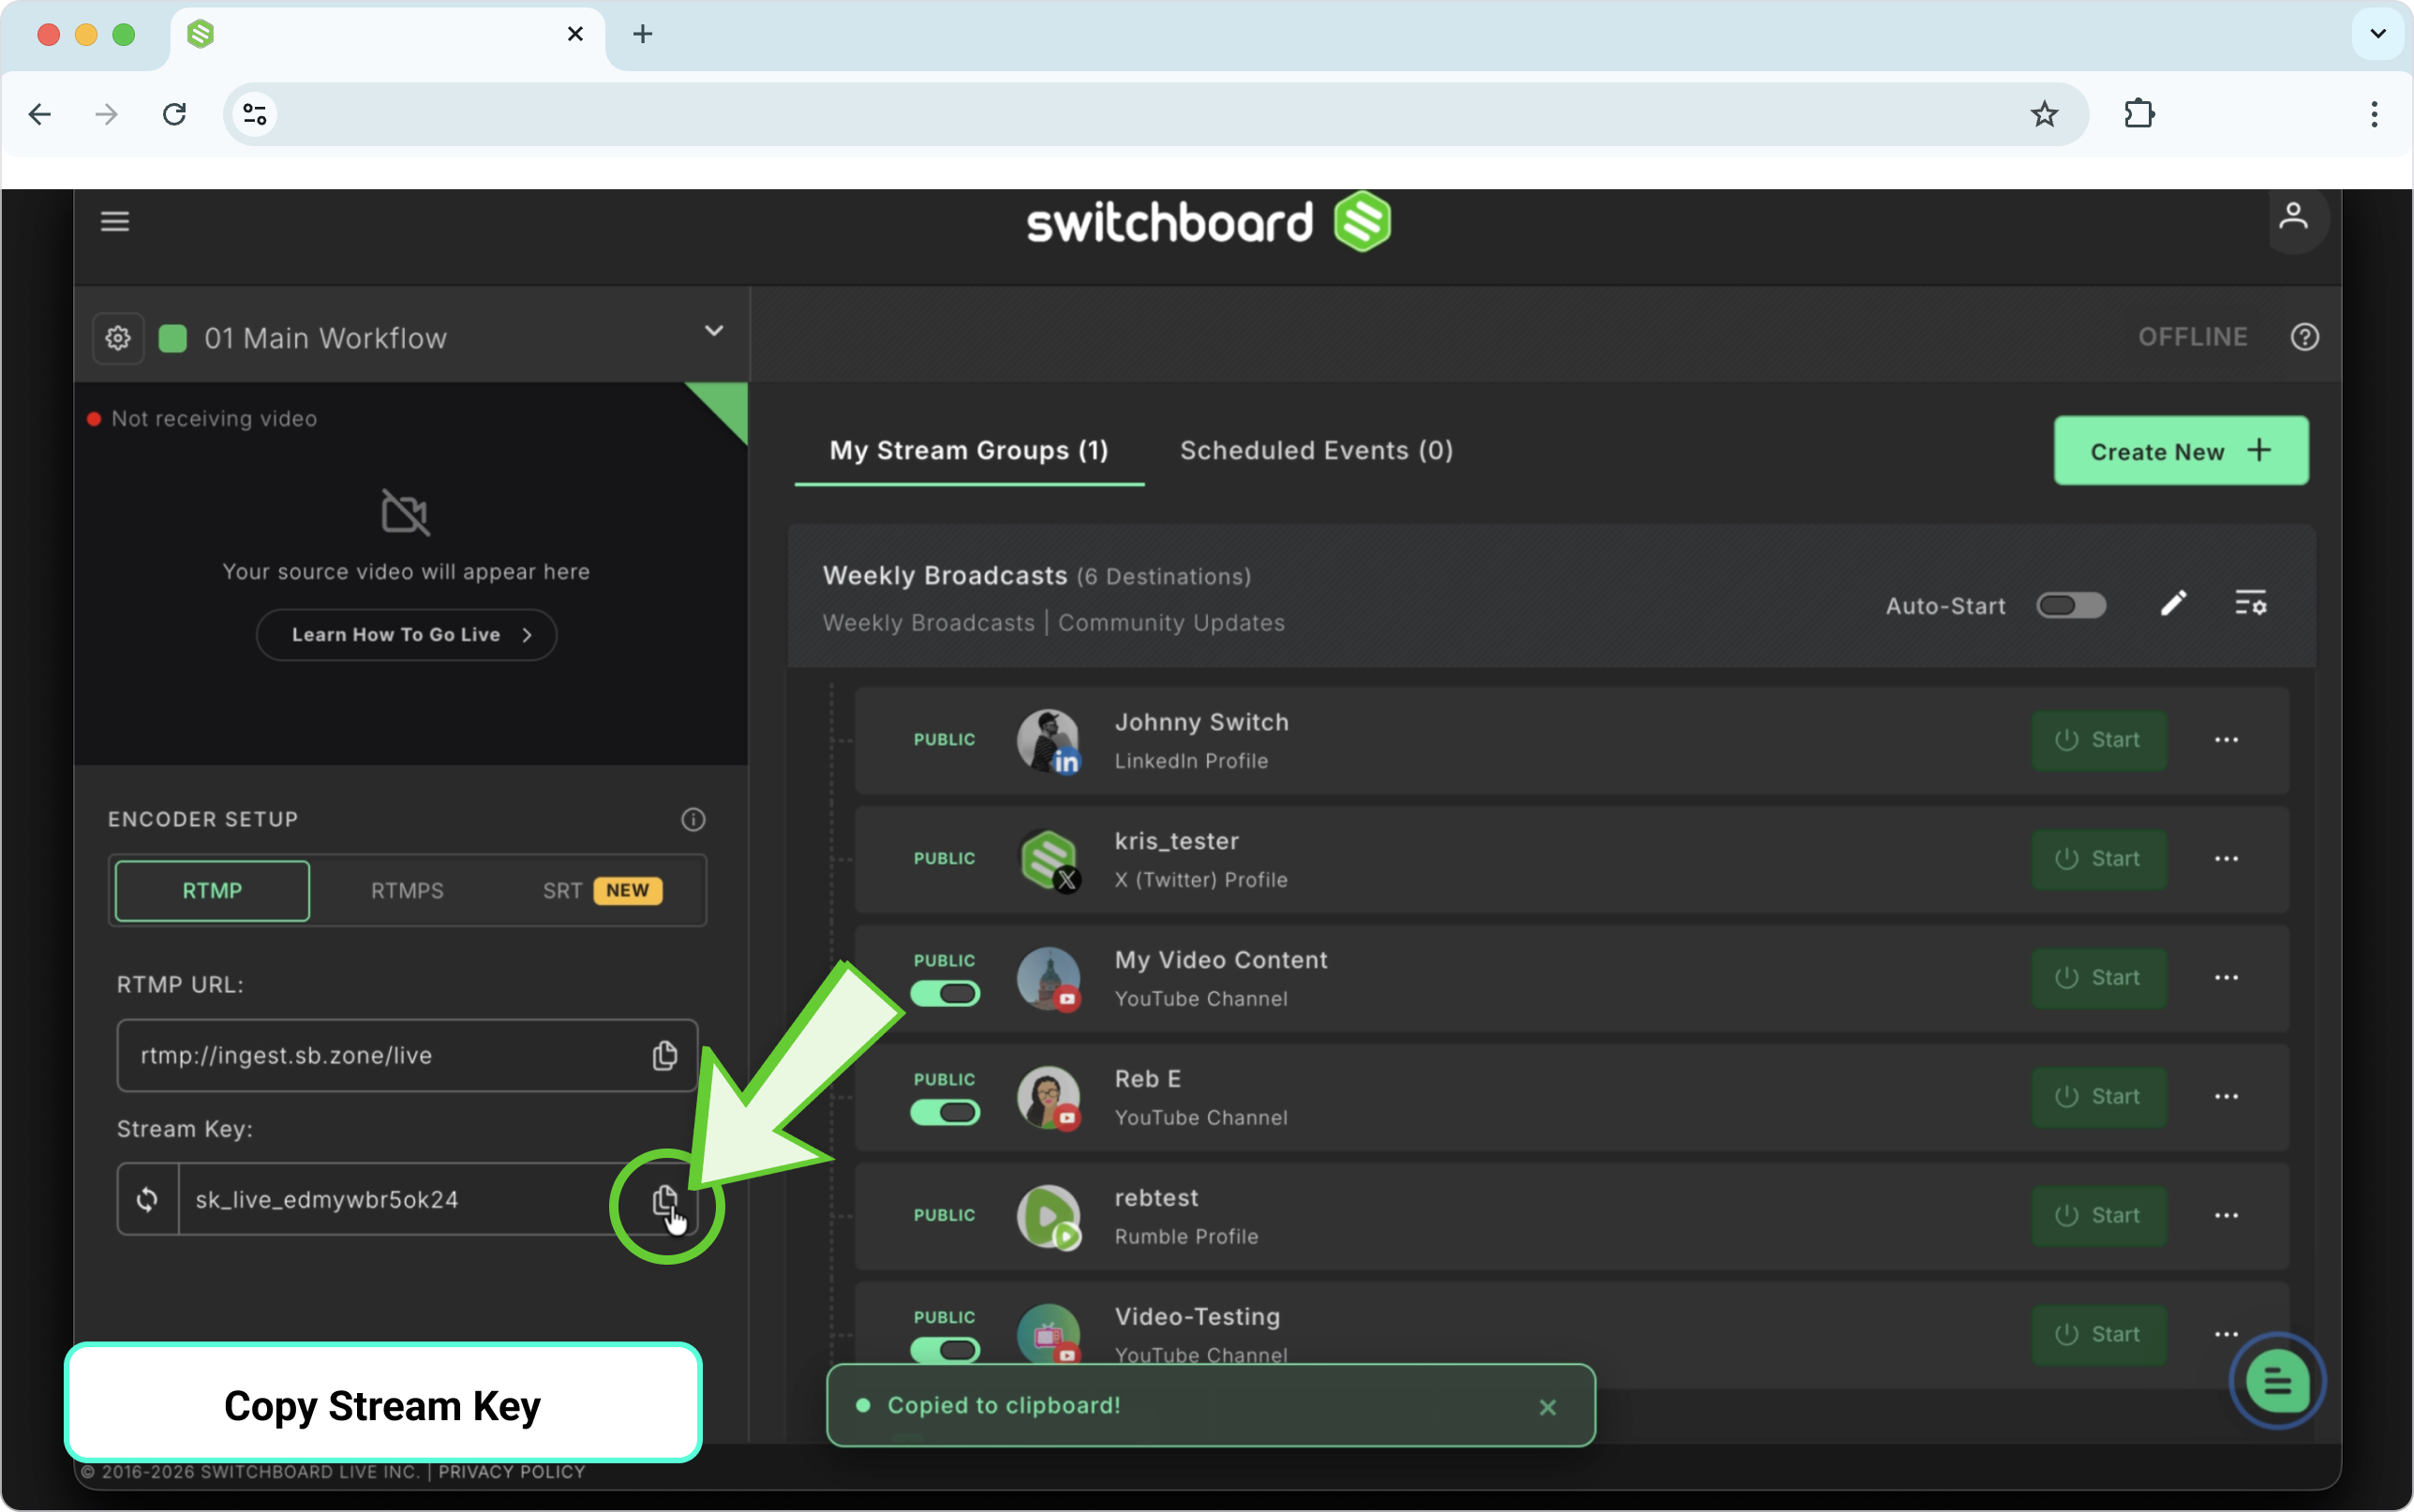
To send video from your streaming software into Switchboard, copy your workflow's Stream URL and Stream Key into your encoder's stream settings.
Below the preview window, you’ll see the options for RTMP(S) and SRT
Click the copy button to copy the Stream URL and paste the information into your live streaming software ( Encoder)
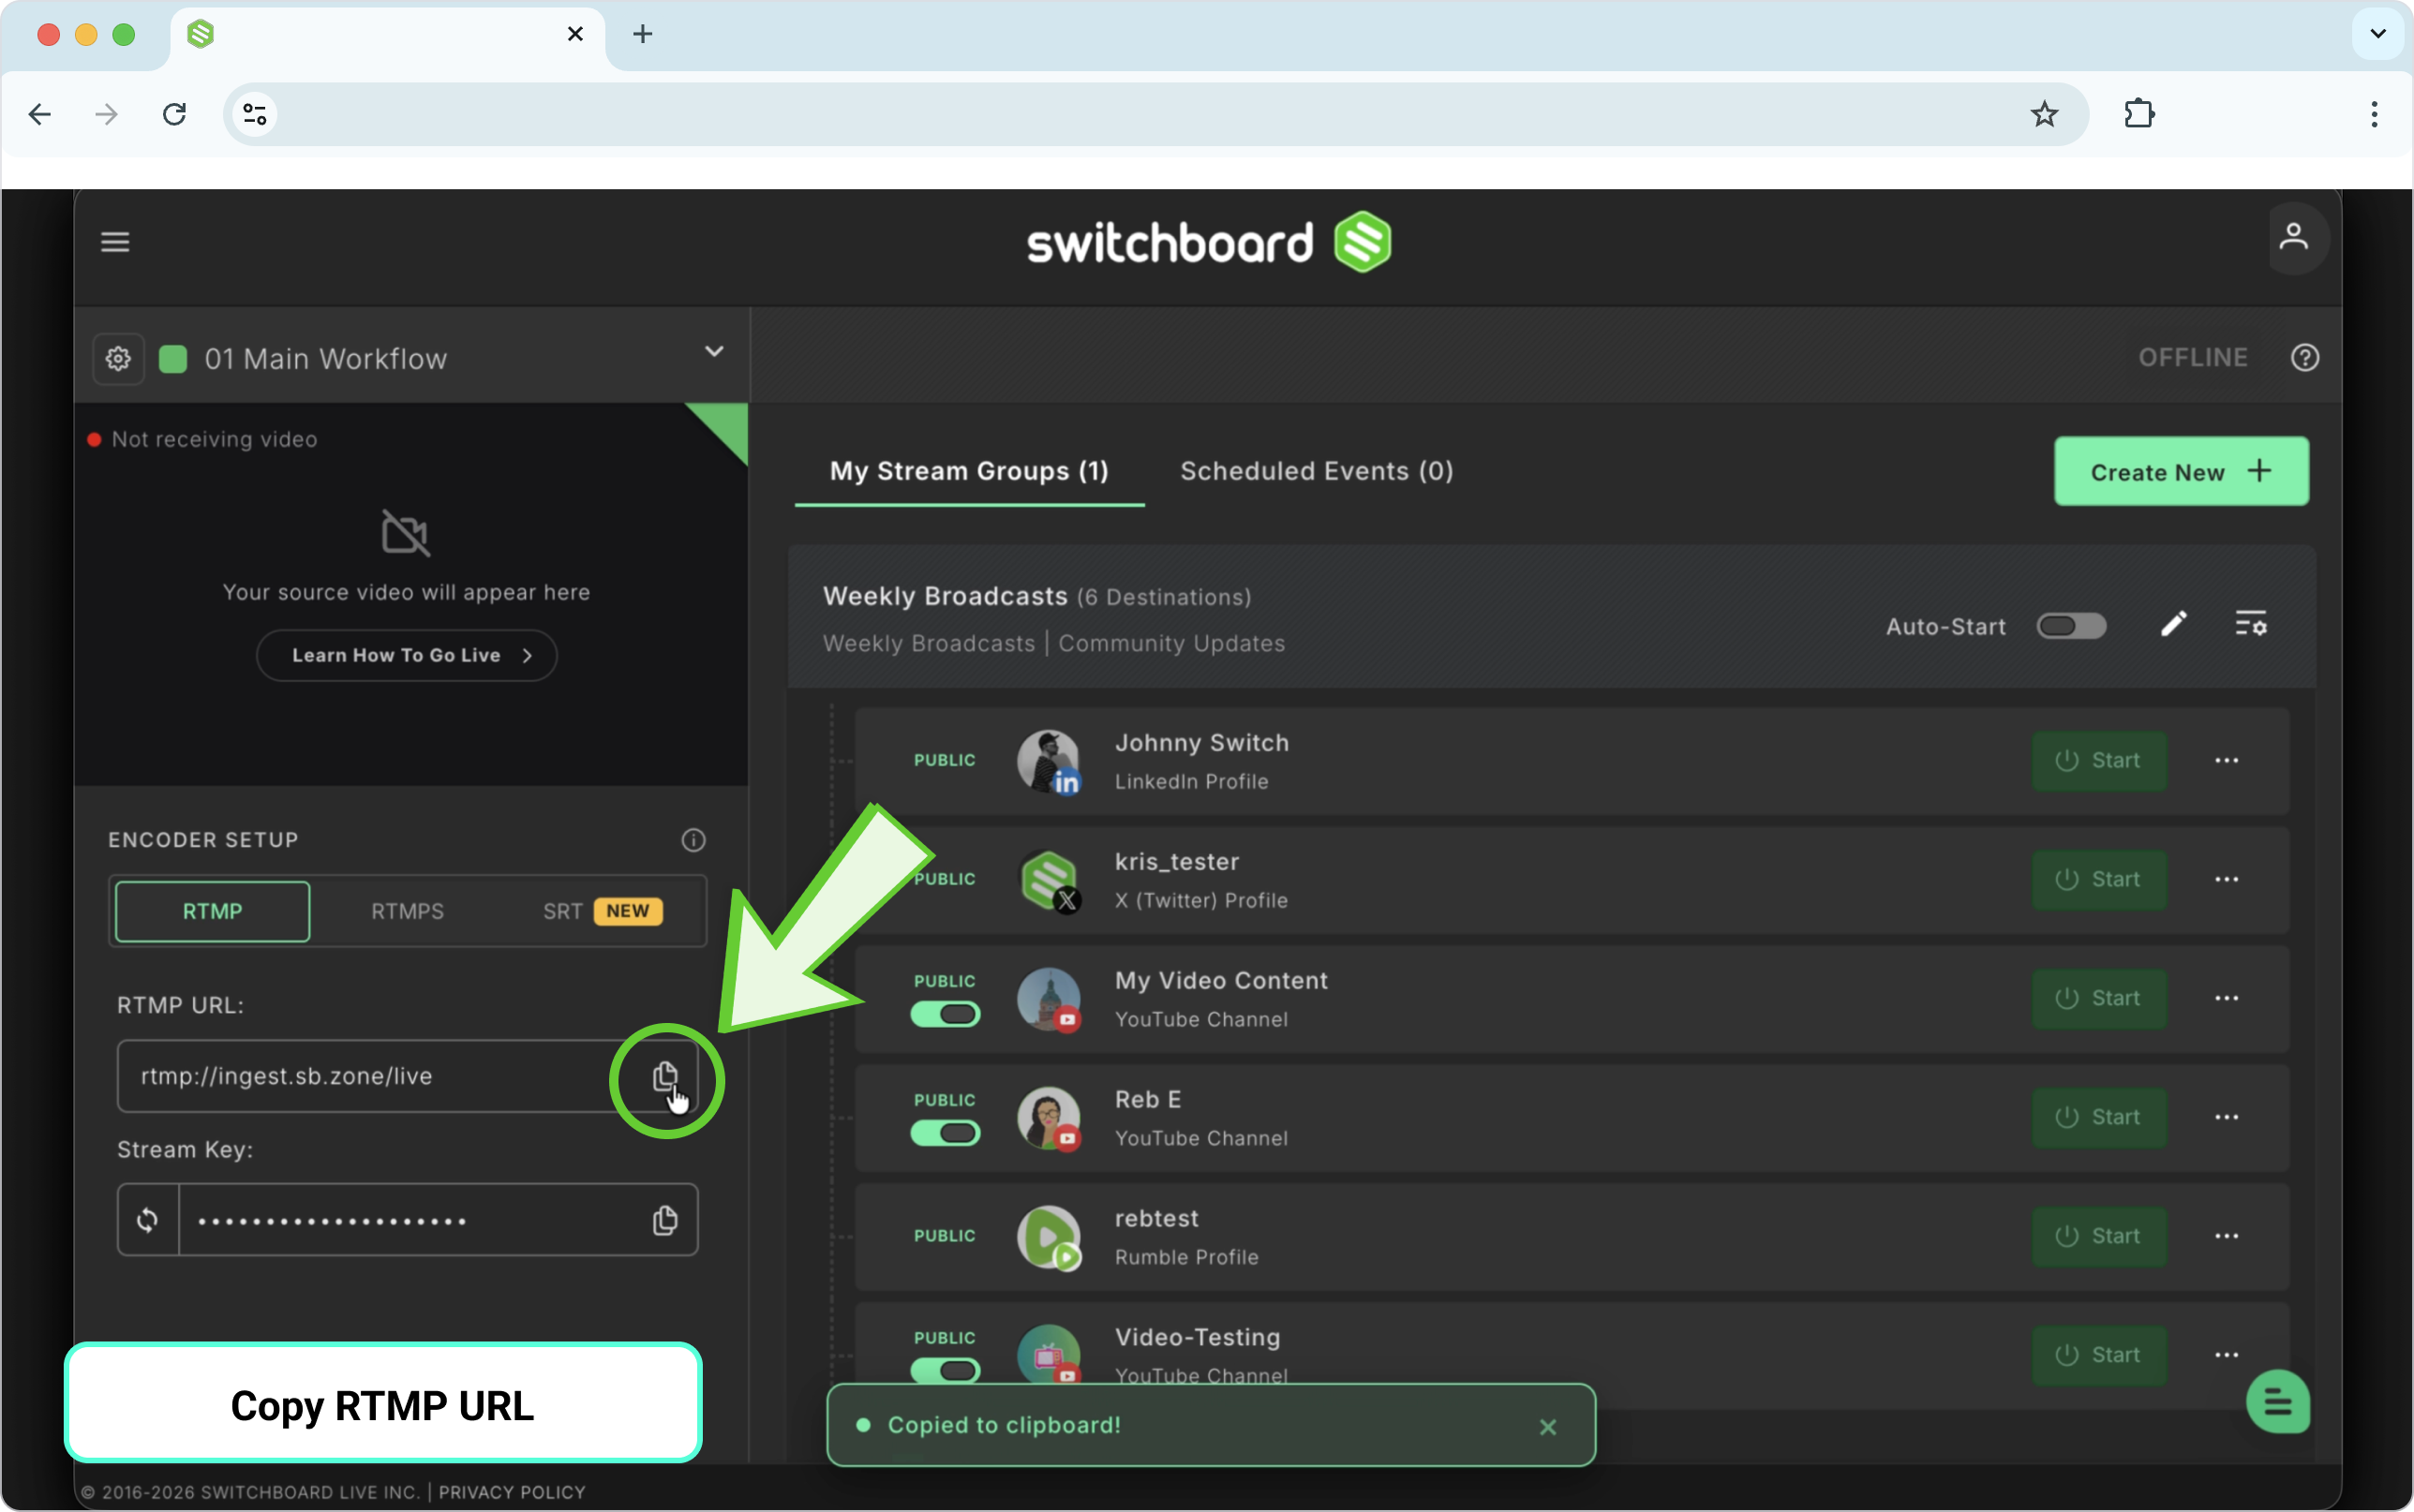
Click to copy the stream Key and paste it into your live streaming software ( Encoder).
We recommend clicking on the dots to reveal the stream so that you can compare the information on your Switchboard account with the live streaming software.
Match your encoder's settings
Before testing, confirm your streaming software is configured with these recommended settings:
Rate: CBR (Constant Bitrate)
Keyframe rate: 2 seconds
FPS: 30 or 60
Step 5: Test the Connection
Send video from your encoder into Switchboard to confirm the connection. This will not push you live to any Destination; it only tests the link between your software and Switchboard.
You'll know it worked when you see:
Video appears on the Confidence Monitor.

Status changes from "Not Receiving" to "Receiving."
The stream status heading reads “Start your destinations to GO LIVE”
The Start button turns from dark green to a brighter green.
Step 6: Go Live
Once you've tested the connection and your video source is displaying on the Confidence Monitor, you're ready to multistream. Switchboard supports an unlimited number of destinations, including custom RTMP.
You can start streaming one Destination at a time, or start every Destination in the group at once:
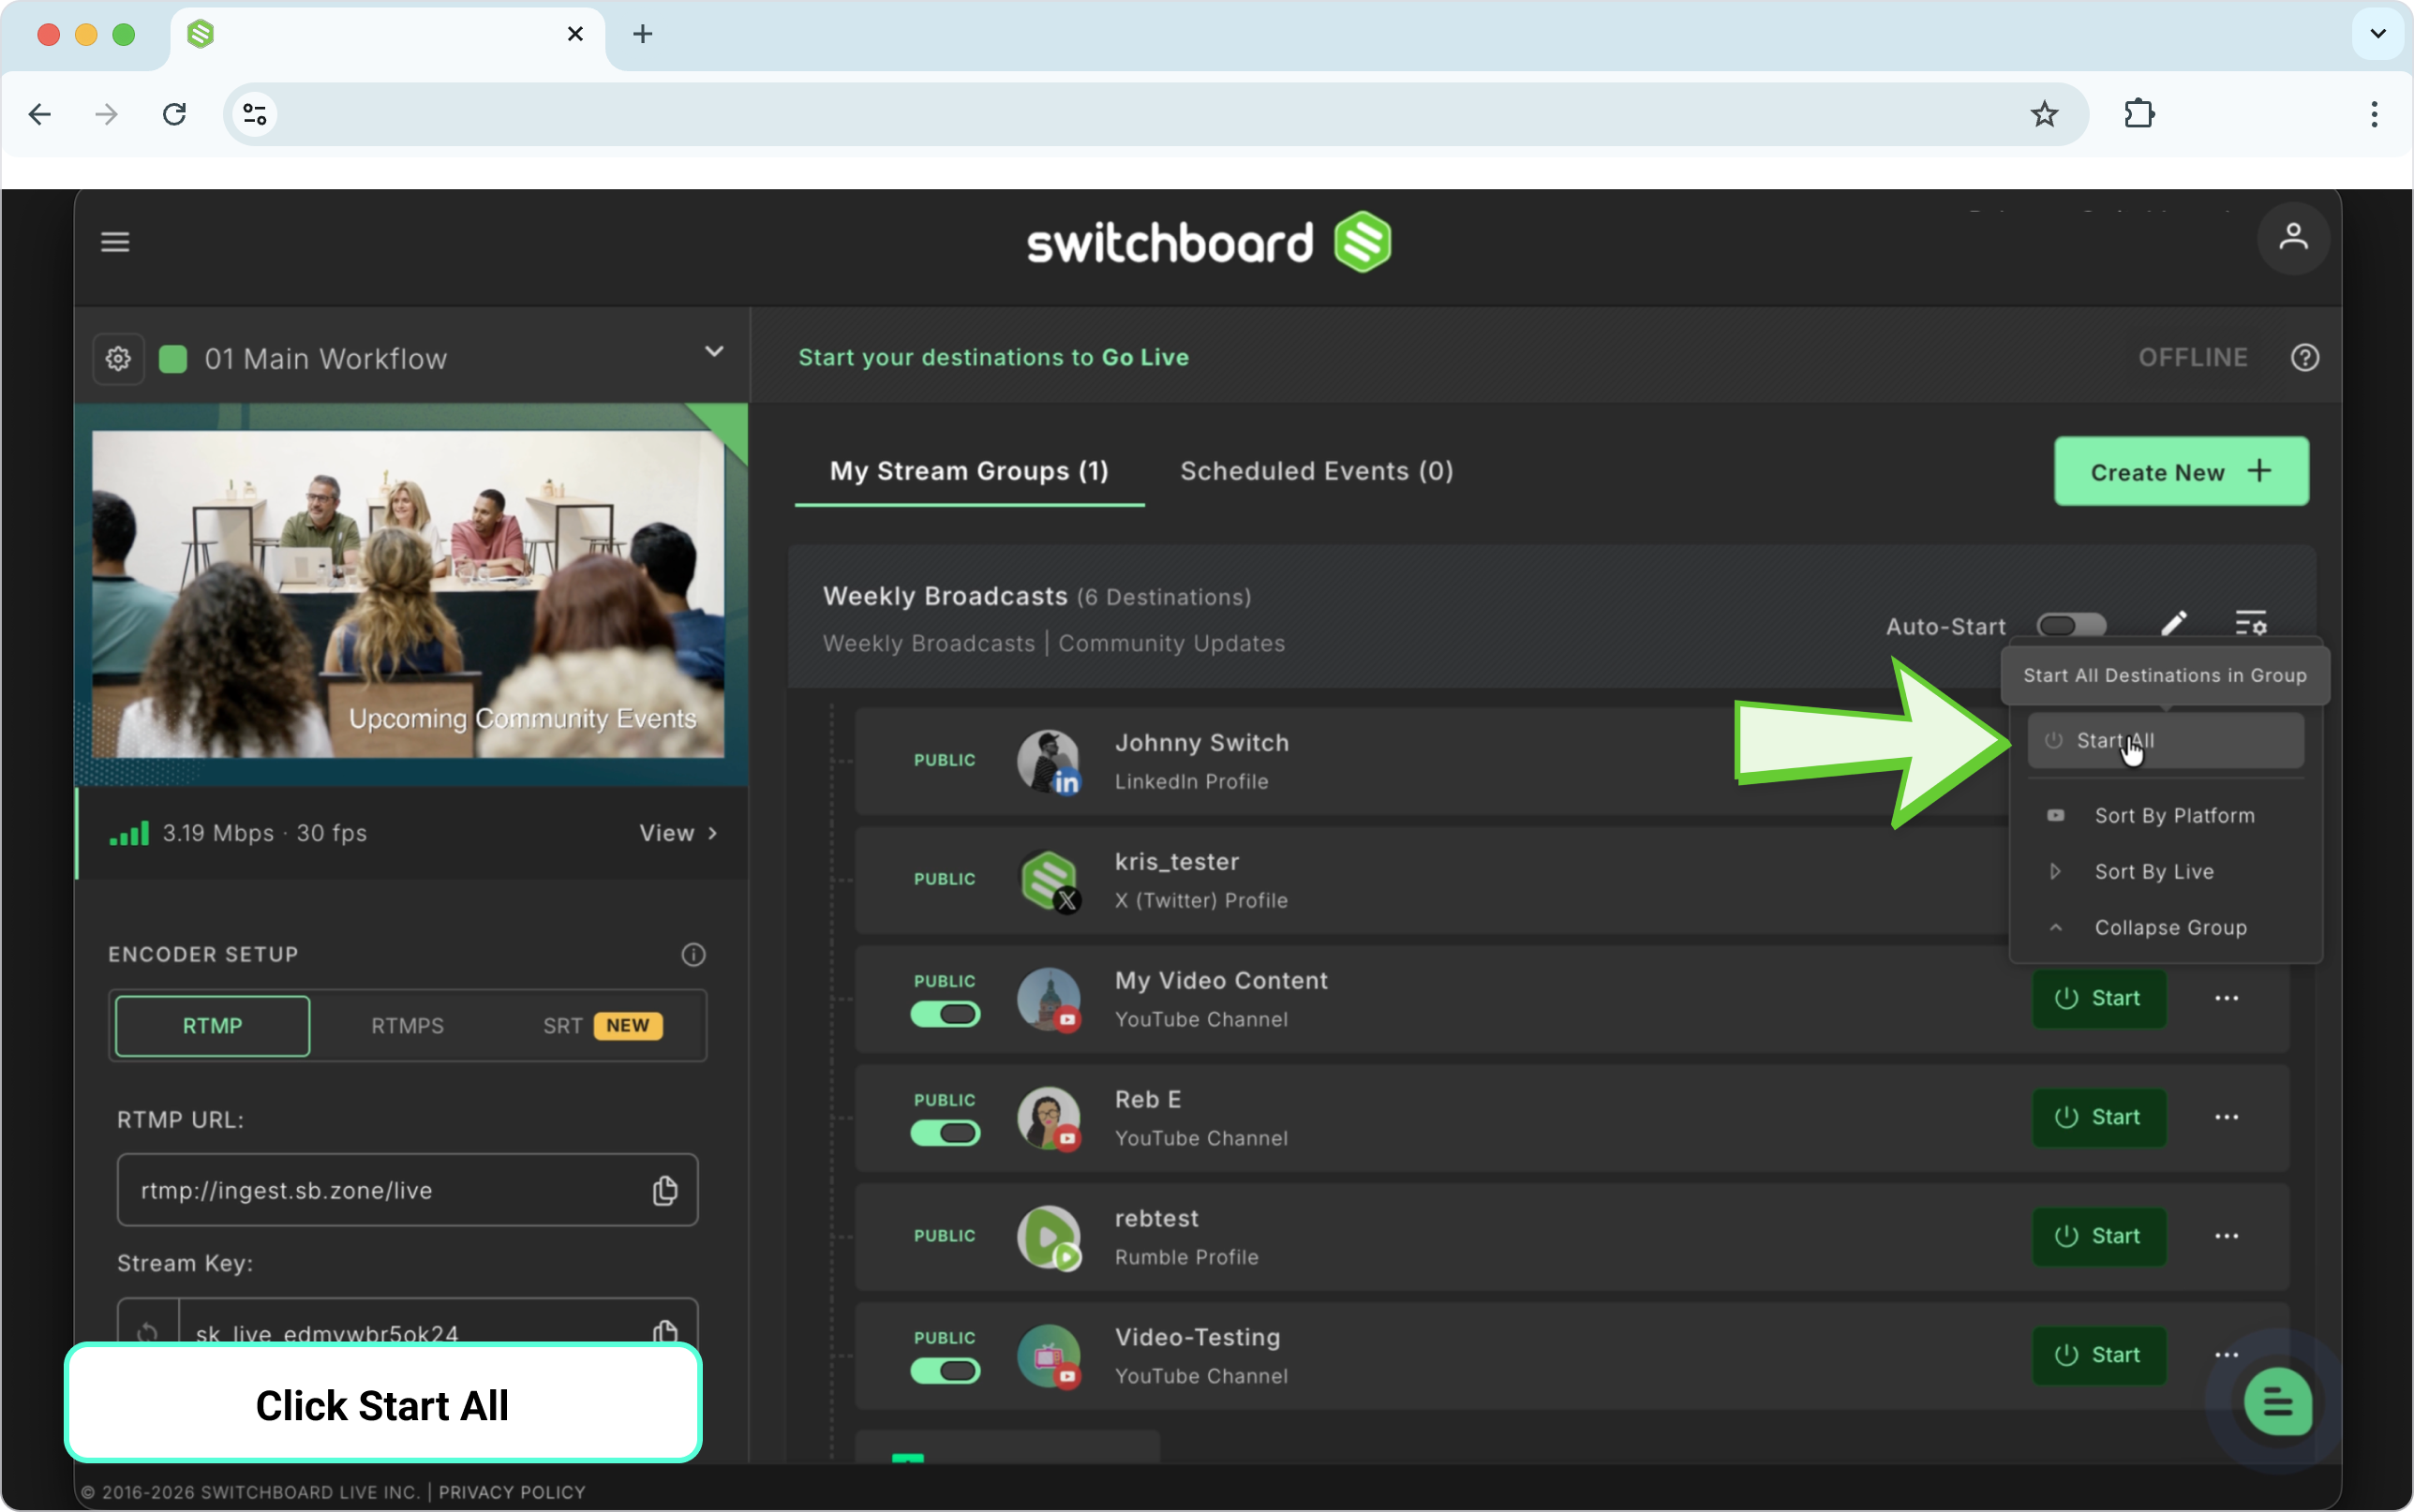
Option A — Start all destinations in the group at once
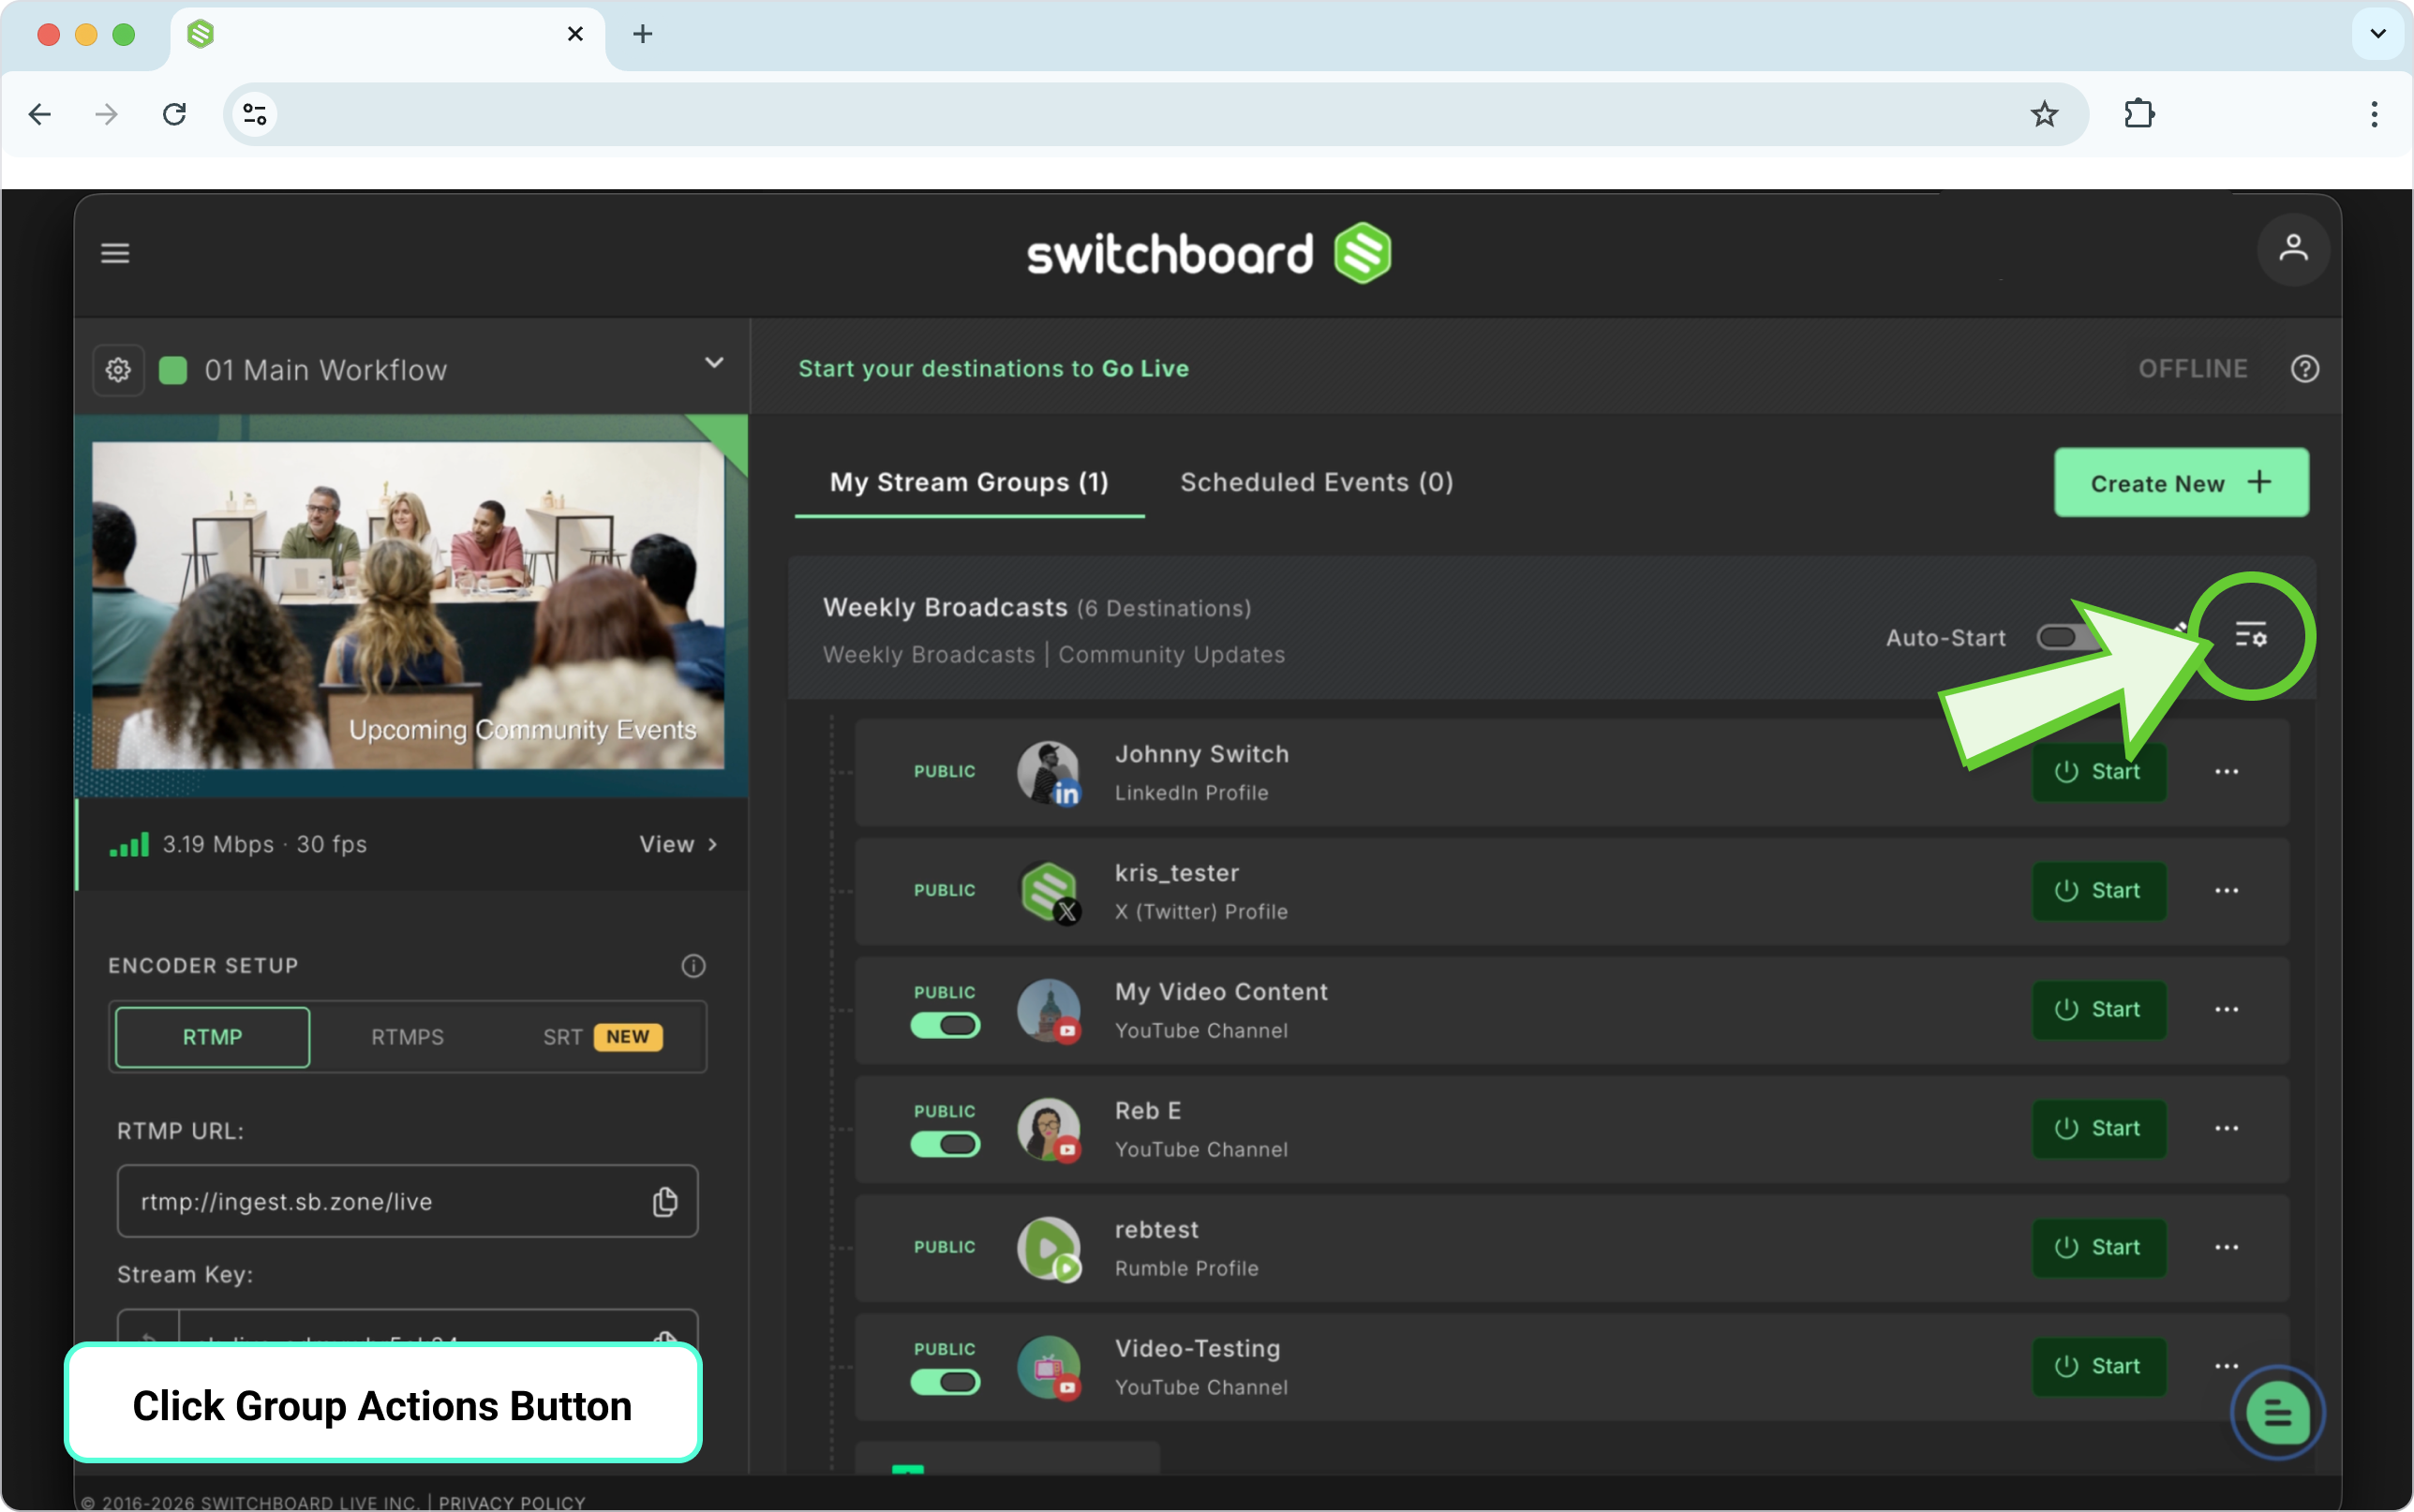
Click the Group Actions menu (this lets you apply one action, like starting or stopping, to every Destination in the group).
Select Start All.
Option B — Start one Destination at a time
Click the green Start button next to the Destination.

After a few seconds, you'll be live on every Destination you started.
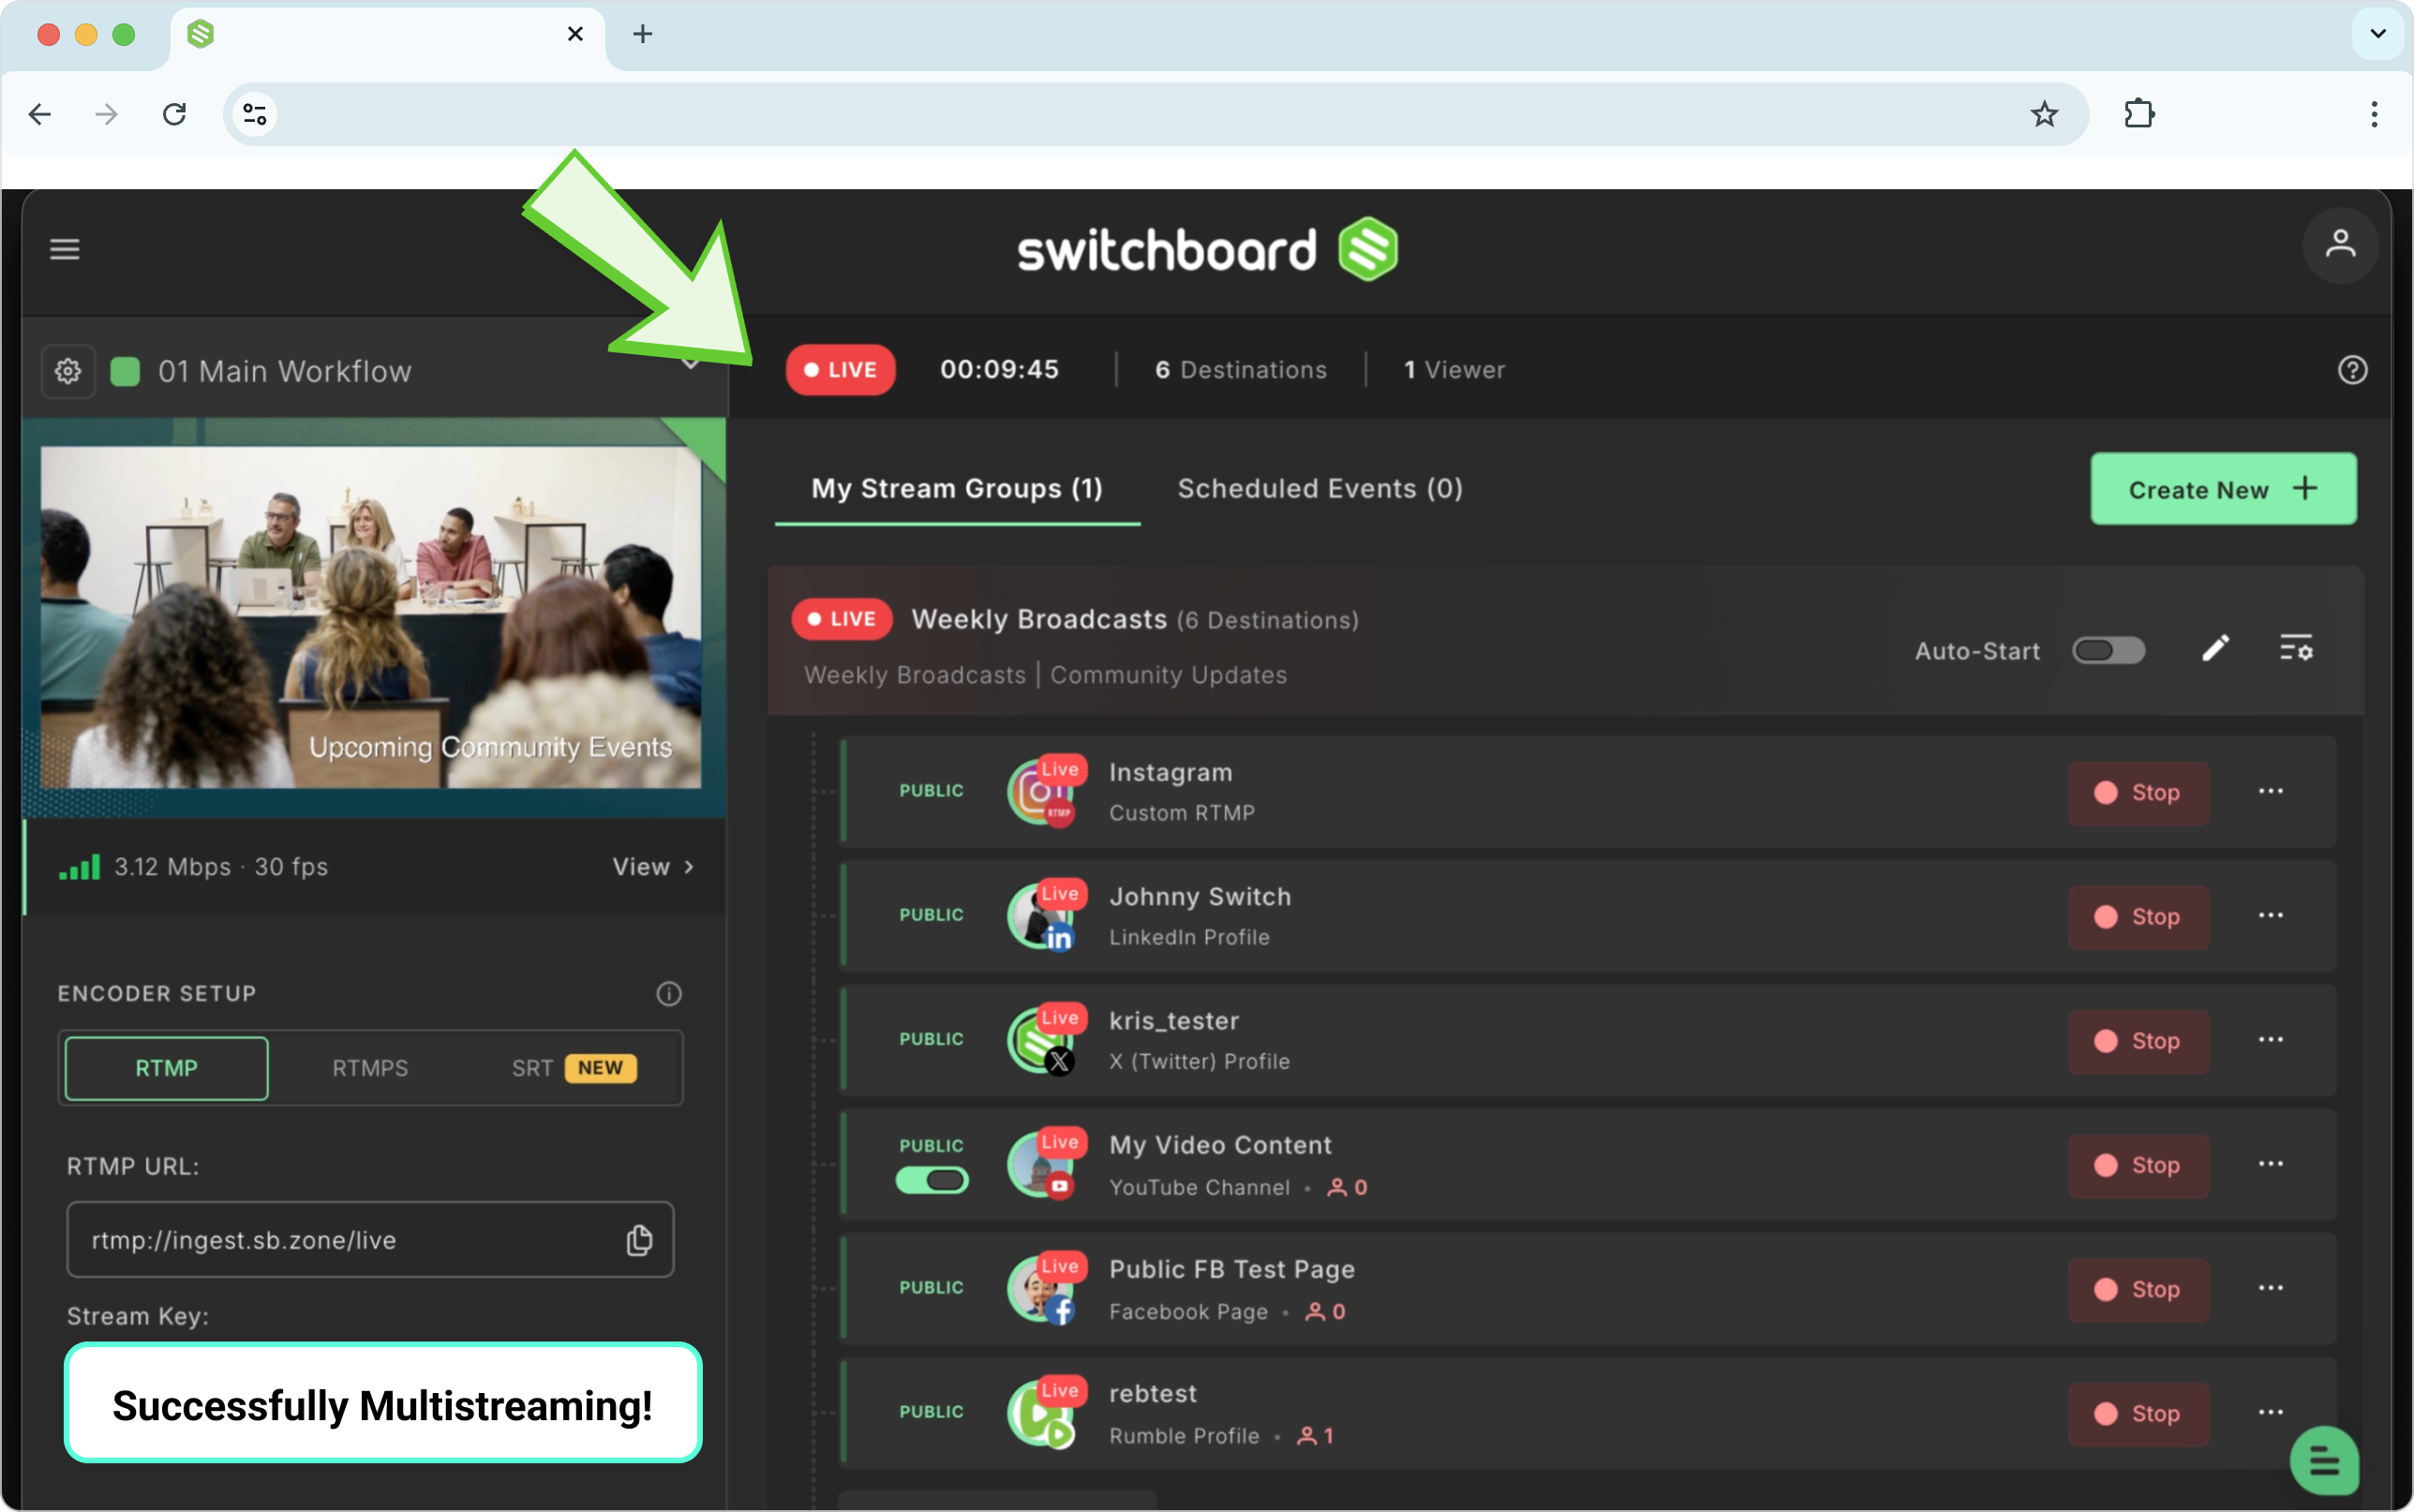
To confirm a stream is live on a specific destination:
Click the three dots next to a Destination and select View Stream.
The stream opens in a new tab so you can check that it's live on that Destination's platform.
Step 7: Stop Streaming
To end your stream cleanly, we recommend the following order:
Stop the stream from your live streaming software or encoder first (the source you're broadcasting from).
The Confidence Monitor will stop displaying video and return to its static state.
Switchboard automatically stops the connection to each Destination; you don't need to do anything further.
To stop manually instead: select all destinations and choose Stop Streaming. This ensures the live stream has ended on every Destination.
Optional: Customize Your Workflow
Renaming your workflow and giving it a color label makes it easier to find at a glance, especially useful once you're running more than one workflow or sharing access with a team.
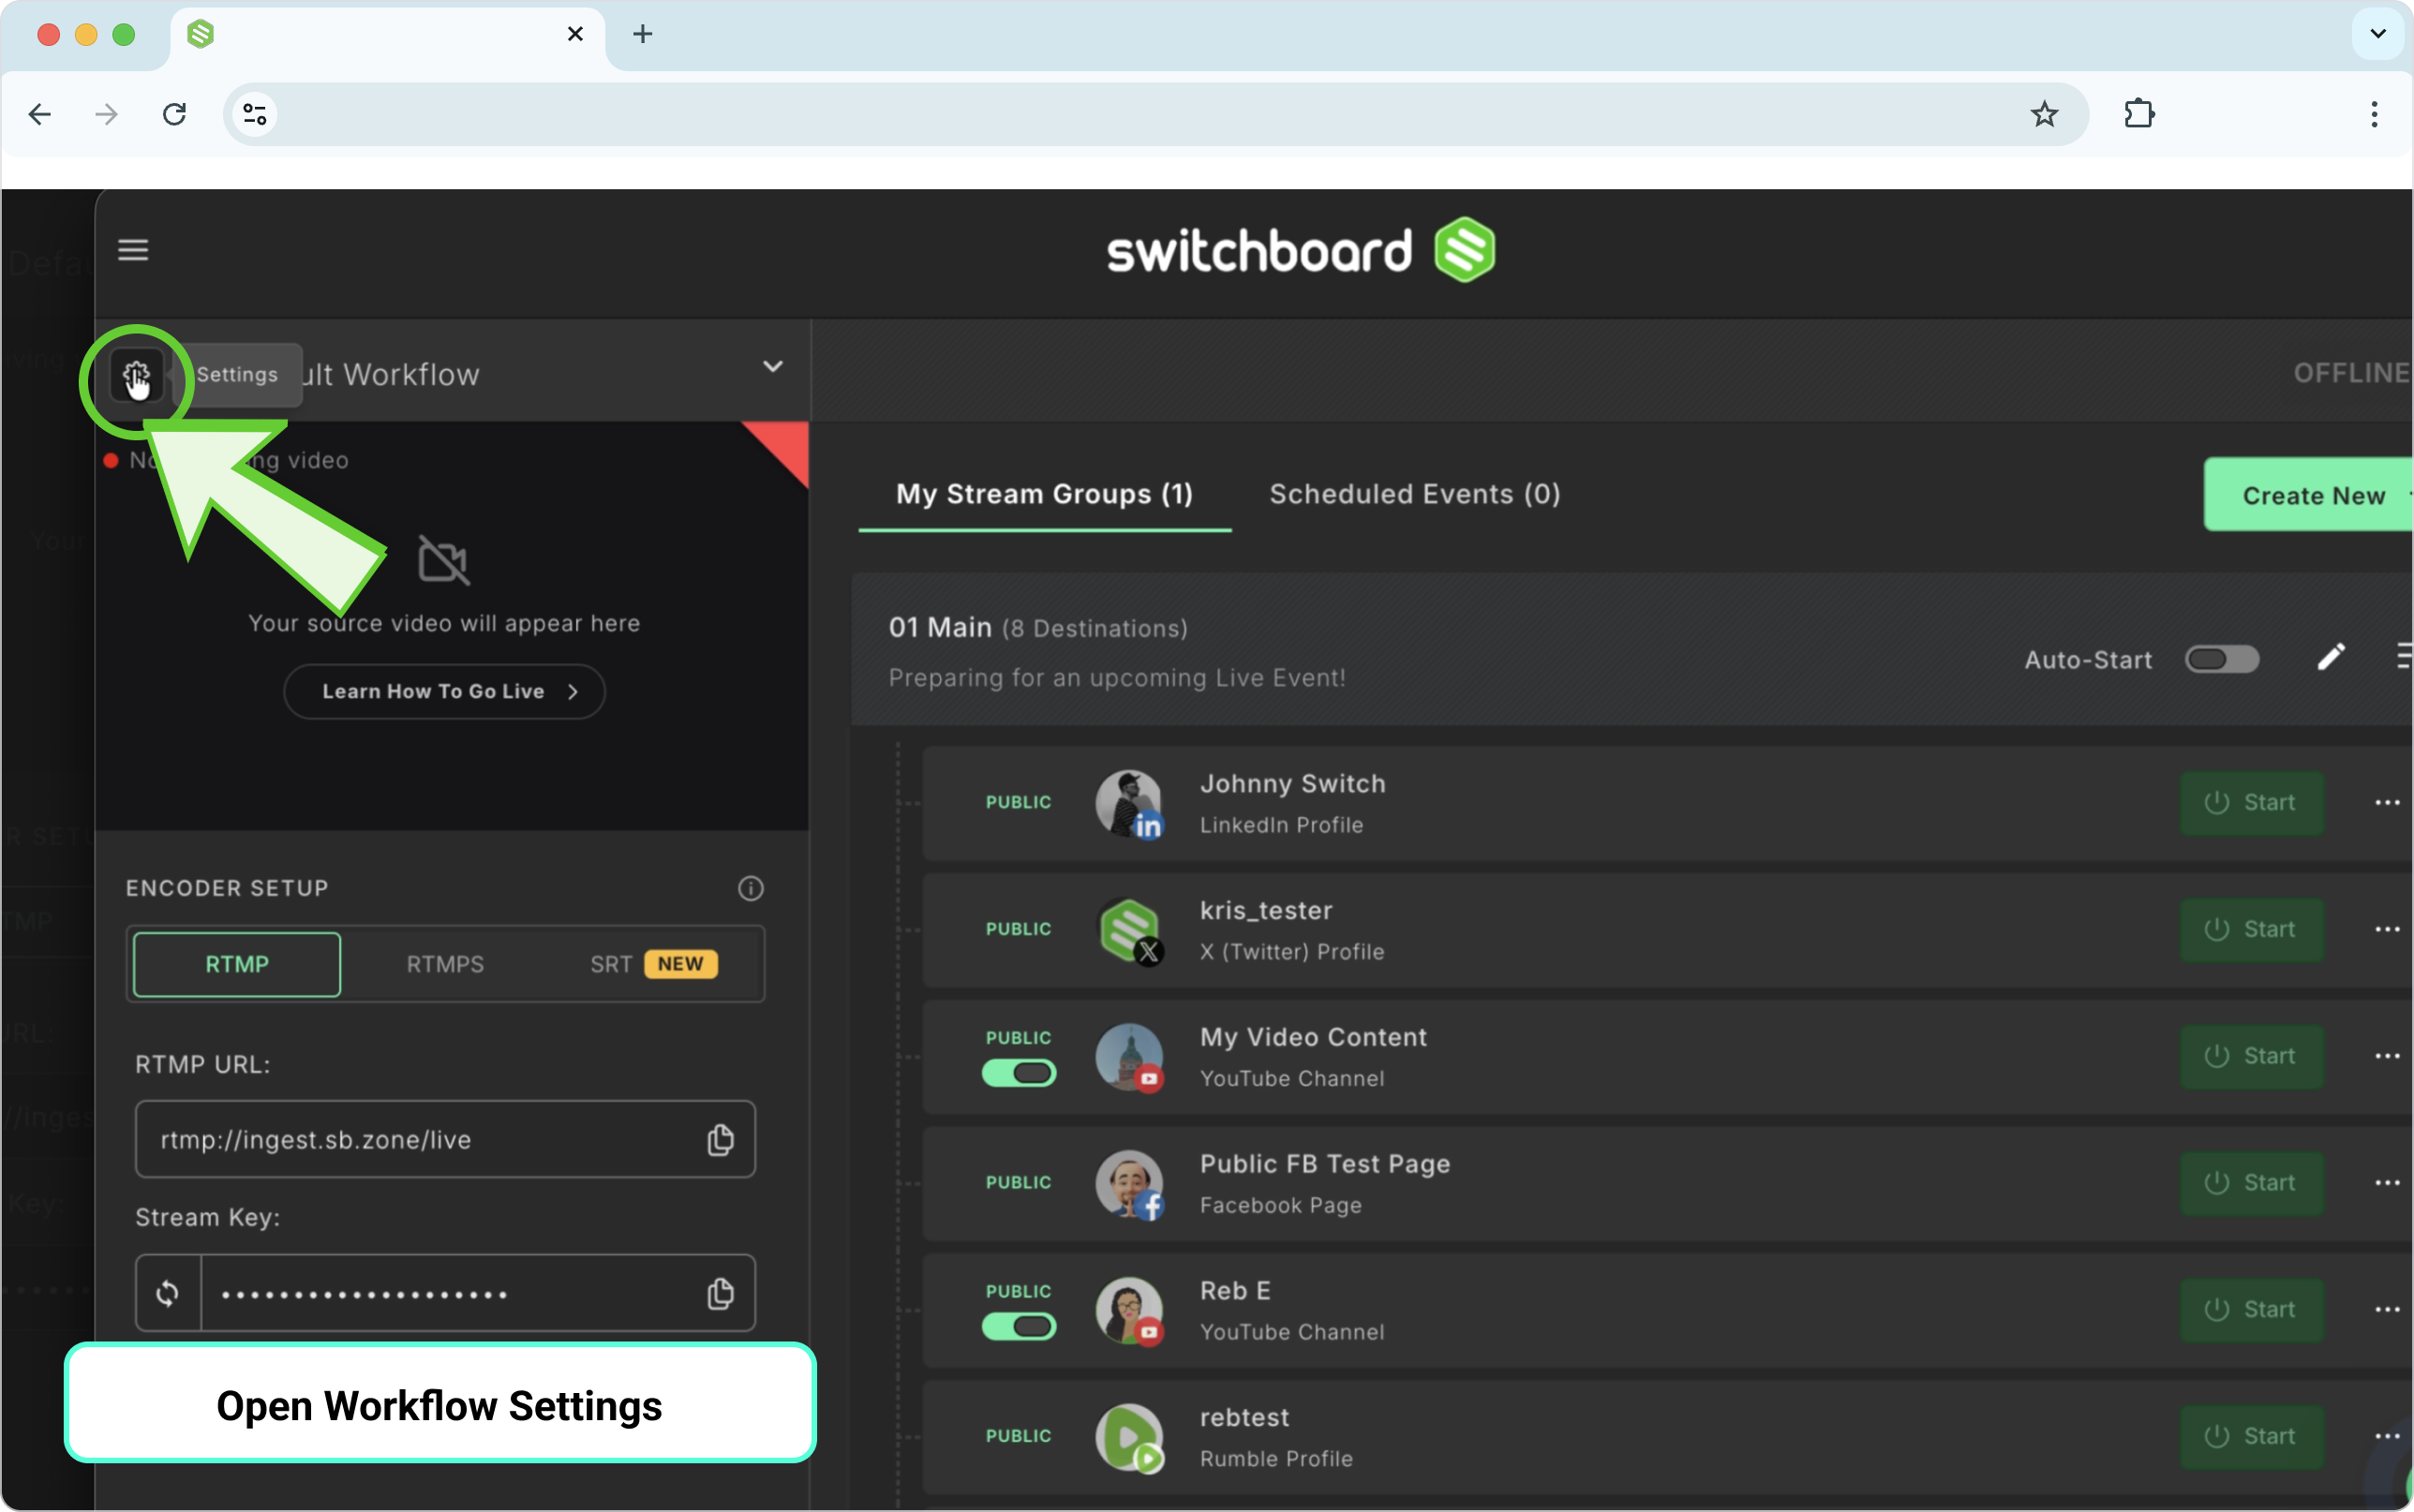
Rename the workflow
Click Workflow Settings.
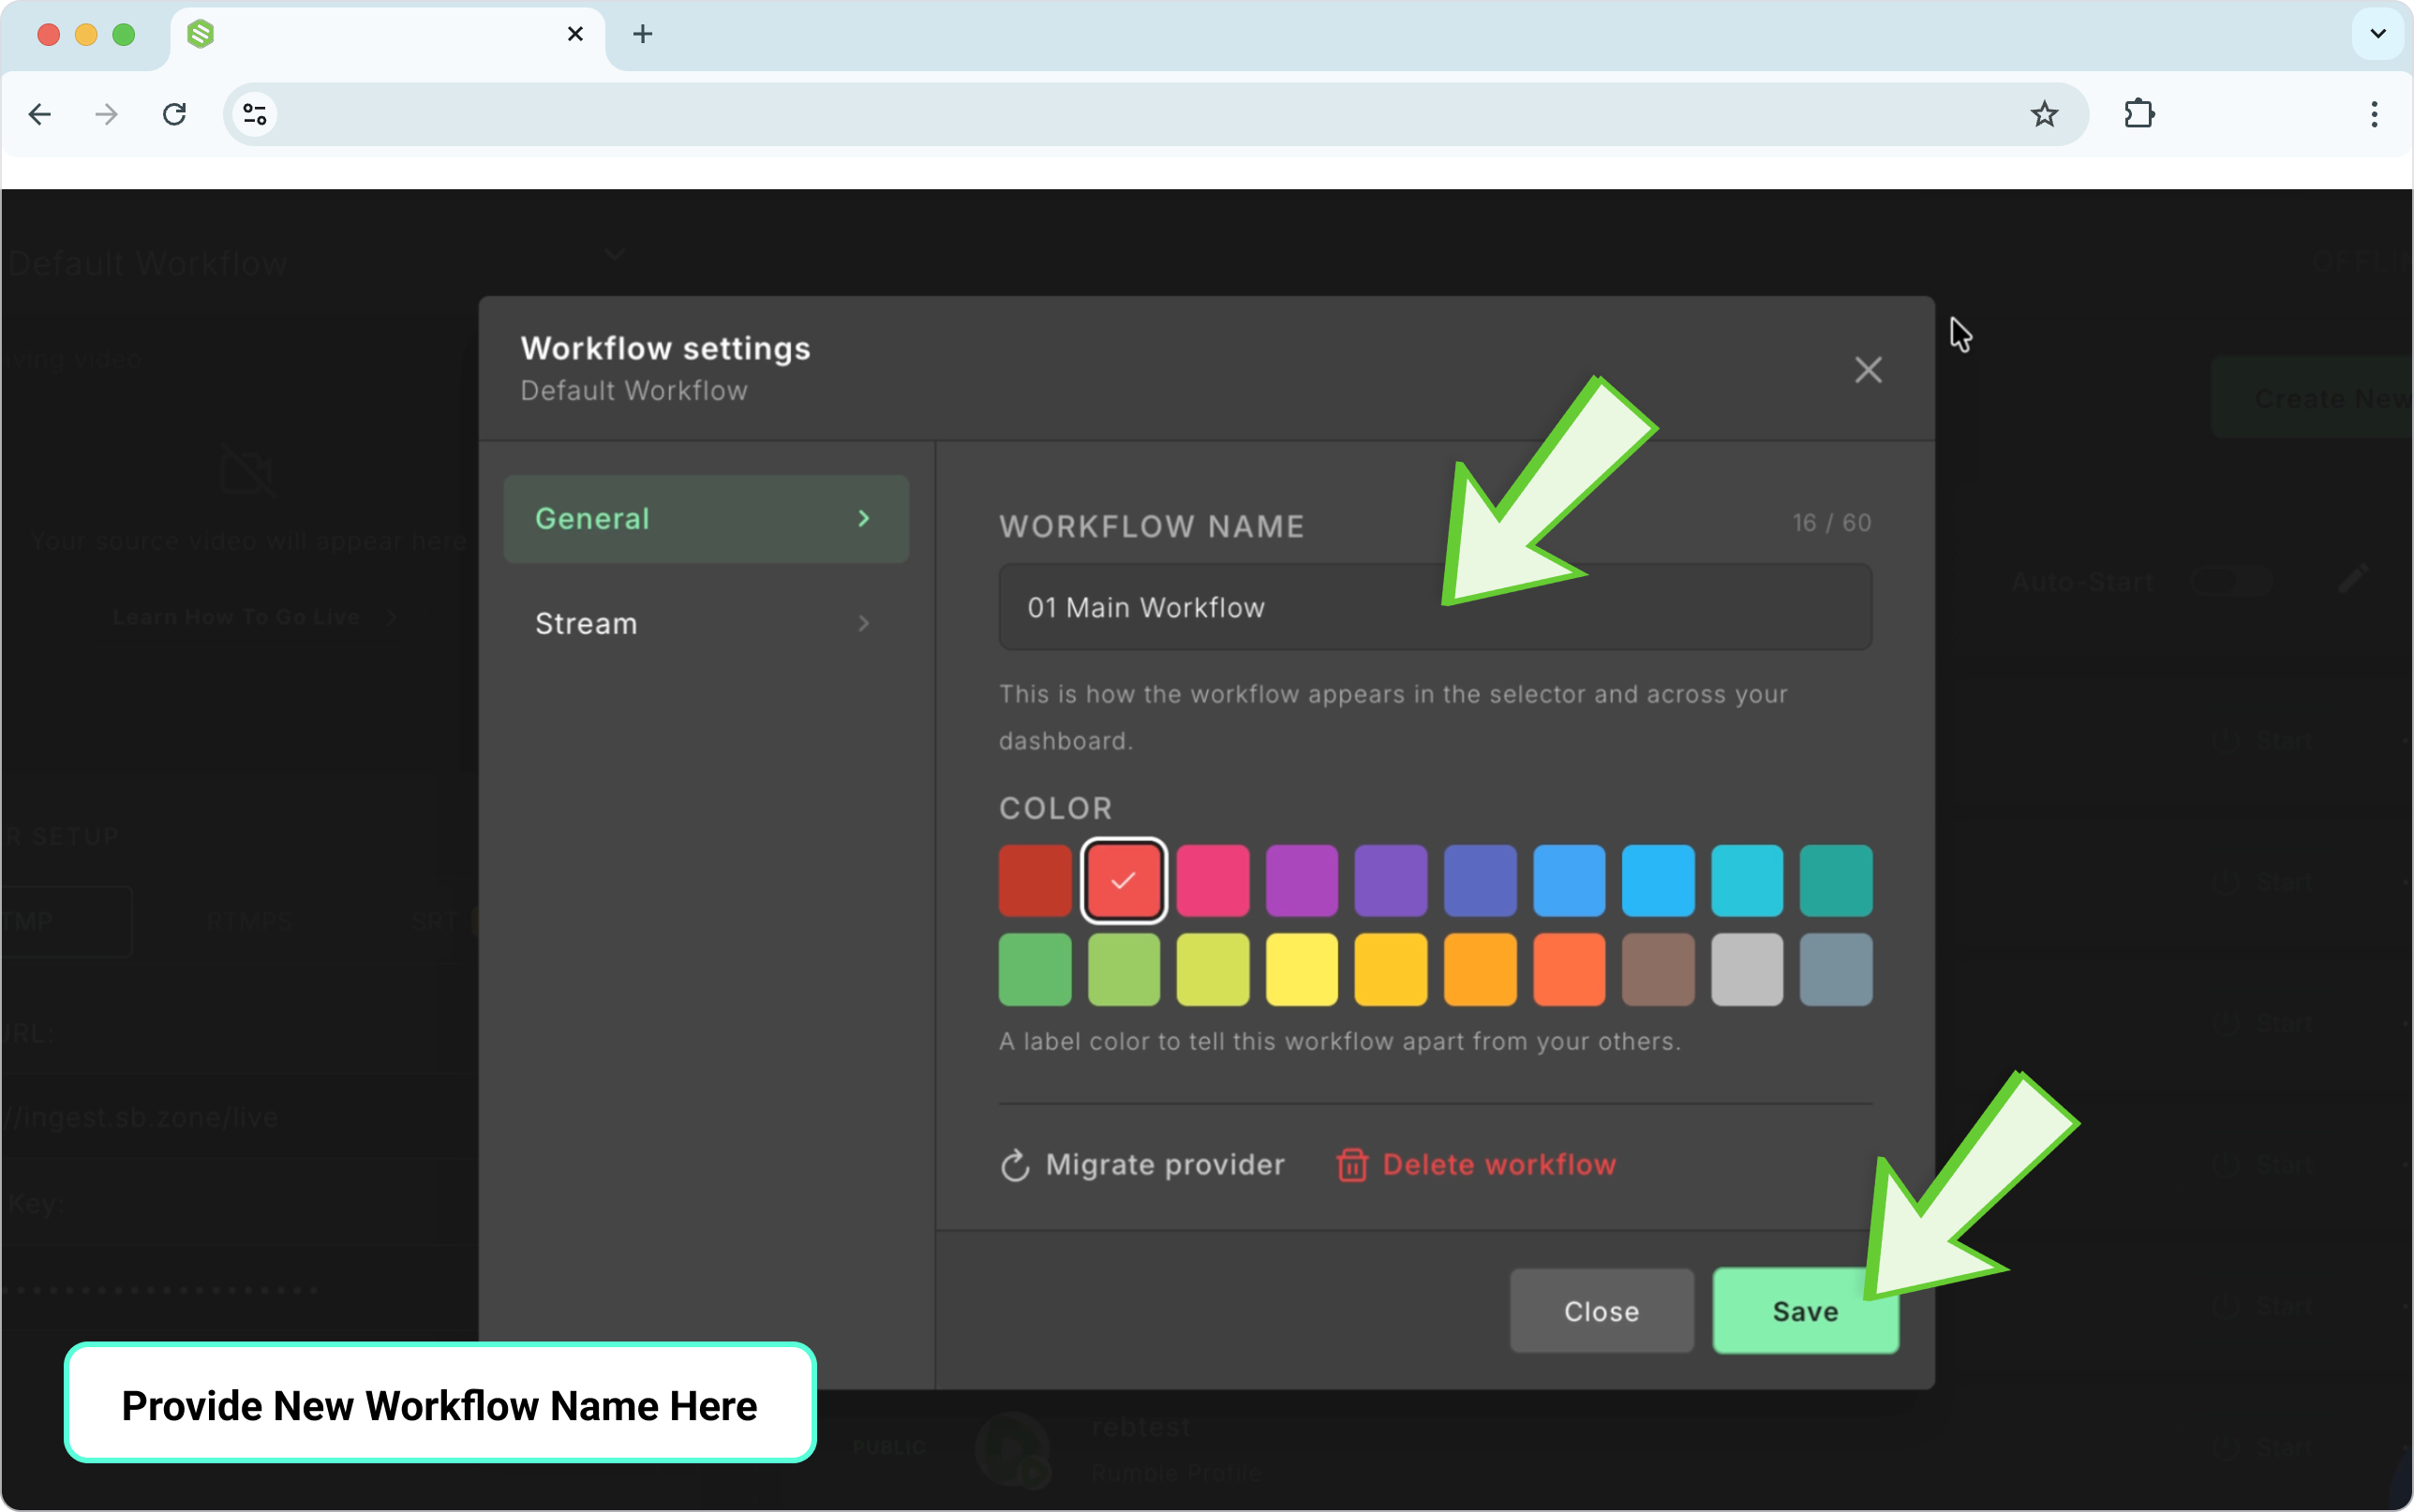
Type the new name in the workflow name field.
Click Save.
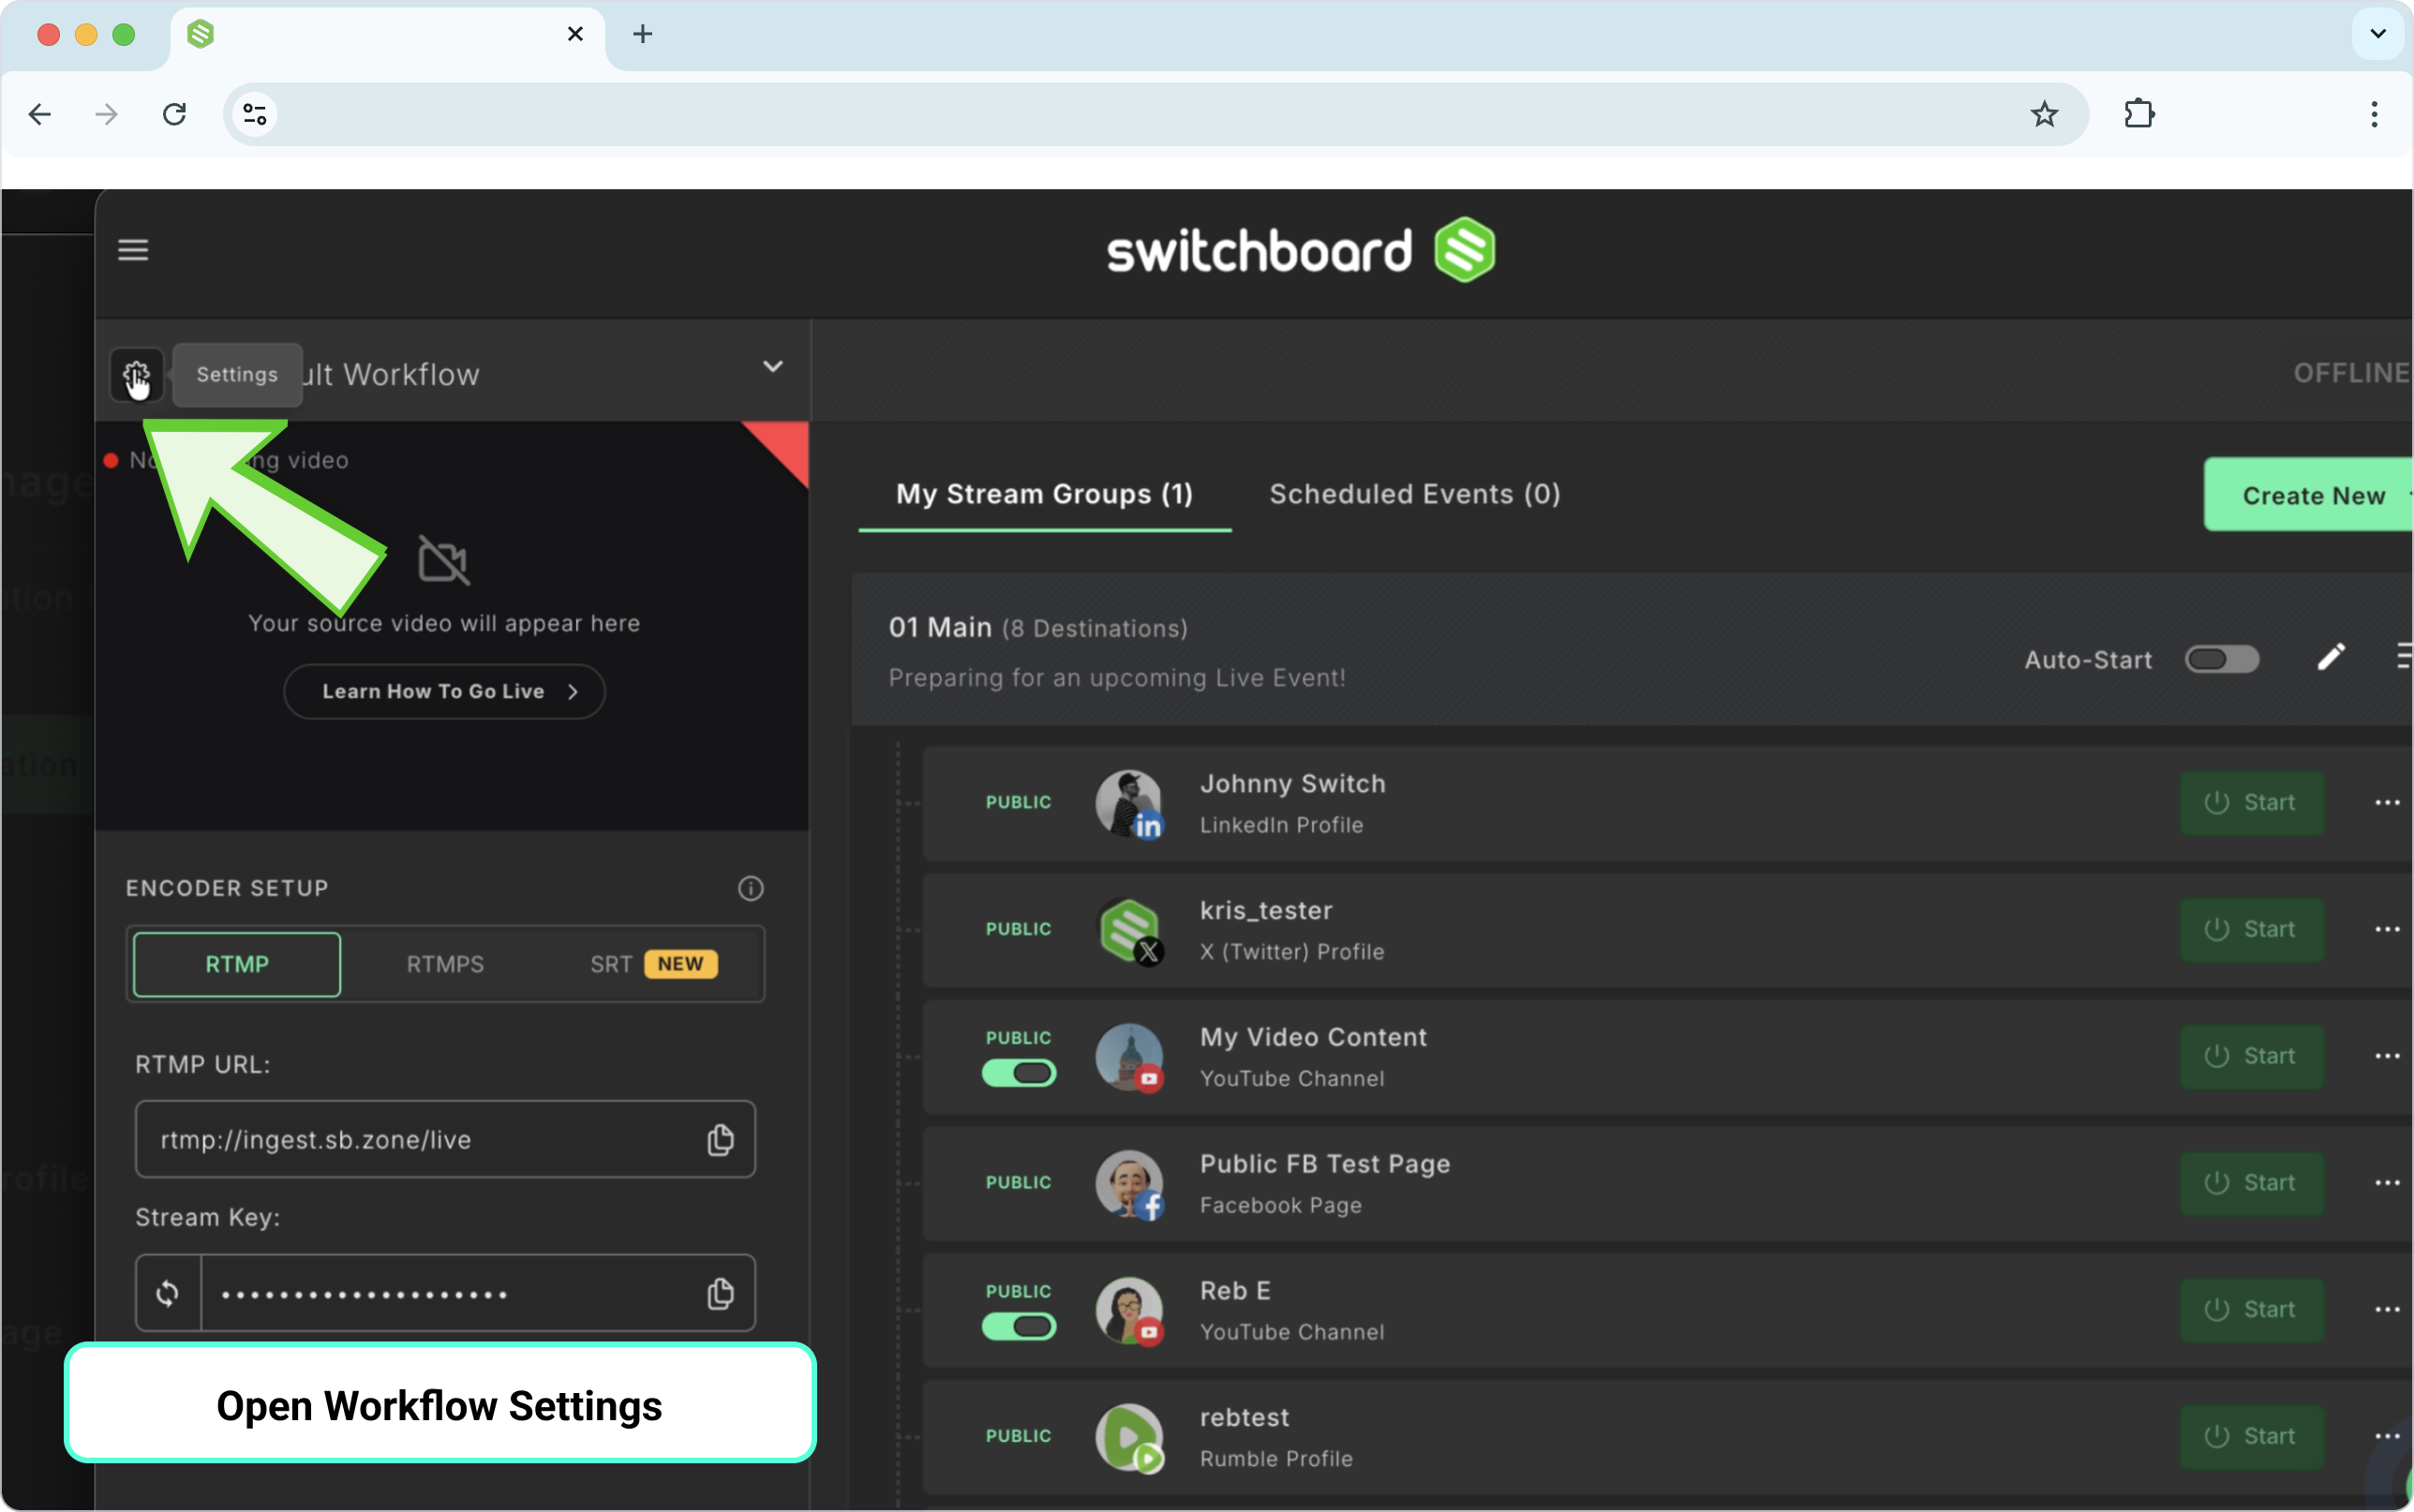
Change the workflow color label
Click Workflow Settings.
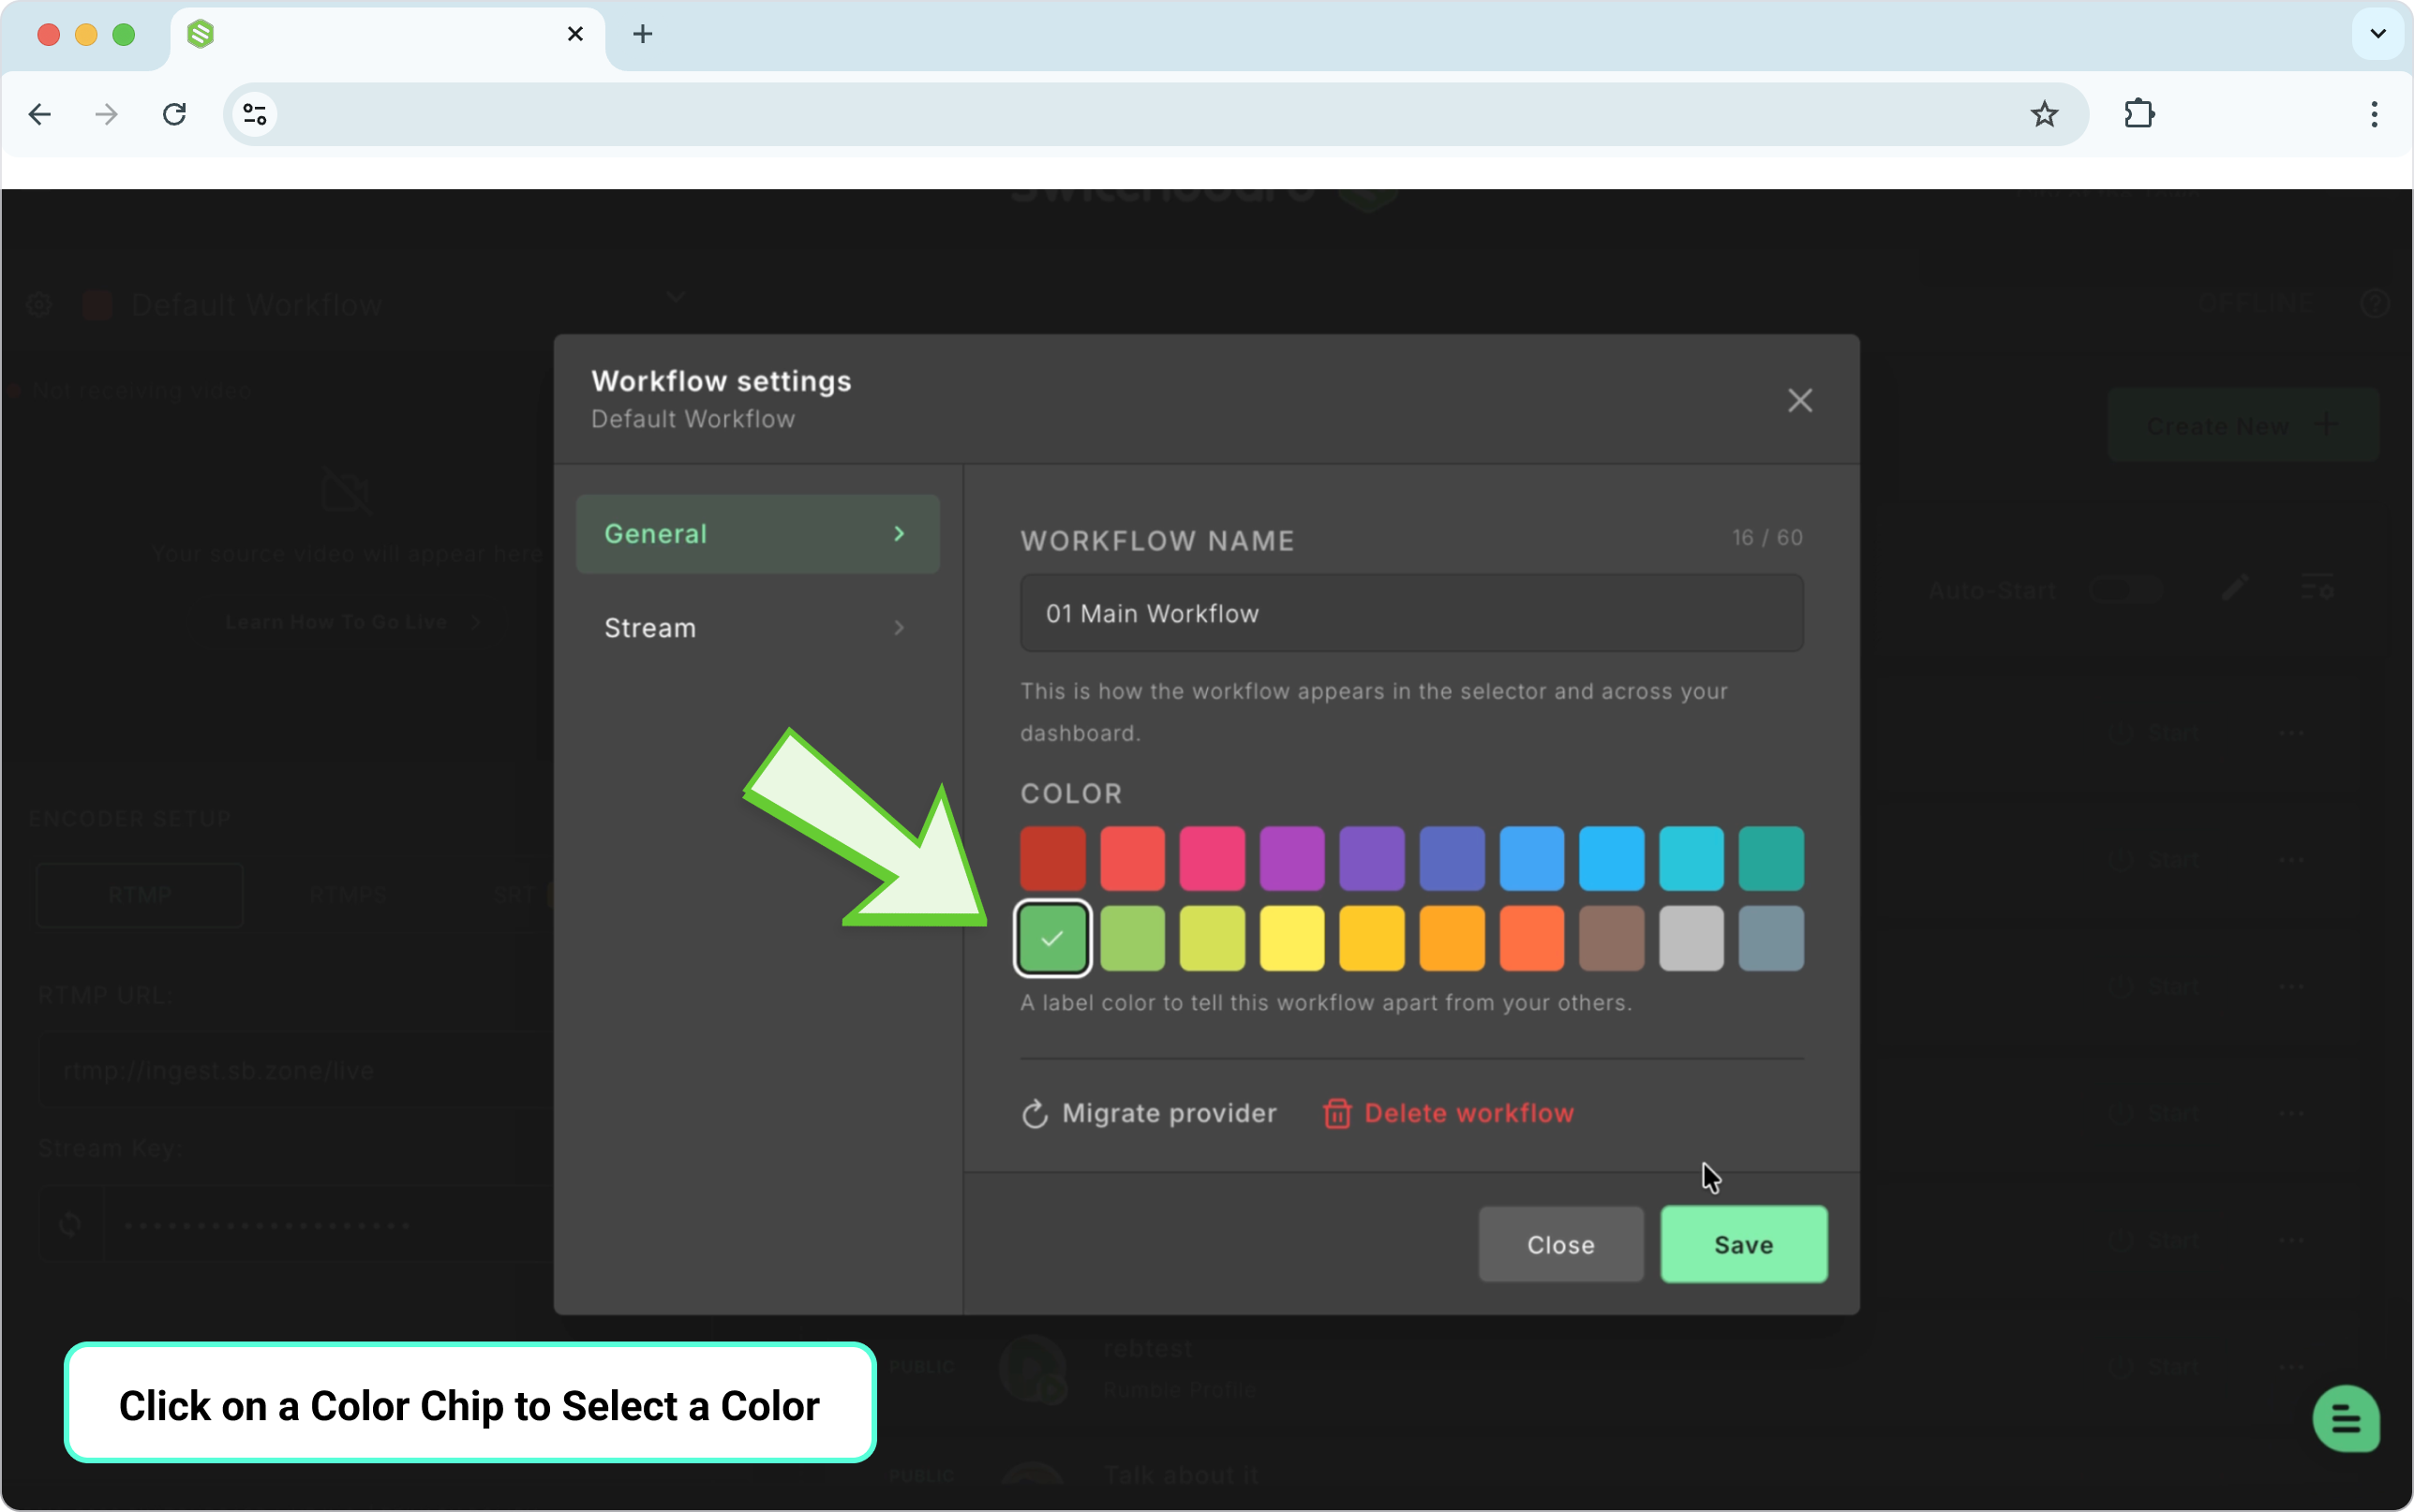
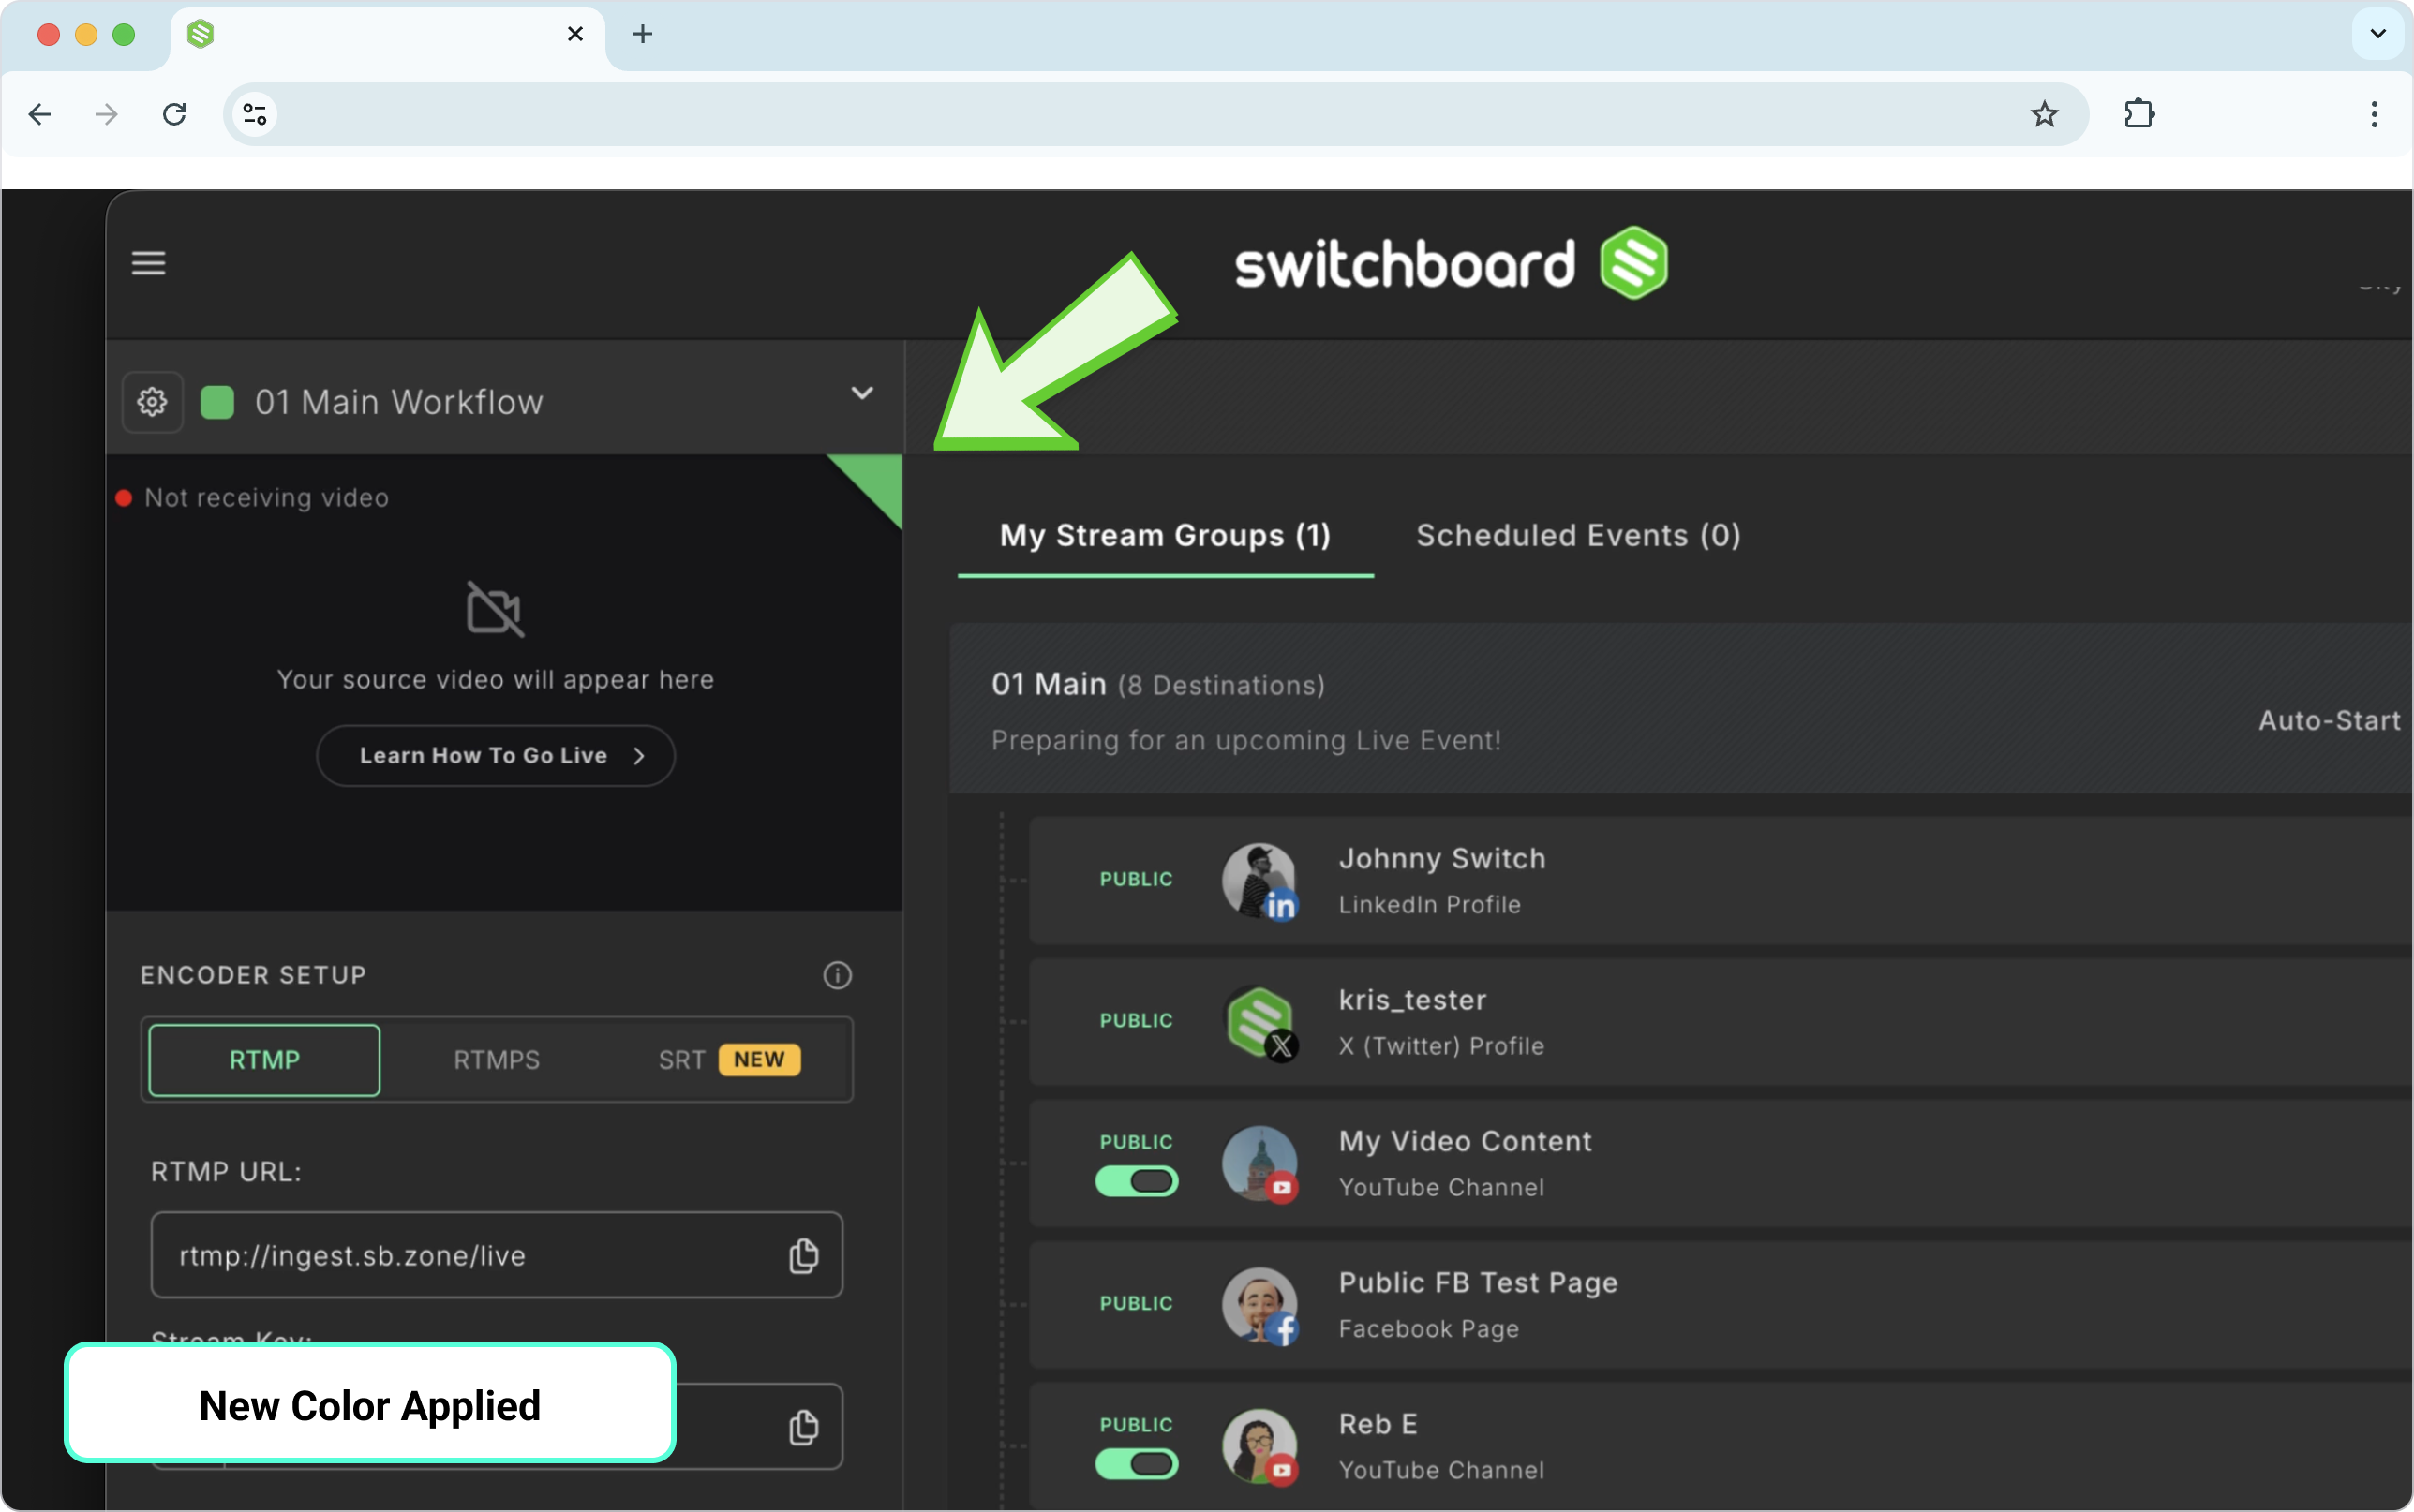
Click a color chip to set the label.
Click Save.
New color label
Built for Teams
Switchboard scales from a single streamer to a full team managing multiple workflows:
Multiple workflows — Create a separate workflow per team, department, or recurring show, each with its own name and color label so they're easy to tell apart.
Team Members — Invite others as admins on your account so they can help manage streams. Learn how to invite team members →
PartnerShare — Let a partner's social channel go live alongside yours without ever needing their login credentials. Learn how to use PartnerShare →
Explore More Features
This guide covers the essentials — here's what to check out next:
Autostart — Automatically go live to your destinations as soon as your streaming software starts broadcasting.
Add a Stream Title and Description — A closer look at customizing what viewers see.
Workflow Page Deep Dive — Full breakdown of everything the Workflow page can do.
Stream Groups — A closer look at managing multiple Stream Groups.
Add Destinations — More detail on connecting destinations to your account.
Configure Your Encoder Settings — Full recommended settings breakdown by platform.
Which Encoder Should I Use with Switchboard Cloud? — Not sure which streaming software to use? Start here.
What Destinations Can I Go Live To Using Switchboard? — The full list of supported platforms.
FAQ: Frequently Asked Questions — Common questions about accounts, billing, and technical setup.