Connecting LiveU Solo to Switchboard
Learn how to connect a LiveU Solo encoder to Switchboard via RTMP, configure the correct encoding settings for a stable feed, and start multistreaming live video from your LiveU Solo to your social channels, including the one setting to avoid in the LiveU portal that can break the connection.
Last updated 16 days ago
This article walks you through linking a LiveU Encoder to Switchboard.
1. Power on and Connect the LiveU Solo
Connect the LiveU Solo encoder to your camera.
Plug the appropriate cable into the HDMI or SDI input.Turn the unit on by holding down the power button.
If the device isn't charged, power it through the DC connector while it boots.

The device stays offline until it's connected to a network, so make sure your input device is connected before powering on the unit.
2. Connect LiveU Solo to a Network
From the Main screen, navigate to the Interface screen by moving the joystick to the right or pressing the center (Ok) button.
Connect your device to a network through a Cellular, WiFi, or LAN interface.
3. Register Unit
Registering your LiveU Solo lets you monitor and manage the device remotely and is required if you plan to update firmware or check connection status outside of the unit itself.
Find your device's serial number: press the Right arrow to open the Menu, then the Down arrow to select Unit Info.
Go to solo.liveu.tv and register your unit using the serial number.
4. Create a Switchboard Destination for LiveU
You'll create an RTMP Destination in LiveU Solo to send the feed to Switchboard.

Next, select RTMP from the list of options.

Next, enter the appropriate information for the Destination you just created.
For the URL and Stream Name Key, get this information from the appropriate workflow in your Switchboard Account.
Copy and paste the RTMP URL and Stream Key into the appropriate fields.
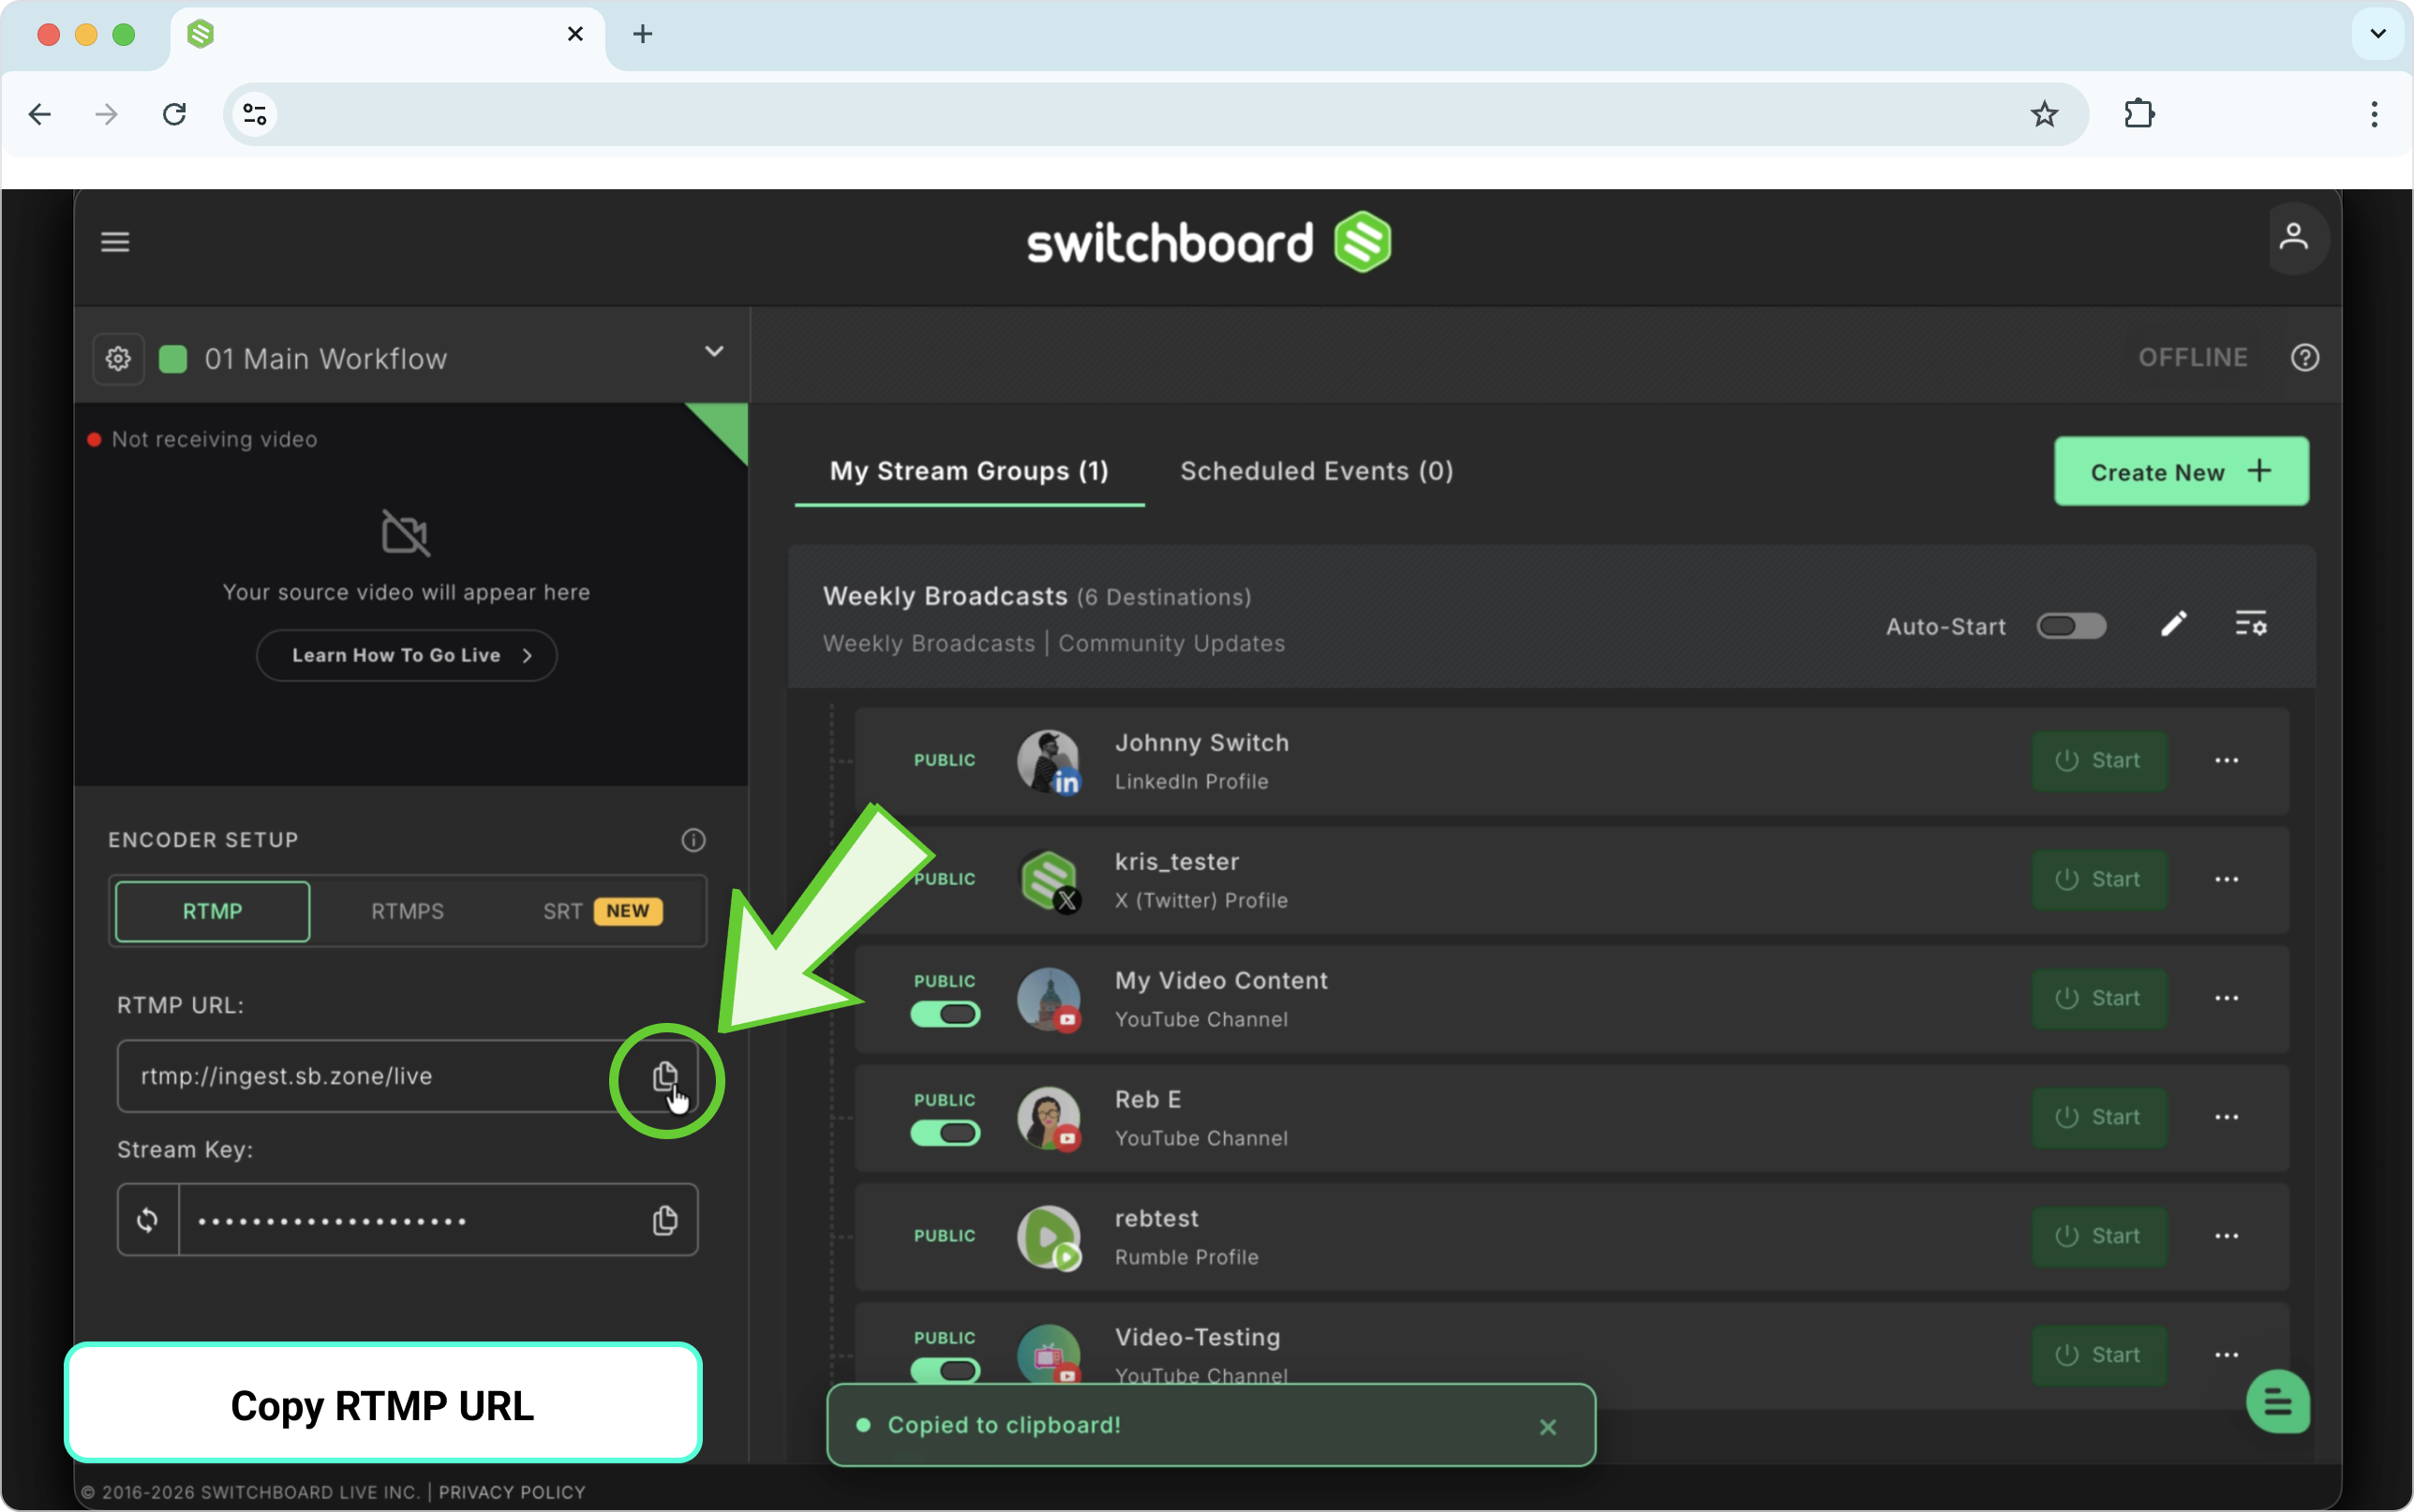

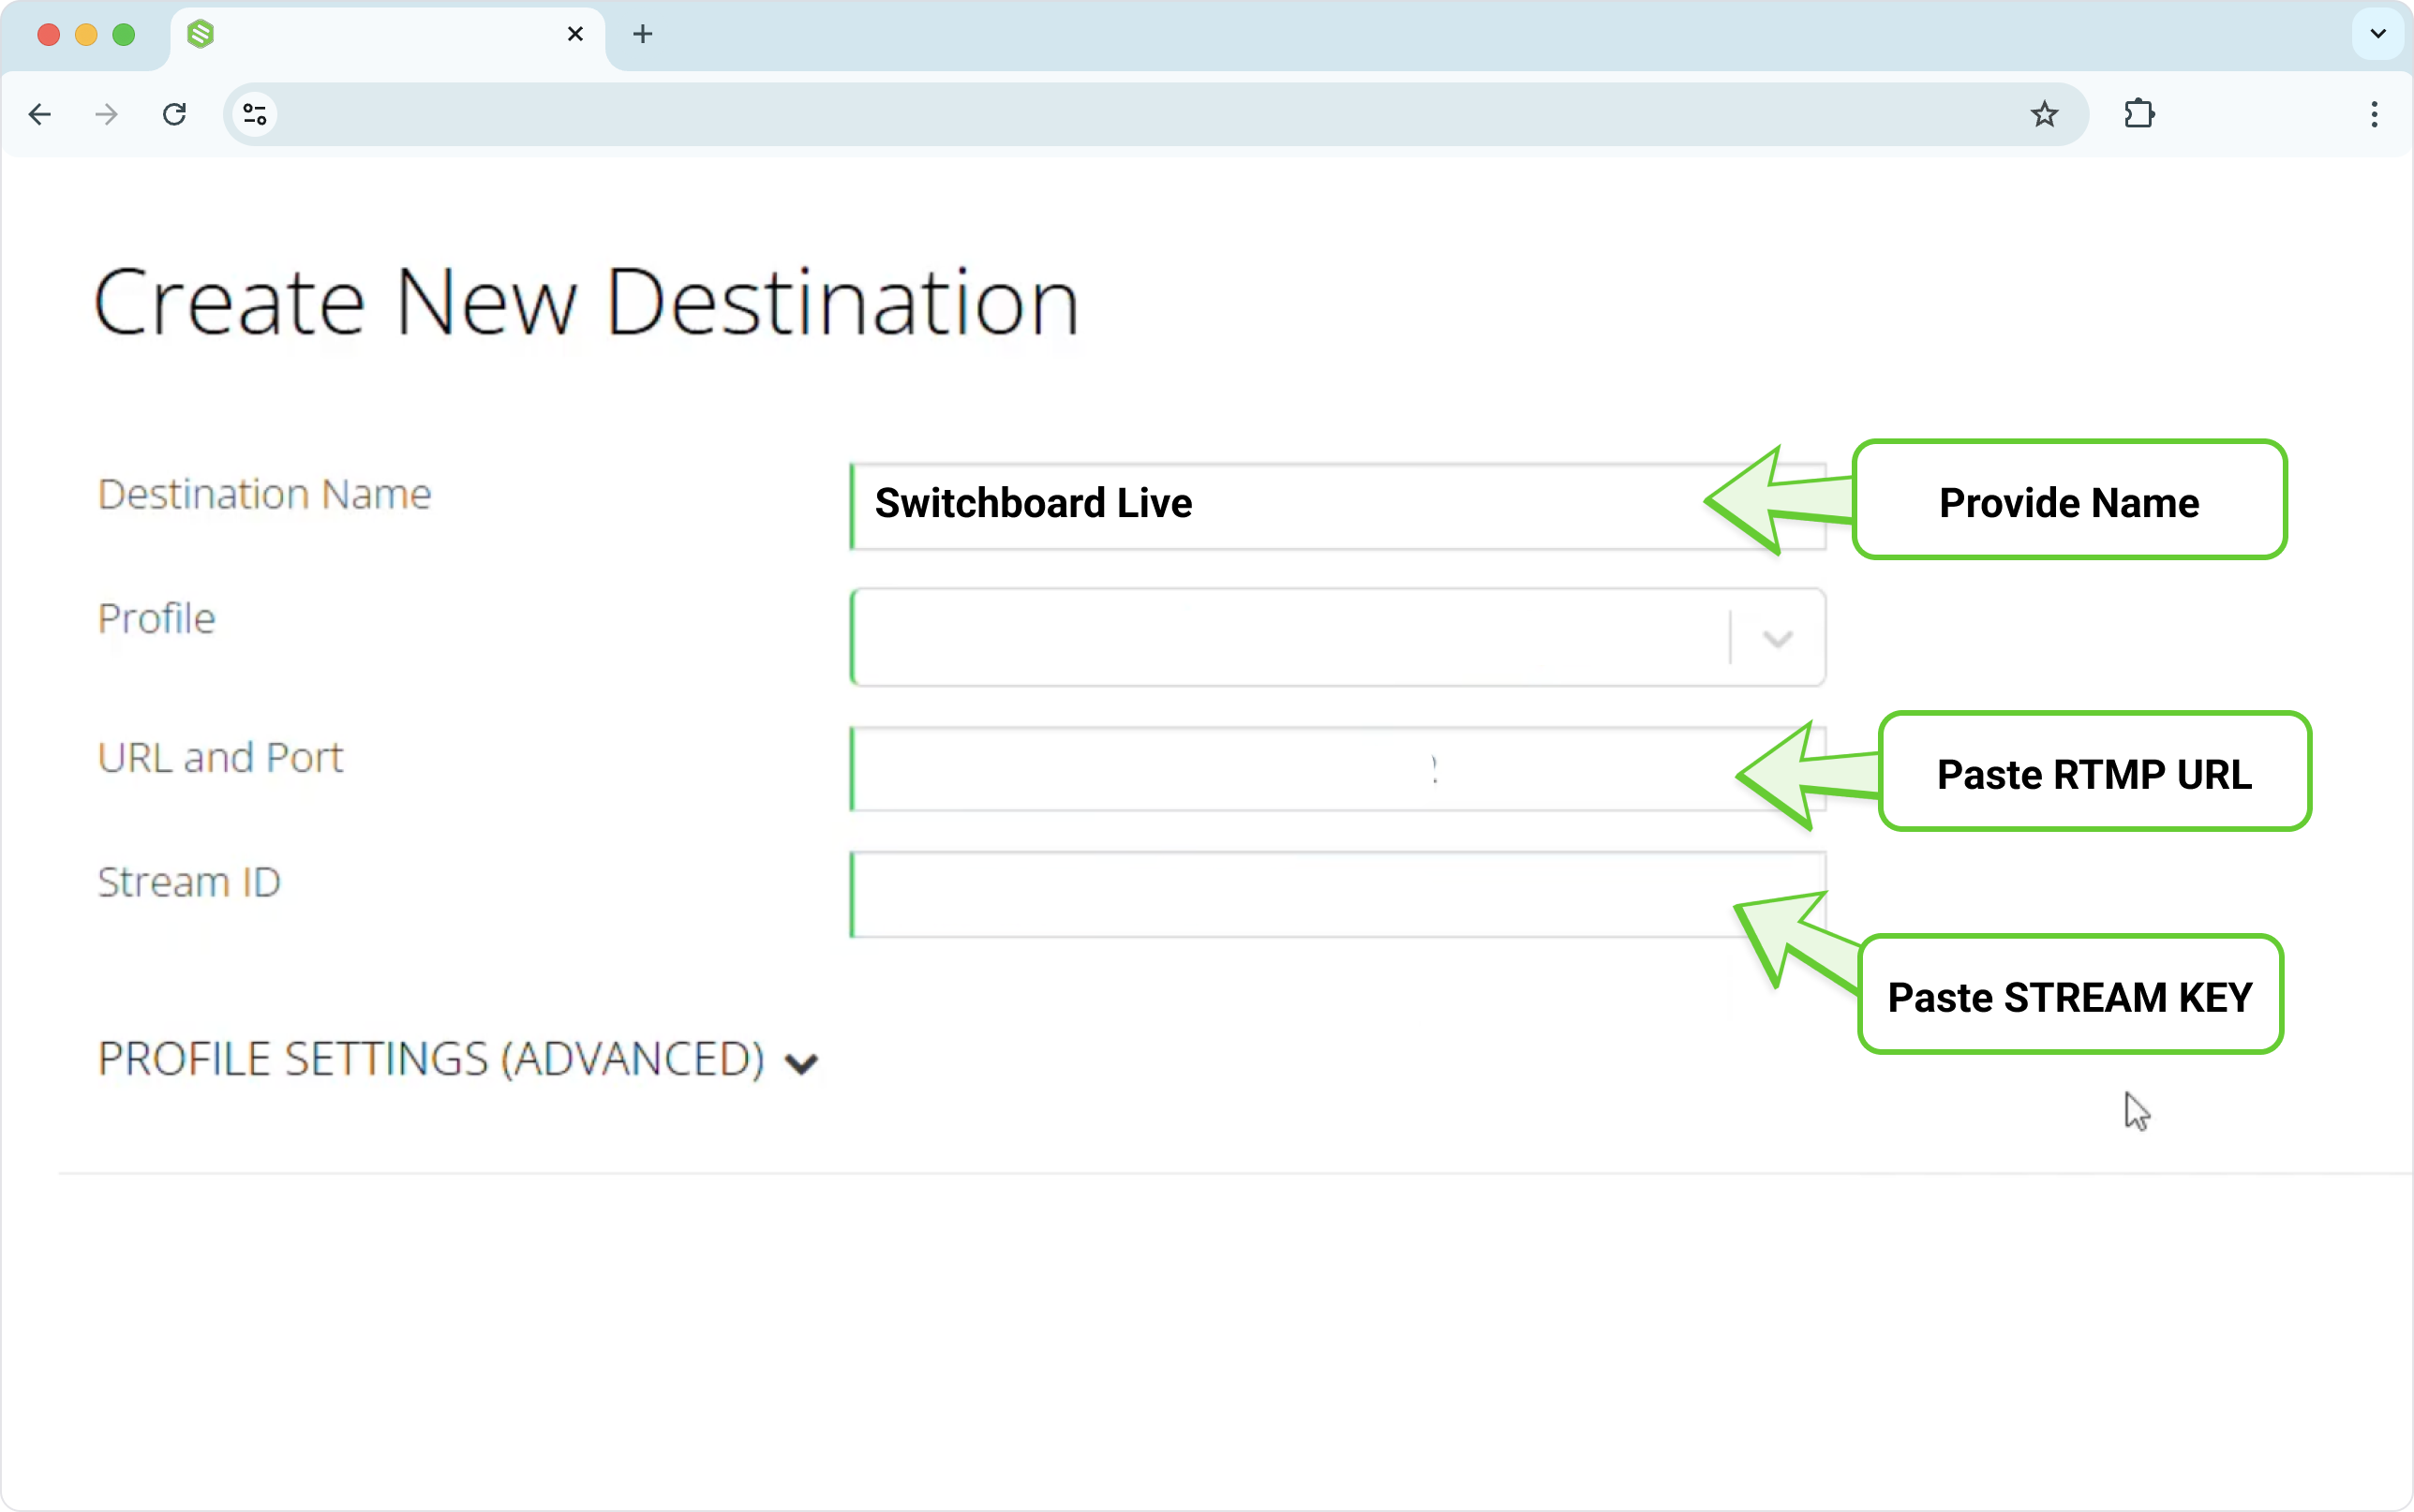
Click Submit.
Next, configure your LiveU to send video to your Switchboard account.
Keyframe rate = 2
FPS = 30 or 60
Constant Bitrate
After selecting the correct encoding profile (720p, 1080p, etc..), select the Streaming Server closest to your LiveU Solo unit.
5. GO LIVE!!
Now that you've completed the previous steps, the last step is to go live. You can click and hold the button on the front unit or click the GO LIVE button in the upper right-hand corner.

NOTE: Once your LiveU Solo unit begins sending live video to your Switchboard account, you’ll need to start streaming from your Switchboard account to the social channels.
6. Start Multistreaming
Verify video from LiveU is coming through on the preview window inside Switchboard.
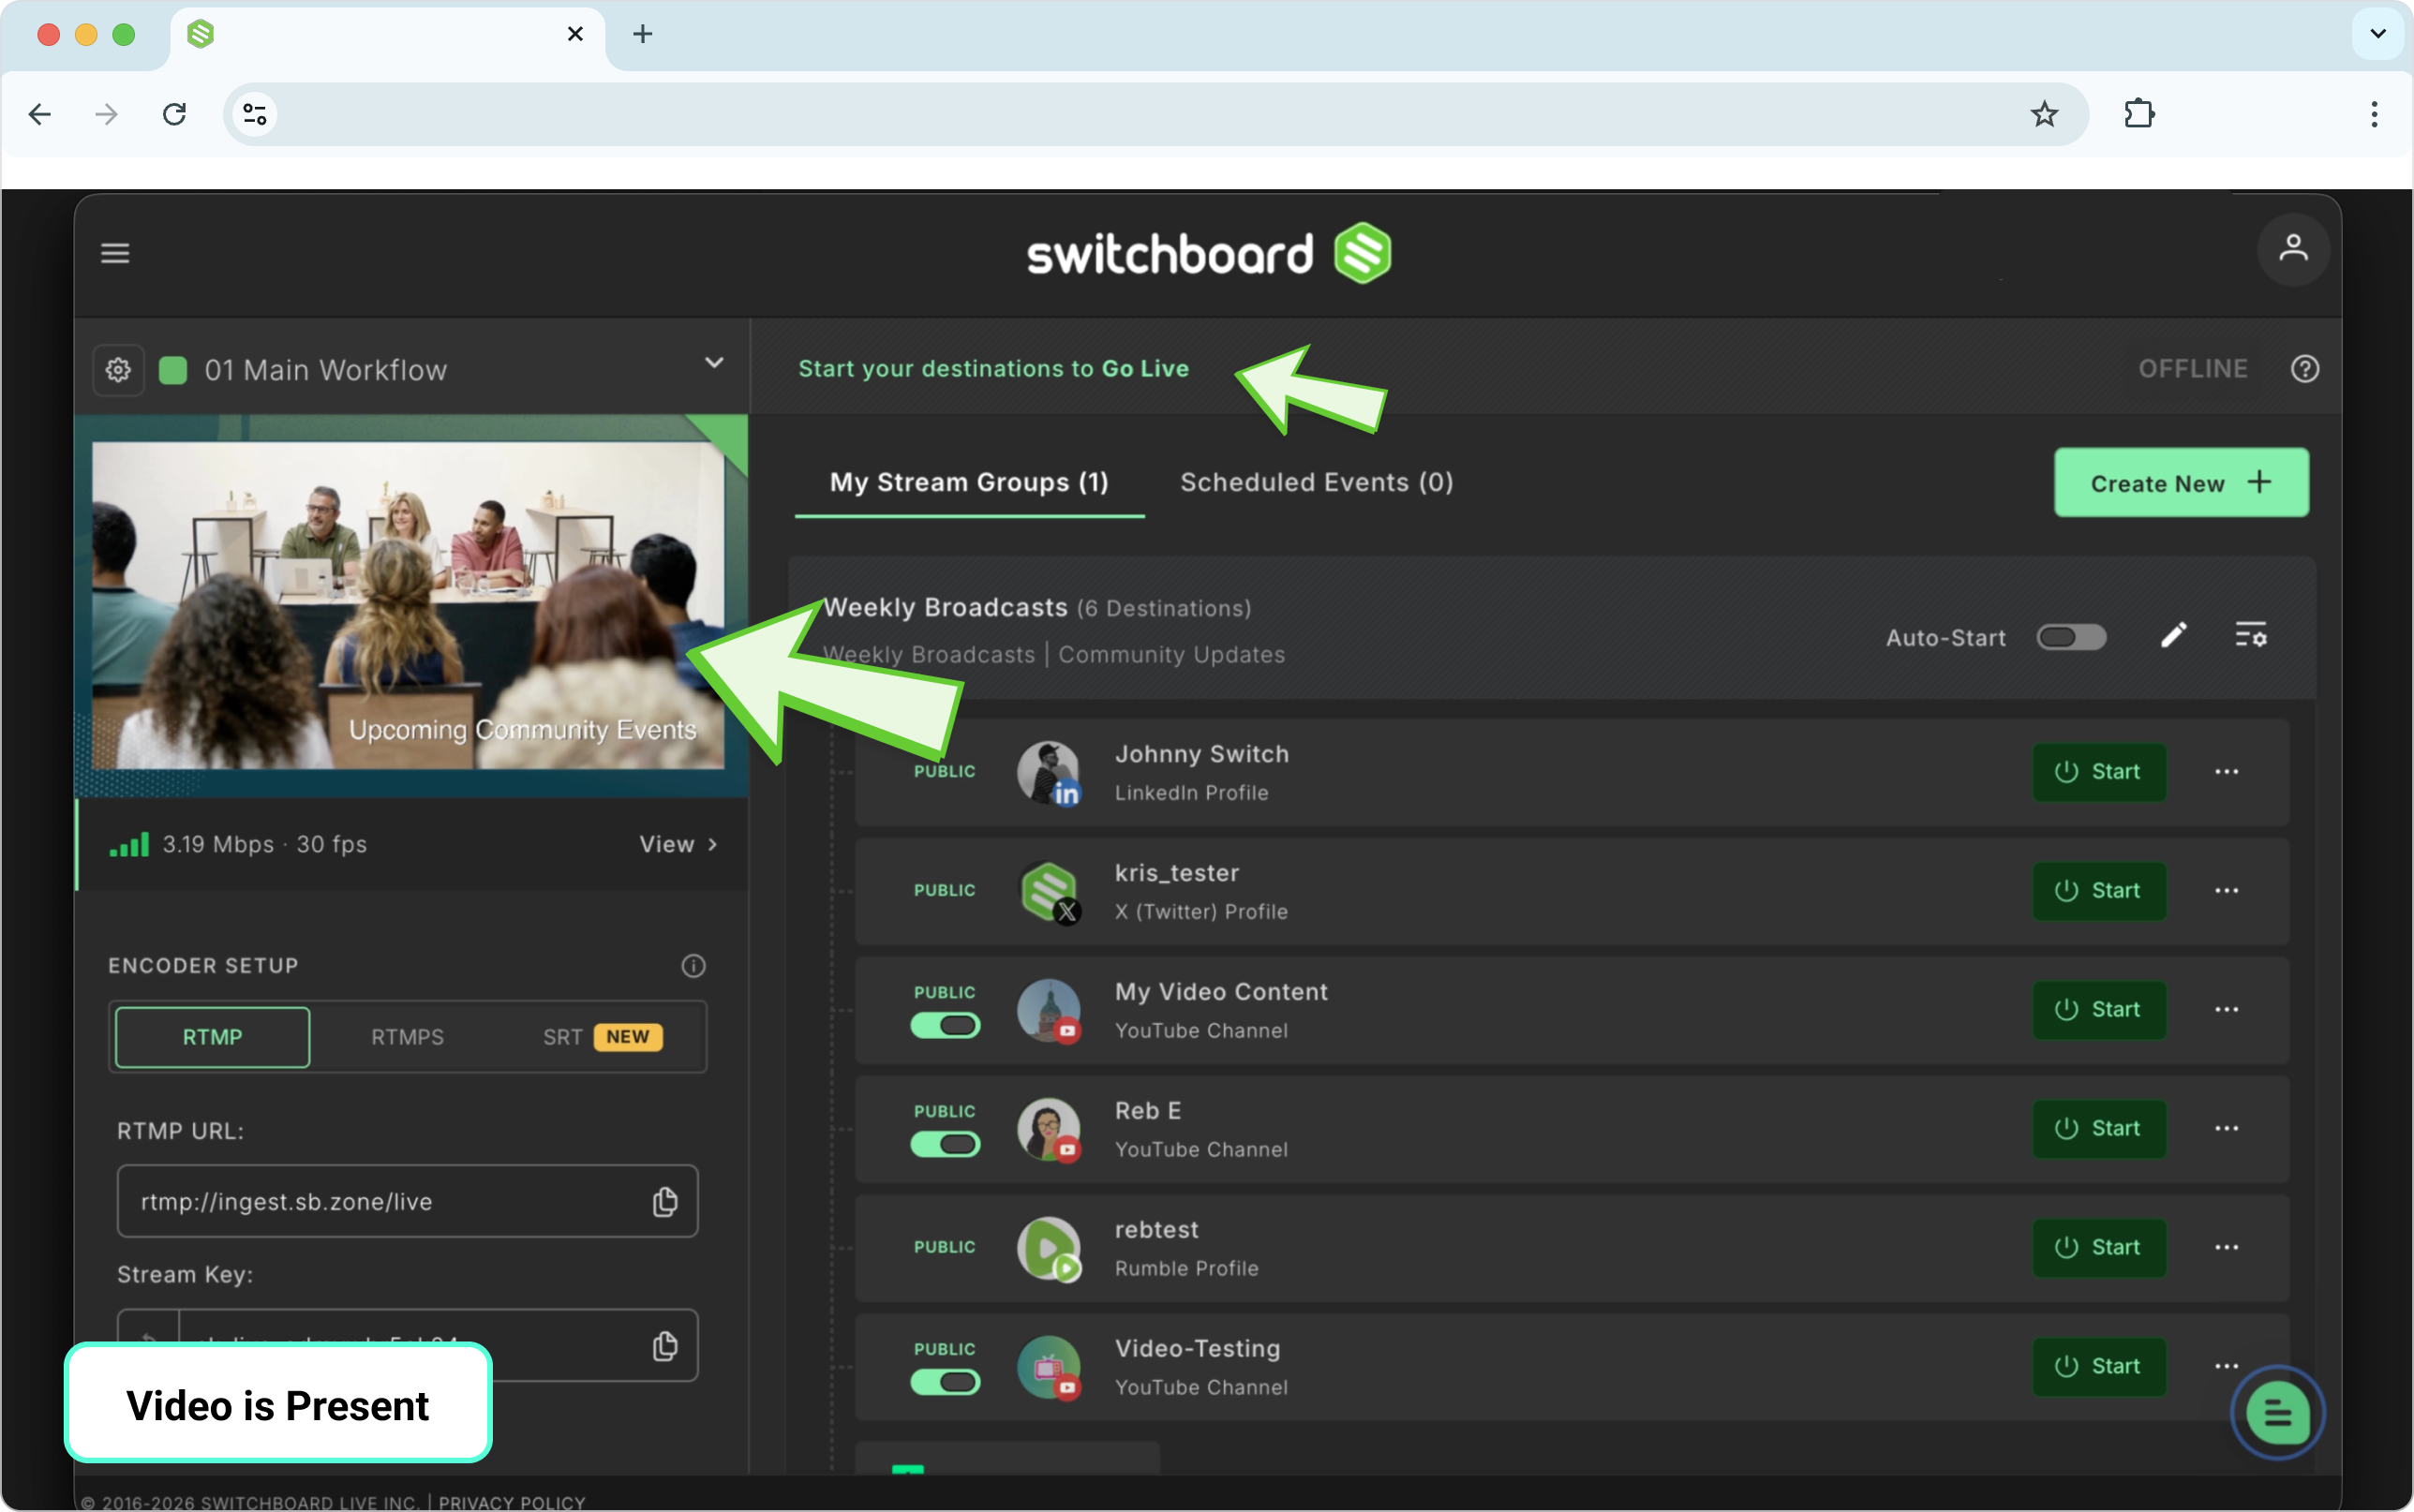
Click Start next to specific destinations, or start all the social channels grouped together.
After a few seconds, you’ll be live on the social channels that you’ve selected.
FAQ
Why isn't my LiveU feed showing up in Switchboard?
Double-check that the RTMP URL and Stream Key on your LiveU Solo exactly match the Destination in Switchboard, and confirm your LiveU Solo has an active network connection (Cellular, WiFi, or LAN). Also confirm you selected Custom as your Destination type on LiveU
I see Switchboard listed as a Destination option in my LiveU portal. Should I use it?
No, do not select the built-in Switchboard option in your LiveU portal or app. It doesn't currently work as expected. Choose Custom instead, and manually enter the RTMP URL and Stream Key from your Switchboard Destination, as described above.
Do I need to register my LiveU Solo before I can stream?
No; registration at solo.liveu.tv isn't required to stream, but it's recommended so you can monitor and manage your unit remotely.
Can I use one LiveU Solo across multiple Workflows?
Each Destination (and its RTMP URL/Stream Key) is tied to a single Workflow. To send your LiveU feed into a different Workflow, create a new Destination there and update the RTMP settings on your LiveU Solo.