Connect Atem with your Switchboard Account
Producing a multi-camera broadcast like a city council meeting, church service, or live sports event? Blackmagic Design’s ATEM switchers are powerful hardware encoders that pair perfectly with Switchboard Live. By connecting your ATEM to Switchboard, you can produce a TV-quality broadcast with multiple camera angles and distribute it flawlessly to all your social media platforms at once. This guide will walk you through the hardware prerequisites, adding Switchboard to your ATEM dropdown menu using a custom XML file, and going live with total confidence.
Last updated About 2 months ago

Part 1: Install ATEM Software Control
To make your hardware talk to your computer, you need the official software from Blackmagic Design.
Go to the Blackmagic Design support page: https://www.blackmagicdesign.com/support/family/atem-live-production-switchers
Download and install the latest ATEM Switchers Update software appropriate for your machine (Mac or Windows).
Restart your computer after the installation is complete.
Part 2: Download the Streaming XML File
Out of the box, the ATEM software doesn't list Switchboard in its dropdown menu. You will need to download our custom XML file to add Switchboard as a permanent streaming option.
Log in to your Switchboard Live account and open your workflow.
Look directly below the preview window and confirm your RTMP URL reads: rtmp://ingest.sb.zone/live
Next, download the Switchboard Streaming XML file here:
Streaming.xml
1.3 KB• Text
(You can also copy the XML profile code block directly).Update the ATEM File: You will use this downloaded file to update the ATEM's streaming profile on your computer.
⚠️ Code Editing Warning: If you ever need to manually edit this XML file to change the URL, you must use a plain text or code editor (like Notepad or TextEdit). Do NOT use a word processor like Microsoft Word, as it will add hidden formatting that breaks the code!
Part 3: Set up ATEM Control Software
Your hardware is plugged in, and your XML file is loaded. It's time to connect the ATEM to your Switchboard account!
Open the ATEM Software Control application on your computer.
Navigate to the right-hand control panel and find the Output section.
Open the Live Stream tab.

Click the Platform dropdown menu. Because you added the custom XML, Switchboard should now appear as a streaming option. Select it!
Open a web browser, log in to your Switchboard account, and copy your Stream Key.
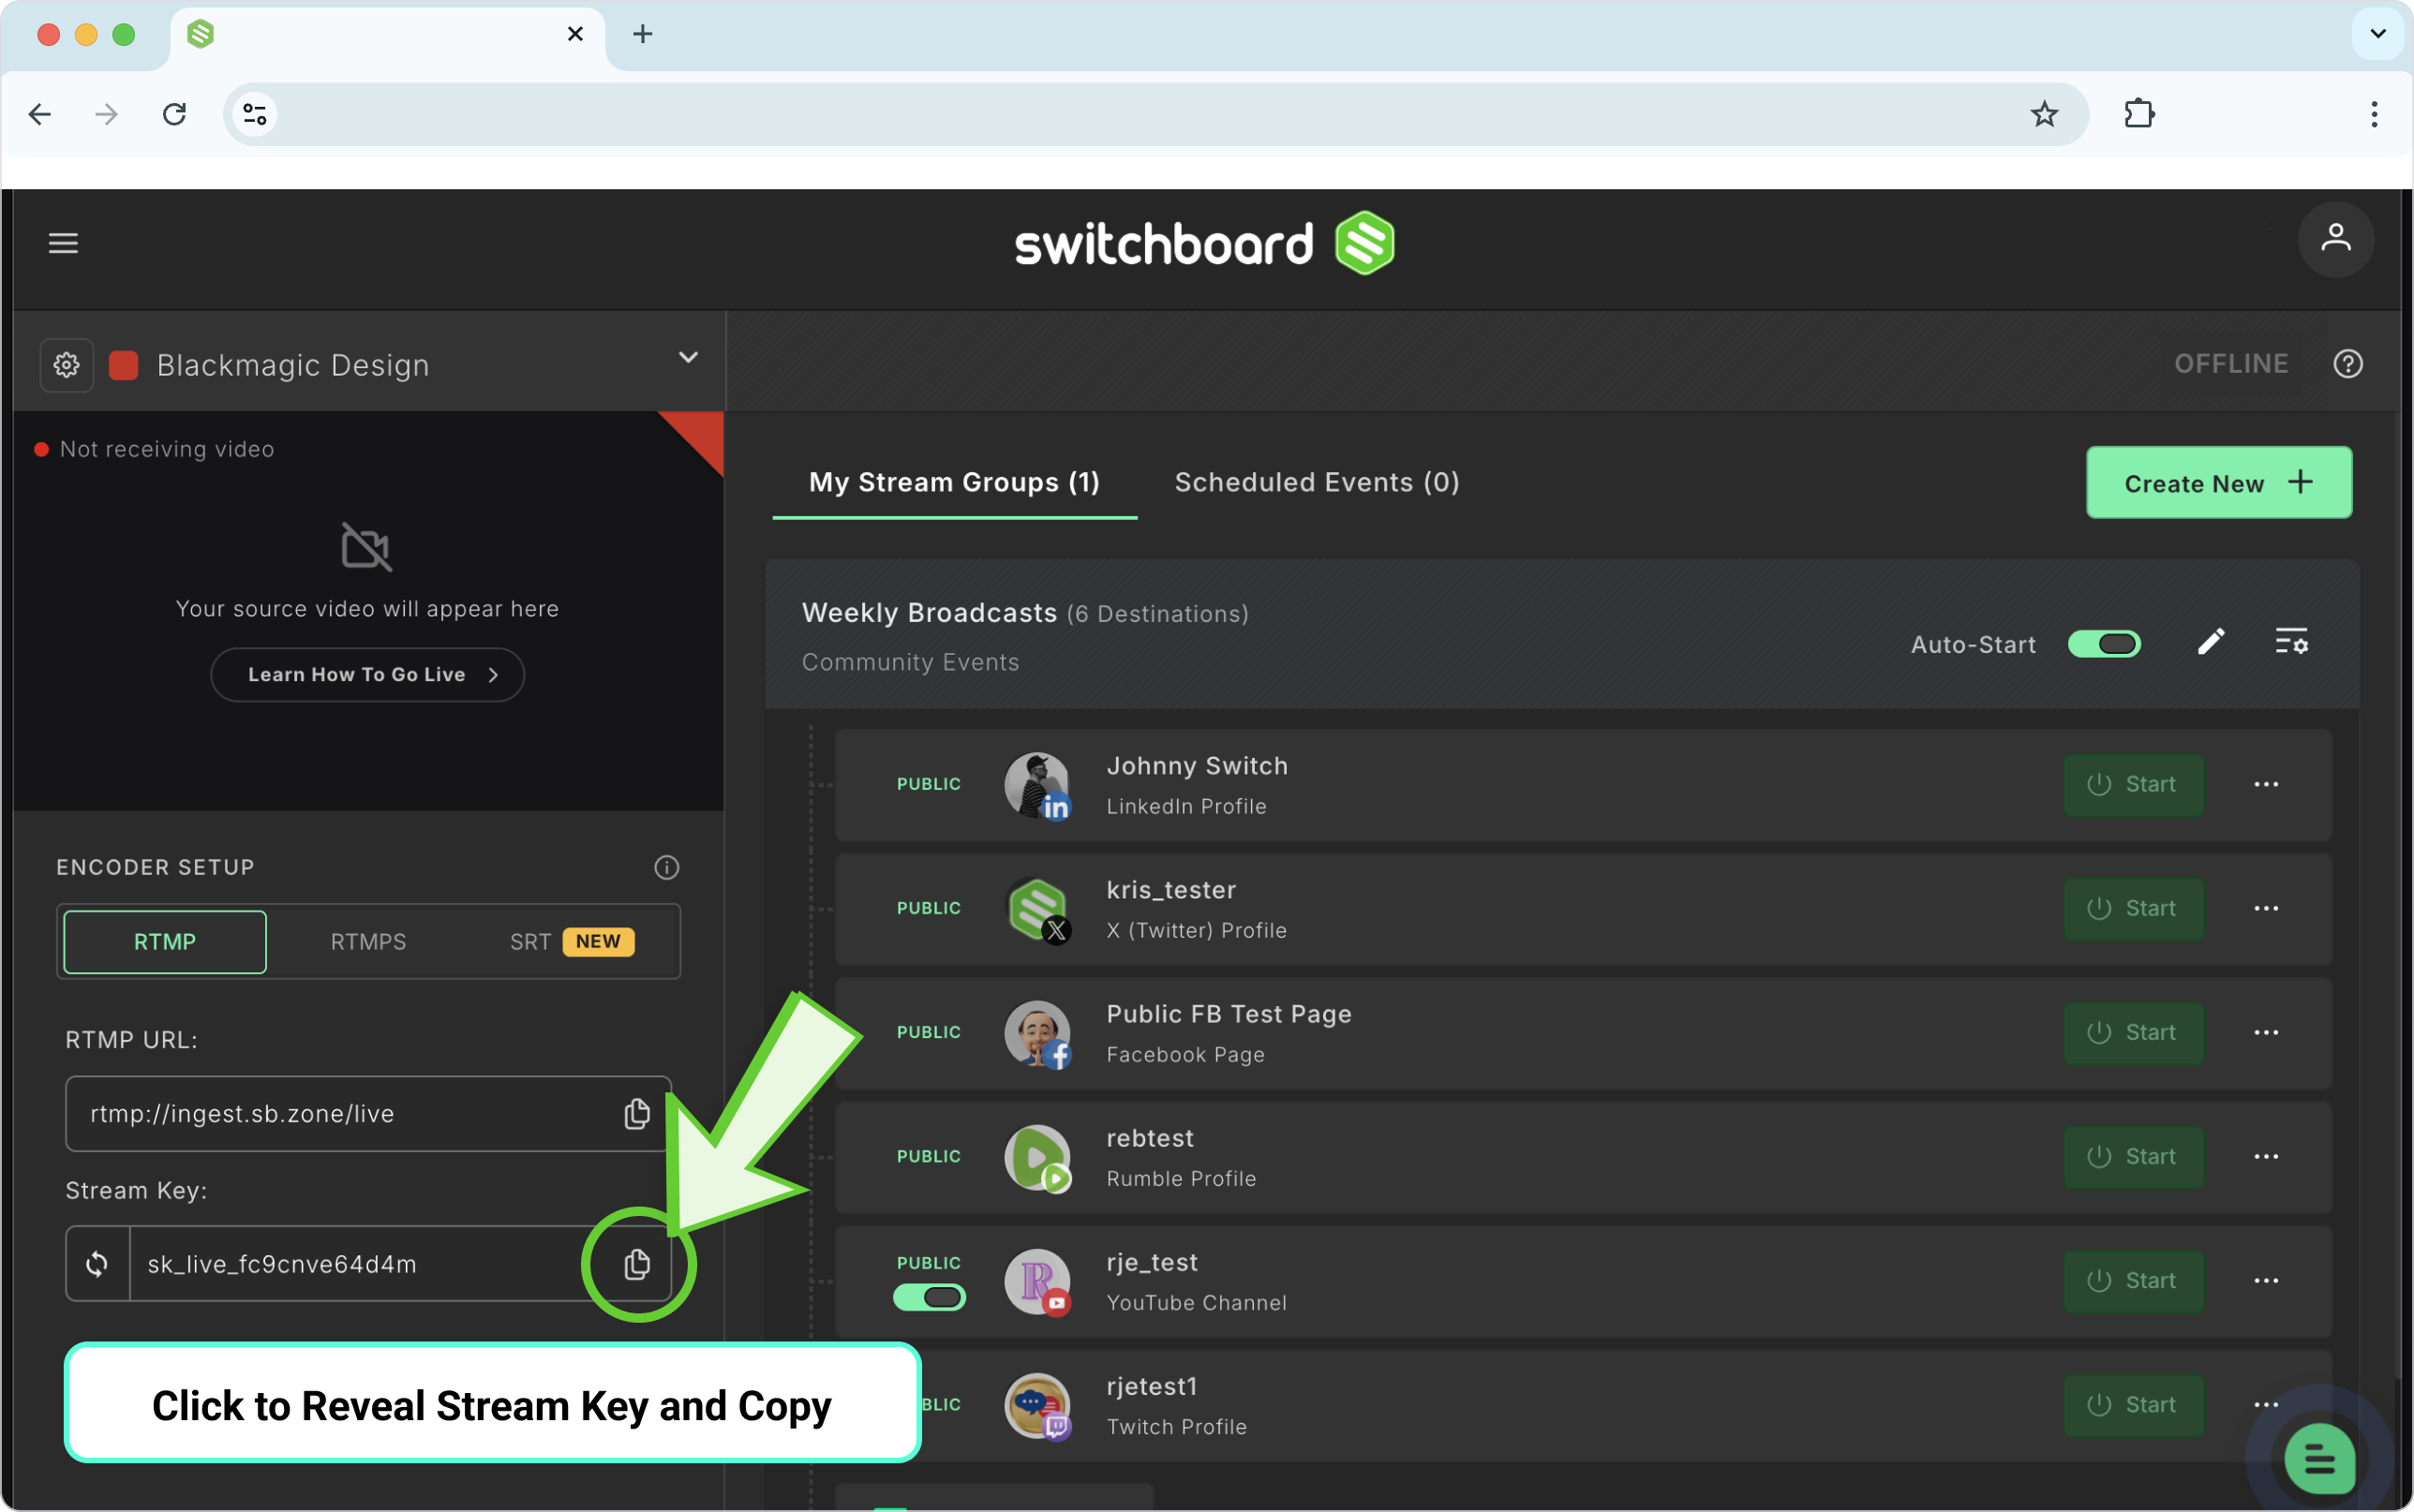
3. Paste the Stream Key into the corresponding Key field in the ATEM Control Software.

Part 4: Going Live!
When you are ready to broadcast, press the glowing ON AIR button inside the ATEM Control Software (or on the physical ATEM switcher board).

Toggle back to your Switchboard Live dashboard. A successful connection will display your ATEM's video feed clearly in the Switchboard preview window.
To broadcast to the world, click the green Start button next to your social channels (or select your Stream Group) in Switchboard!

To Stop the Stream: Simply press the OFF button located right next to the ON AIR button on your ATEM, and click Stop in Switchboard.
💡 Pro Tip: Record a Local Backup
Need an archival copy of your broadcast? You can record your program feed directly from the ATEM! Connect a compatible USB-C external hard drive to the ATEM's USB-C port, and press the REC button. Your event will record locally while simultaneously streaming to Switchboard.
Troubleshooting & FAQs
Q: Why isn't my ATEM connecting to Switchboard even though I hit "ON AIR"?
A: This is almost always a network issue. Remember, ATEM switchers do not have built-in Wi-Fi and must be hardwired via Ethernet. If you are sharing the internet from your computer over a network, ensure "Internet Sharing" is enabled for the network adapter in your computer settings.
Q: Why is the "ON AIR" button flashing on my ATEM?
A: A flashing ON AIR button (or a stream that breaks into several fragmented files) is the ATEM's warning system. It means your live stream is dropping its signal because your local internet connection is struggling. To fix this, you may need to lower your video bitrate in the ATEM streaming settings to match your internet's actual upload speed.
Q: Why doesn't Switchboard show up in my ATEM Platform dropdown menu?
A: If Switchboard is missing from the ATEM Software Control dropdown, the custom XML file was not loaded into the correct Blackmagic Design system folder on your computer. You must replace the default streaming.xml file with the custom one provided in Part 2.
Q: Can I use an ATEM Mini Pro to stream directly to multiple destinations without a computer?
A: The ATEM Mini Pro can only stream to one destination at a time. That is exactly why pairing it with Switchboard Live is so powerful! By sending your single ATEM stream directly to Switchboard, we handle the heavy lifting of multiplying that feed to Facebook, YouTube, LinkedIn, and more simultaneously.
Switchboard Live Streaming XML Profile
Copy the code below
<?xml version="1.0" encoding="UTF-8" ?>
<streaming>
<service>
<name>SwitchboardLive</name>
<servers>
<server>
<name>SwitchboardLive</name>
<url>rtmp://ingest.sb.zone/live</url>
</server>
</servers>
<profiles>
<profile>
<name>Streaming High</name>
<config resolution="1080p" fps="60">
<bitrate>4000000</bitrate>
<audio-bitrate>128000</audio-bitrate>
<keyframe-interval>2</keyframe-interval>
</config>
<config resolution="1080p" fps="30">
<bitrate>2700000</bitrate>
<audio-bitrate>128000</audio-bitrate>
<keyframe-interval>2</keyframe-interval>
</config>
</profile>
<profile>
<name>Streaming Medium</name>
<config resolution="1080p" fps="60">
<bitrate>2000000</bitrate>
<audio-bitrate>128000</audio-bitrate>
<keyframe-interval>2</keyframe-interval>
</config>
<config resolution="1080p" fps="30">
<bitrate>1300000</bitrate>
<audio-bitrate>128000</audio-bitrate>
<keyframe-interval>2</keyframe-interval>
</config>
</profile>
<profile>
<name>Streaming Low</name>
<config resolution="1080p" fps="60">
<bitrate>1000000</bitrate>
<audio-bitrate>128000</audio-bitrate>
<keyframe-interval>2</keyframe-interval>
</config>
<config resolution="1080p" fps="30">
<bitrate>700000</bitrate>
<audio-bitrate>128000</audio-bitrate>
<keyframe-interval>2</keyframe-interval>
</config>
</profile>
</profiles>
</service>
</streaming>